Choosing Images for Marketing & Social Media
Choosing the right images, the big three Criteria
These are the big three criteria you need for choosing images that will have the most impact on your business.
1. Branding
The most important aspect of choosing images is paying close attention to branding. Web design, social media and marketing choices all stem from this one thing. Branded images aren’t only about colors and fonts.
Choosing images is about your brand personality. Make sure the images that you choose will fit your brand aesthetic and they are true to who you are as a brand. Your brand’s identity.
2. Message
The second aspect you want to look at when choosing images for your brand content in the messaging. Your images need to have a purpose. The images need to convey a message and say something about your topic.
If you saw the image on its own without any other context would you understand the subject? If the answer is yes then you’re on the right path.
3. Engagement
The third aspect of choosing images for your brand is engagement. You want to choose images that are high-resolution. The images must have good color and they must speak to your ideal customer.
If you have done your homework on your ideal customer, you should have no problem. Identifying images that your audience will relate to and find engaging can be easy. As long as you do this work and put in an effort to get to know them.
If you haven’t done that I encourage you to go back and do that work. It is the hardest work that you will do in the branding process. but getting your ideal customer avatar down will make everything so much easier to do. This includes choosing images.
Now that we got the big three out of the way let’s start looking at some finer details. Here are a few more things you should pay attention to when choosing images for your brand.
Who else is using the image (if stock)
We all use stock images it is a part of doing business online. However, you want to be careful and look out for other companies that are like yours. If they are using the same stock photos that you are using it diminishes your brand.
Creating your own stock images
Consider creating your own library of stock images. You don’t have to be a professional photographer to find inspiration everywhere you go. All you have to do is look for it.
Armed with a smartphone you can create a vast collection of stock photos. Here are a few collections you might want to start with:
- Nature (trees, flowers, mountains, grass, the sky)
- Work environment (phones, desk area, computers)
- Shopping and commerce (shopping bags, cash registers, boutiques)
- Food and Health (Produce, grocery aisles, butcher counter)
- Action shots, (pets, sports, gym equipment)
- Concept (Trophies, thumbs up, walls, doors, books, light bulbs)
Avoid faces or get permission
My one caveat here is to avoid faces. Unless you have explicit permission from the subject to use the photo. For example, as a brand, website, social media or marketing photo. Unless you have written permission, you want to avoid this altogether. You can use images of people in action shots as long as there are no clear subjects or faces in the photo.
Editing Your Own Images
Photographers know all about lighting and they can calibrate their cameras for professional photo quality with minimal editing. For us mortals, Photoshop is our best friend. You can use Photoshop to add filters and make adjustments to your images to get stunning effects. Choosing images is just the first step.
Watch this video to learn all the hidden spots in Photoshop where you can find photo filter presets. Using presets will help you get a starting point to the best possible images for social media and your blog.
Places to find images
Don’t want to bother with saving all those images? I wrote a post a while back about how to customize stock photos. I also wrote this post about using stock photos in your branding with a list of 30 stock image resources. These are all commercial use, professional quality images. Check out that post here.
How many images do you need?
For a webpage, you only need one feature image like a hero. Still, this depends on how much information will be on the page. You want to make sure that you’re breaking up the text as much as possible. Images are a great way to do. You can also use icons and other illustrations. For a blog post, you have a few more considerations, we’ll discuss these next.
How long is the post?
Have at least one feature image in your blog post. You don’t need more than that. However, if you are serious about user experience make sure that your post is easy to digest. Add a few more images to give the eye small breaks between large chunks of text.
Where do you need a natural break in the text?
Read through your completed article. Reading will help you identify where images should go. This extra step will give your readers a better flow through the article.
Benefits of more images
There are benefits to having more images on your blog posts that stem beyond user experience. Here are a couple things to think about.
The SEO Powerhouse
If you are using keywords to name your photos and also add keywords to your old tags, you’re on the right track. Properly naming images is a big help to search engines. Naming helps identify the topic of your articles. This step also helps search engines index images on specific topics.
Content Engagement
More images mean more opportunity for fans to share and engage with your content.
Other Posts You Might Like
What size should my images be?
How you should size your images is a very specific question. This question is difficult to answer unless you know exactly where you’re using the image. Let’s break this question down a bit.
Website Images
On a website, is it a hero or a thumbnail? As you might suspect, a hero image is bigger than a thumbnail image. A lot bigger.
Do you have specific image size specifications for your theme? Check the documentation for your website’s theme if you are using one. If not, check with your developer for specifications if you had your site custom built.
Social Media Images
Even a social media image sizes can vary so much across platforms. Every social media platform has specific aspect ratios that they use. Most platforms also have guidelines for image sizes.
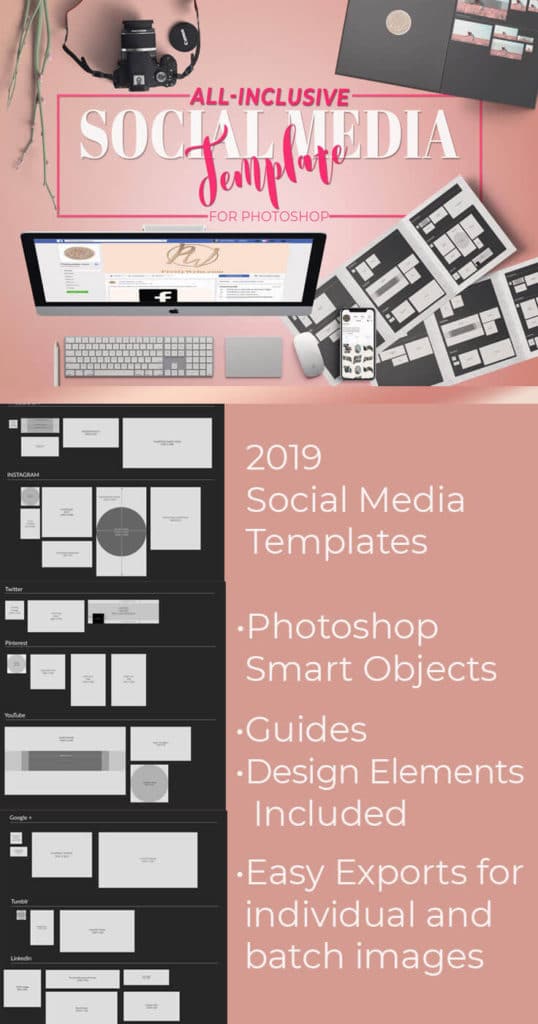
I have an all-inclusive social media sizing template in the PrettyWebz shop. This template is comprehensive. Made specifically for creating marketing campaigns to use across many social media platforms.
I also show you how to make this template for yourself if you would like to try it out. I have an entire video series on YouTube. Make sure to check that out or grab a copy of the All-Inclusive template in the shop. Watch the intro video to this series below.
Does it matter how I name my images?
In a word, yes. Naming images is extremely important for SEO. Make sure to use keywords that will tell search engines what your article is about in your title. Alternatively, use keywords people will search when looking for content in your article.
Make sure the title makes sense for the image. If you saw this image in an image search on your topic would you click over to the website? Would it make sense that it’s there?
What about alt text on an image, how important is it?
Alt text is very important but not meant for SEO. Yes, alt text helps SEO but it’s meant to help the visually impaired understand your image. Make sure that you’re using it primarily for that purpose. While also integrating your keywords for search optimization. It’s important that this description makes sense to the visually impaired. Search engines are secondary here.
More Posts on this Topic
Designing for Your ICA 
Design Tweaks for Better Social Media and Website Images 
Branding Stock Photos with Mockups
What about image quality?
There is a balance between high-quality images and optimizing for search engines. Still, Image quality is very important.
Sure, we want the 4000-calorie dessert on the restaurant cart. It looks amazing! But we opt for something lighter because our waste line will hate the result of that indulgence.
It’s the same for images. We love the vibrant, high-resolution images but we hate to wait on load time to experience it. If an image load is too slow people will leave your site before they get a chance to see what you’re all about.
What’s Most Important to You?
Weigh the fact that you need to get people to see an image before you wow them with the quality of that image. For user experience, and aspects of SEO like site speed you need to walk a fine line.
If you’re on a shared network like HostGator or Bluehost, your site is going to be slower. Slower, as compared to the big sites hosted on their own servers or those that have premium hosting. Smaller image size is going to be more important to you just to stay competitive with big sites.
How to optimize your photos to look their best for your website and social media
In this week’s tutorial, I’m going to do an overview of image processing inside of Photoshop. We’ll take a look at different ways to use image resampling. We will also look at a couple of filters that will help you increase detail and resolution in your images as well.
Image Resampling
This process will give you the highest resolution possible when resizing in Photoshop. This will never look as good as the original but you’ll get good results. I will show you three resampling methods to get the best settings for an image, illustration, or clip art.
What is Image Resampling?
Image resampling is a simple process performed inside of Photoshop. The process changes the pixel dimensions of an image. It either removes or adds pixels to reduce or enlarge an image.
Photoshop uses advanced processes to “guess” what should be in the missing pixels. Then it adds new pixels with this information. This process is not perfect and the quality will not be like the original image but it gets pretty close.
Sharpening Filters
We’ll also use two powerful sharpening filters to get even better results. In this tutorial, we’ll look at shake reduction and Unsharp Mask. These filters are two of the best ways to get superior detail and quality from your images. All while maintaining full control of the sharpening process.
Sharpen images and graphics to get a stunning image resolution. Transform blurry and grainy images with just a few steps using either of these methods.
What is the best way to optimize images for the web and social media
Use a tool
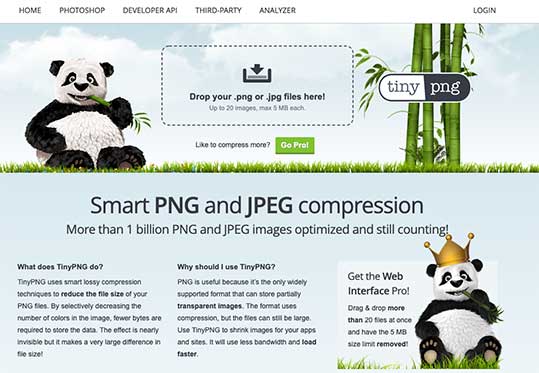
There are several online image optimizers available. All you have to do is upload your images, the program processes them and returns them to you ready to go. Here are a few you can check out.
Optimizing Image Types
Use the perfect image type for your needs. Here are the most popular and common options for image types and the pros and cons of each.
Png vs. Jpeg
PNG and JPEG are the most common types of image files used online. Here is a comparison of the two that you can use in choosing image file types.
JPEG
- Better for photographs
- Good color efficiency (good color smaller file)
- Does not support transparency
- Smaller file size overall
PNG:
- Supports transparent backgrounds
- Higher quality
- Larger file size
- Better for Text heavy images, logos and graphics as PNG handles sharp lines much better than JPEG
PNG 8 vs. PNG 24
When working with JPEG image quality is pretty straight forward. You have low, medium and high-quality JPEG. With PNG choosing the right type can be unclear. Here is a basic breakdown of the differences between PNG 8 and PNG 34
PNG 8
- Smaller file size
- Supports transparency but the quality is not as good as PNG 24 (may halo in some programs)
- Limited to 256 color profile – Lower color resolution but mostly not visible unless you’re looking for it. It is noticeable in large scale work, i.e., large posters and billboards.
- Use for simple colors, i.e. logos, buttons, web elements.
PNG 24
- Large file size
- Higher resolution, higher quality overall
- Color profile up to 16 million
- Perfect transparency, no halo effect
- Use for complex gradients and color (high-resolution photos, true transparency)
Other Posts You Might Like
What Next?
If you like the informational videos that we share here on Prettywebz, then make sure to subscribe to our newsletter to receive a notification every single time we send out a new video or a blog post. You can sign up in the footer of any page on the website.
Also join me on Youtube as well to check out the playlists I’ve set up for Photoshop, PowerPoint and other software you can use to design your online graphics.
Did you like this post? Share it with a friend or save it for later by pinning this image!