Wrap Text Layout Photoshop Tutorial
Photoshop does not have a text wrap function like you would find in a program like Indesign or even Word. Still, you may want to create a layout using only one program instead of moving back and forth with adjustments and editing. This is much faster and more convenient.
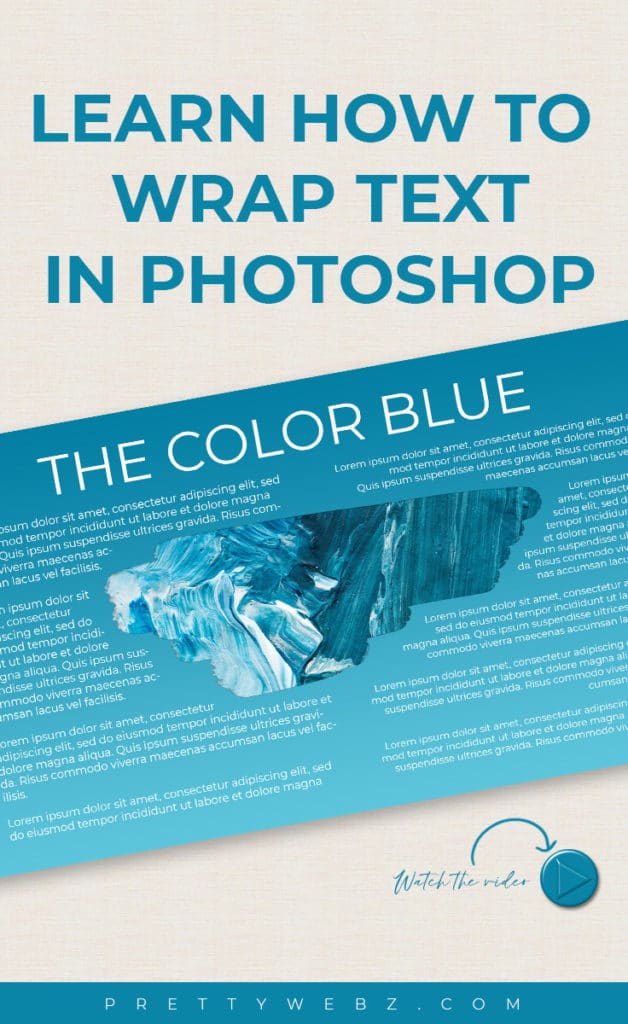
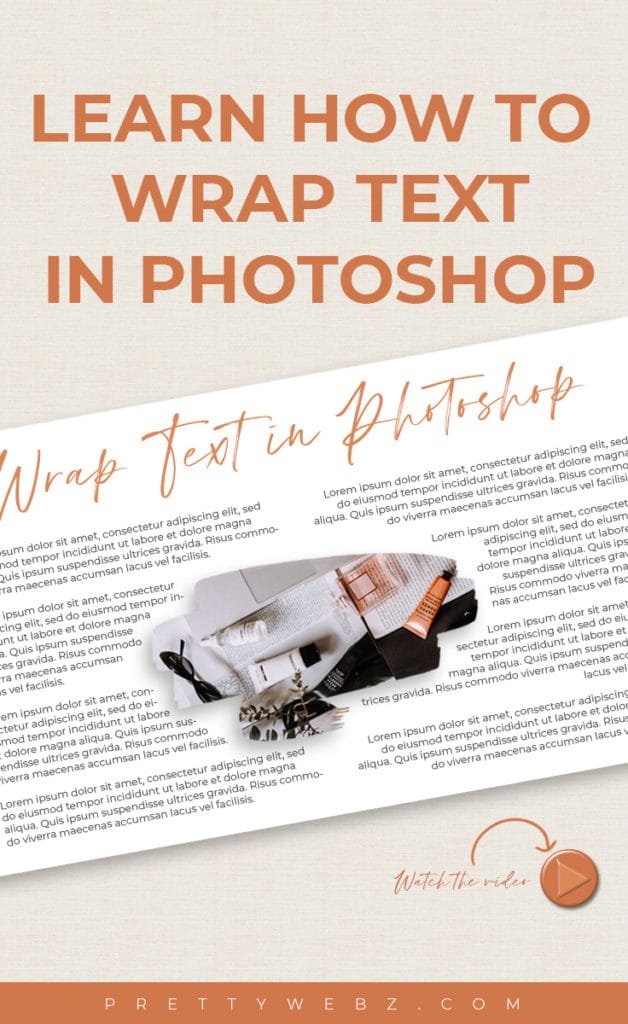
If you are creating a simple one-page layout there is a workaround to create beautiful text wraps in Photoshop. Today’s video will show you how to create custom text wraps around any image and how to create custom image holders as well.
This is one of many ways to create text wrap in photoshop but it is the perfect way to do it for beginners. Because you will not have to use the pen tool at all.
The pen tool is the thing most beginners have the most trouble with so this will bypass that completely. In this wrap text photoshop tutorial, I’m going to show you how to create wrap text with a custom painted shape but this can be done with any transparent image (PNG), vector objects, and shapes.
You can also wrap text in Photoshop with masked images but you will need to make the selection from the mask and not the image itself. This wrap text Photoshop tutorial is super easy to follow for beginners.
You will easily be able to fit your image in circles, triangles, hexagons, or custom shapes. I’ll show you how this is done using a custom drawn-out shape but the process works with traditional shapes as well.
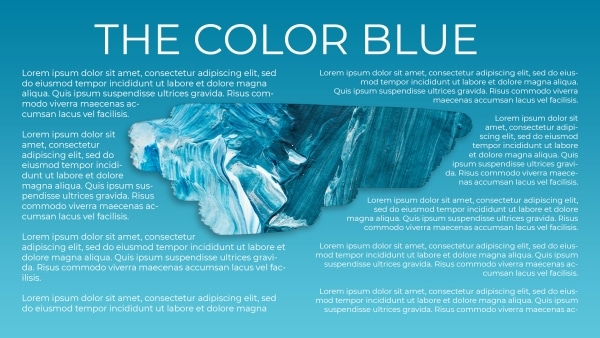
We will be working on a classic layout that is very popular in magazines and editorial environments. This means you can create this layout once and use it as a template. As you may already know, templates make the design process much faster.
LEARN DESIGN TOOLS ONE STEP AT A TIME
Learn and master the most frustrating aspects of overwhelming programs like Photoshop and Illustrator in a fun and entertaining way with PrettyWebz design tutorials.
Tutorial projects like the ones we share here on the blog are meant to help you grasp the use of the most powerful aspects of design software one step at a time. In the process, you will build your design assets so that you can create a stunning marketing design for your business.
Don’t forget to sign up below in the footer to become part of the Prettywebz family and never miss another tutorial.
Also join me on YouTube as well to check out the playlists I’ve set up for Photoshop, PowerPoint and other software you can use to design your online graphics.
More Posts on this Topic


Premium Templates


Wrap Text Photoshop VIDEO TUTORIAL
Image References
Step One – Set up Guides
The easiest way to know where your text frame should be is to create some guides. Follow the instructions in the following images to create a new guide layout.


Set up a guide for the layout heading as well.


The canvas should look like this.

Step Two – Choose or create a shape for the text to wrap around
In the tutorial I create a custom shape to create a text wrap around. You can use any shape you like. As long as the layer you are working with has a transparent background. Use vector shapes (Photoshop shapes are vector based), transparent PNG images, or the masked portion of a regular jpeg image.
Position the shape where you want it in the final project.
Step Three – Create a selection of the shape
Make sure you have a simple white background showing. Select the magic wand tool. Click anywhere on the white background to make a selection of it. Then invert the selection – command+shift+I for Mac or Ctrl+shift+I for PC. At this point, only the shape should be selected, denoted by the marching ants around the object.

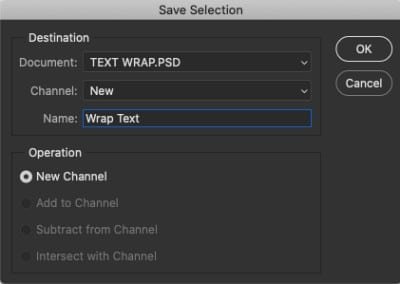
Step Four – Save the Selection for use later on
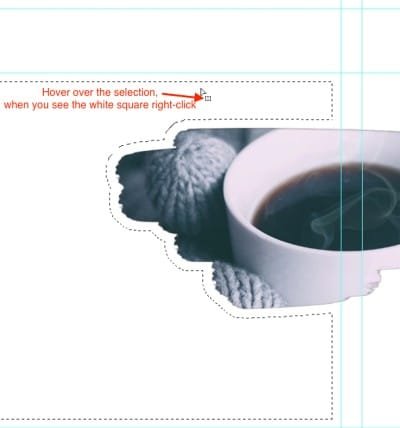
With the object selected, hover over the selection. When you see the white square, as shown below, right-click and choose “Save Selection” name the selection and press command+d (mac) Ctrl+d (pc) to deselect the shape.


Step Five – Make a selection of the area where you want the text.
In the video, I created a simple grid to help me with the text layout. I used the grid to help create the text layout. Setting up guides for your text is highly recommended.
Select the rectangle marquee tool from the tools panel and drag the marque across the canvas to select the area where you want your text.


With the selection made open your Channels tab and choose the channel you just created. I named mine “wrap text”
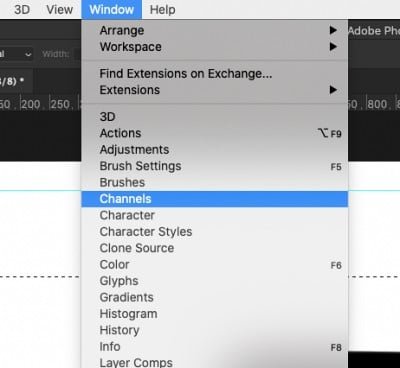

Hover over the custom Channel until you see a white square with a minus symbol in the middle. On your keyboard press option+command (mac) alt+Ctrl (pc) and click on the channel. This will remove the shape from the selection.


Step Six – Contract the Selection
At this point you have a selection that is conforming to the shape. This means your text will stop right at the edge of the object. We want the object to have some breathing room so we will move the selection away from the object slightly.


Step Seven – Create a work path
The work path will be the text holder, the text will conform to the contours of the work path. Select the text tool and click anywhere inside the path to begin typing. Treat this as you would any text frame.


Examples in Use