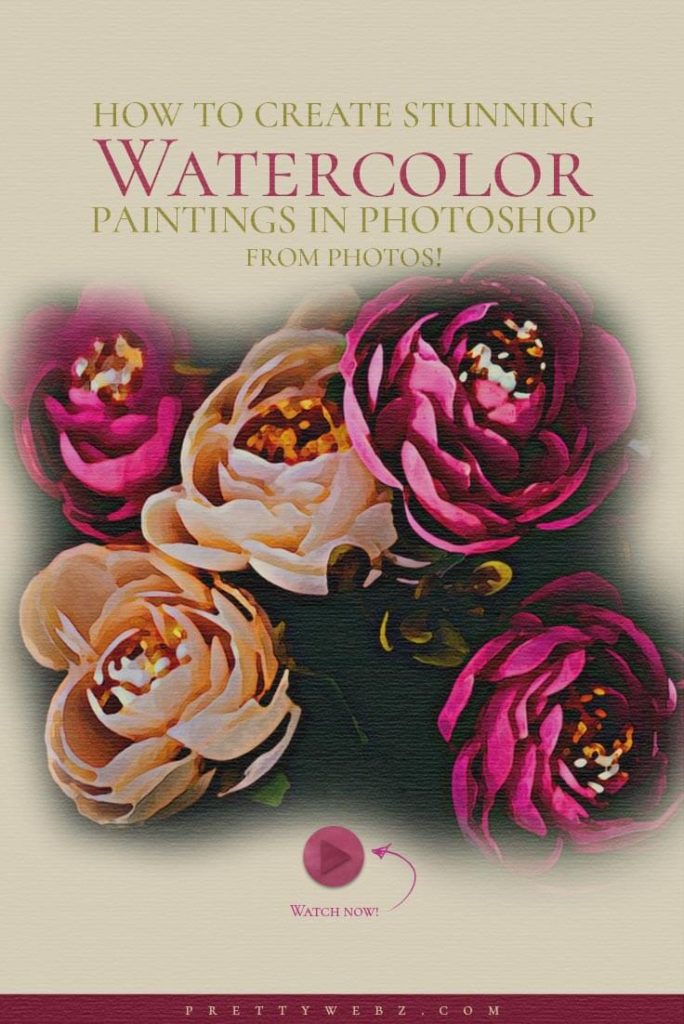
Watercolor Photoshop Tutorial
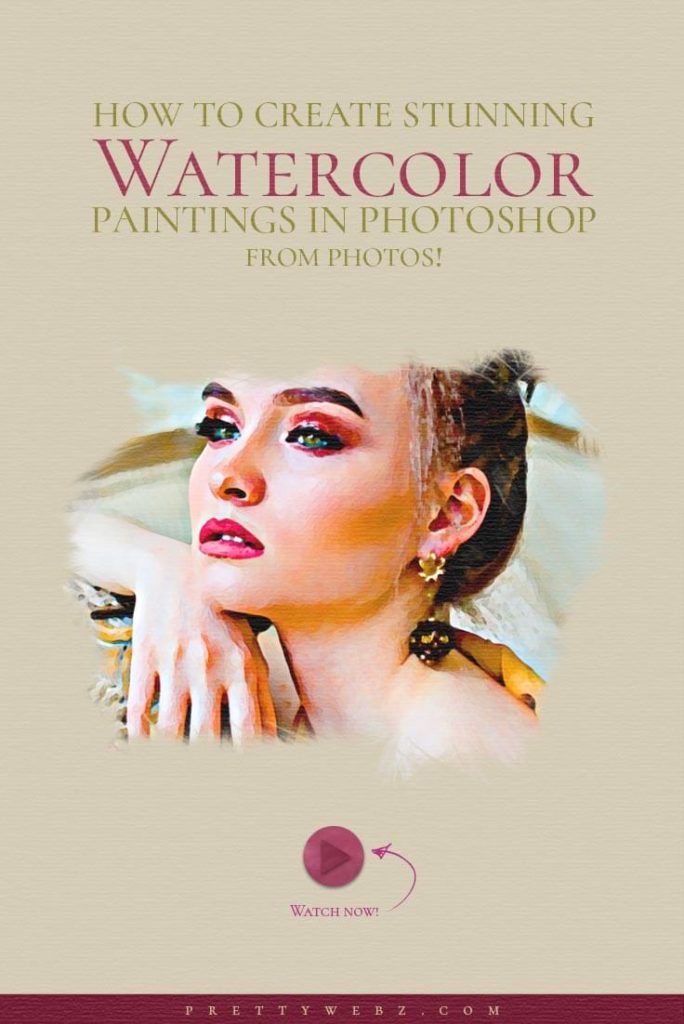
In this video, I’ll show you how to reproduce a watercolor painting using only a photo and Photoshop. We want to simulate the paint puddling effect of watercolor and still maintain some detail. This will be an abstract style where we’re capturing the mood rather than a realistic painting. In order to achieve this effect, we’ll be using layering, blurring and the filters.
LEARN DESIGN TOOLS ONE STEP AT A TIME
Learn and master the most frustrating aspects of overwhelming programs like Photoshop and Illustrator in a fun and entertaining way with PrettyWebz design tutorials.
Tutorial projects like the ones we share here on the blog are meant to help you grasp the use of the most powerful aspects of design software one step at a time. In the process, you will build your design assets so that you can create a stunning marketing design for your business.
Don’t forget to sign up below in the footer to become part of the Prettywebz family and never miss another tutorial.
Also join me on YouTube as well to check out the playlists I’ve set up for Photoshop, PowerPoint and other software you can use to design your online graphics.
RESOURCES USED IN THIS TUTORIAL
Paper texture (search for “paper”)
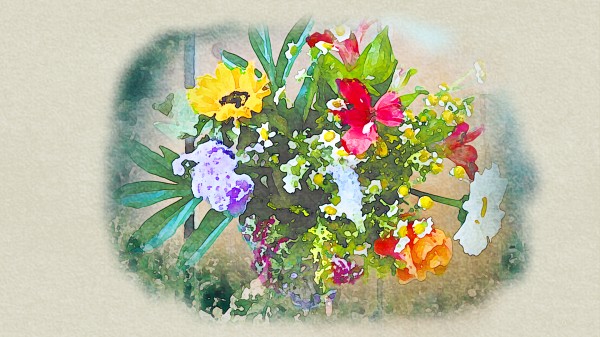
Flower Image
Use Examples
More Posts on this Topic

Watercolor Photoshop Tutorial
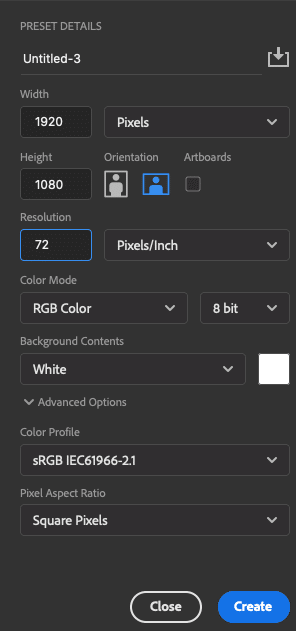
Before We Begin, you will need to set up your document. The image below shows the settings used in the video tutorial. The most important element is the color mode: RGB and 8 bit.
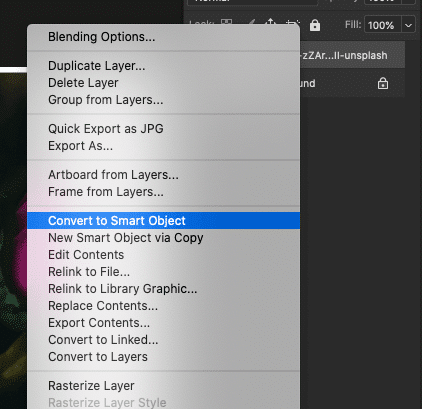
Step One
Import the image and turn it into a smart object
Since every image is different we will start with the settings we create in the video but will use smart filters so that they can be adjusted for different images. This technique is best for landscape and abstract images. If using this on a portrait with small details like faces it may blow out the face and make it look much more abstract
Step Two
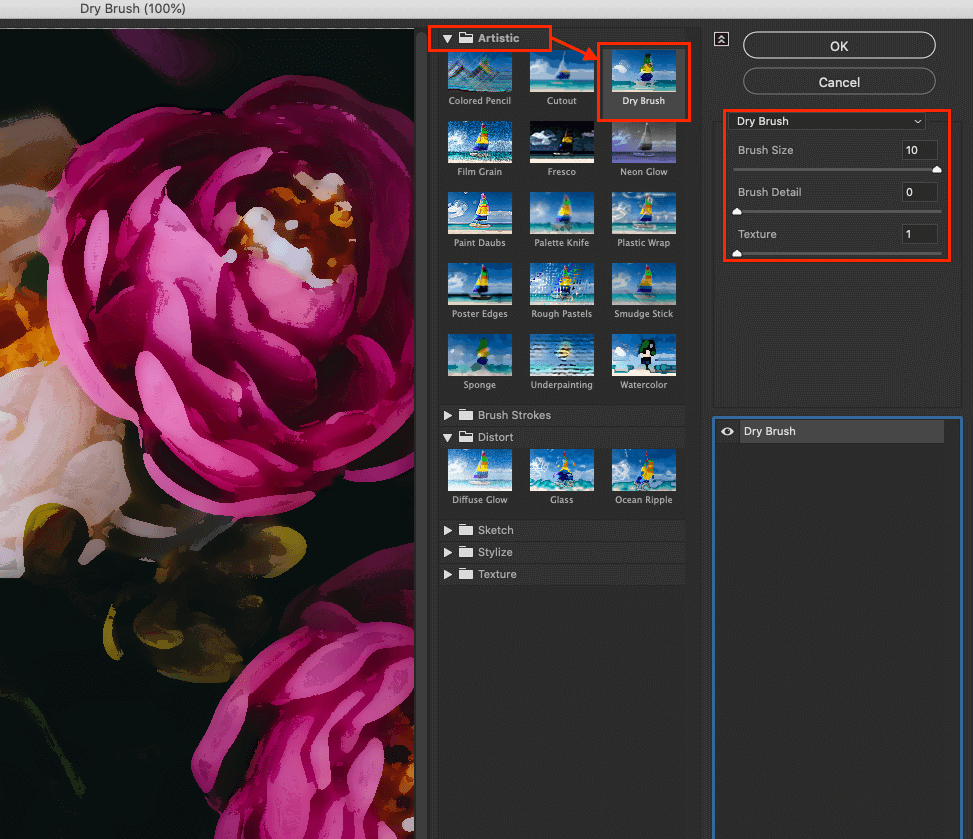
From the Filter menu, select Filter Gallery and select Artistic> Dry Brush.
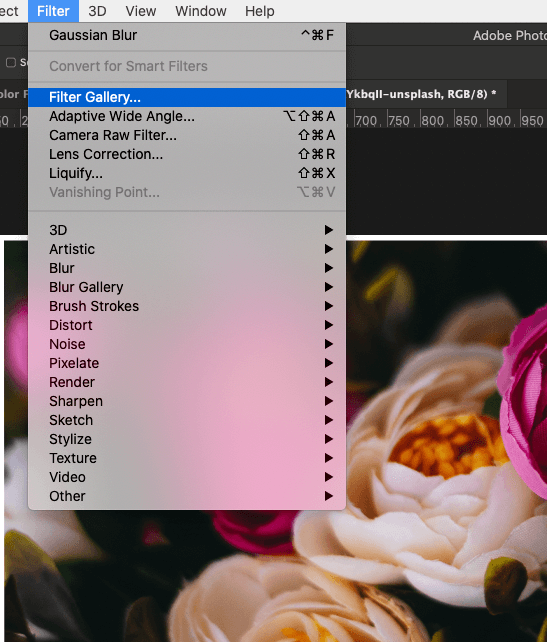
In the [Dry Brush] dialog, set [Brush Size] to [10], [Brush Fineness] to [0], and [Texture] to [1], and click [OK].
- Brush Size: the larger the brush the simpler the watercolor effect will be. Watercolor is typically large broad strokes with layers of simplified detail strokes. We want our colors to blend together as much as possible so we will set the brush to the maximum value of 10.
- Brush Detail: Again, we are going for blurred colors and a more abstract look so we will set brush detail to 0 this controls the width of the edges. The higher the number here the more detail the image will have. If you are working with faces or images requiring more detail you may want to increase this number but it may affect the watercolor feel so be careful.
- Texture – For this watercolor we want the paint to look as flat as possible so we will set this to the minimum setting of 1
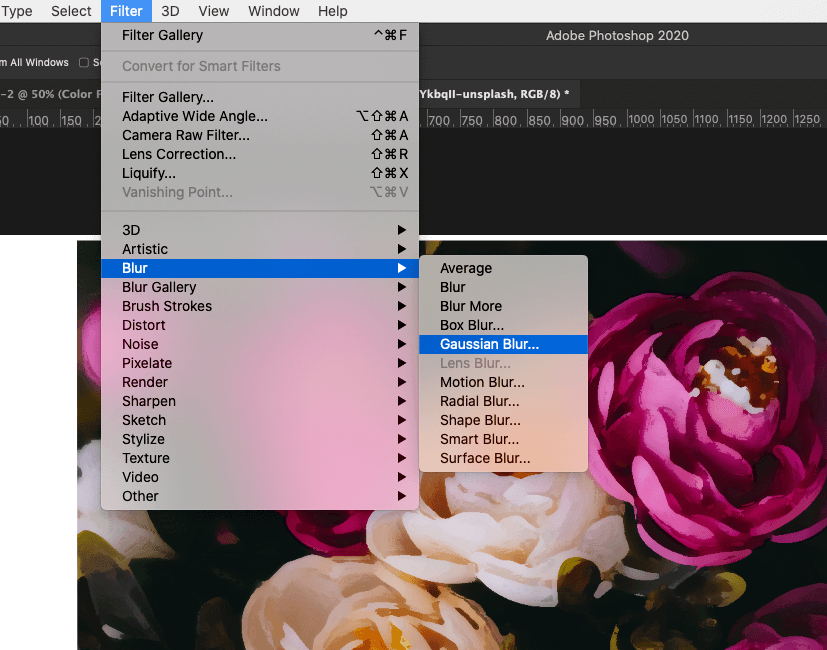
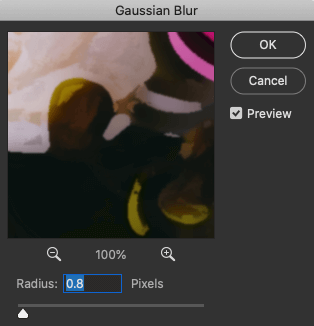
Step Three
From the Filter menu, select Blur> Blur (Gaussian). In the Gaussian Blur dialog, for Radius, enter 0.5 pixels and click OK.
We’re adding a blur to smooth out the color and reduce rough edges.
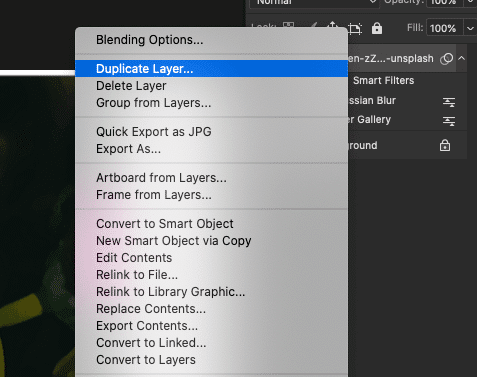
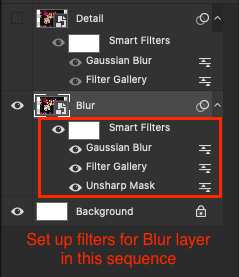
Step Four
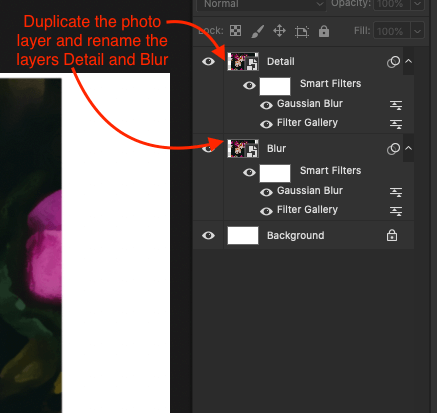
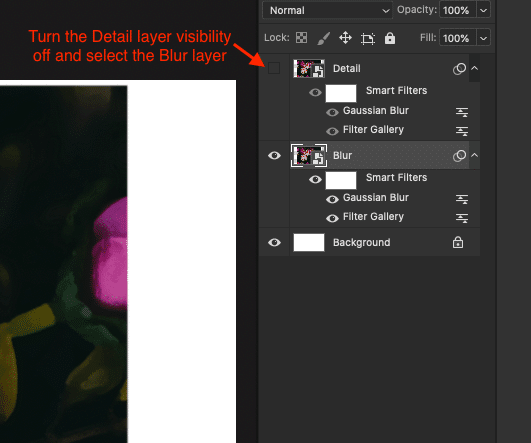
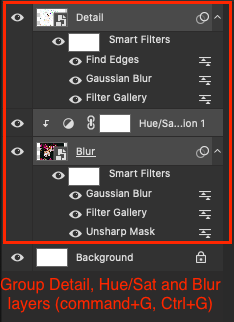
Duplicate the first layer by right-clicking on the layer, then in the menu select “Duplicate Layer” and name the layers Detail (top) and Blur (bottom) Turn off the detail layer.
Step Five
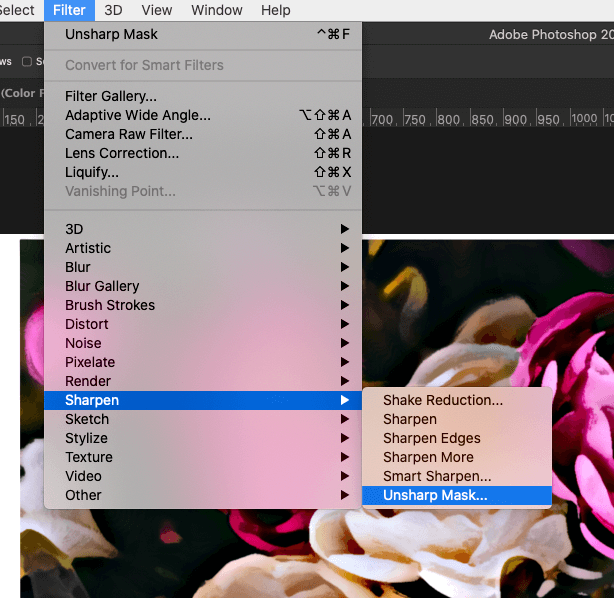
From the Filter menu, select Sharp> Unsharp Mask. In the Unsharp Mask dialog, enter 100% for Amount, 16.0 pixels for Radius, and a 0 level for Threshold, and click OK.
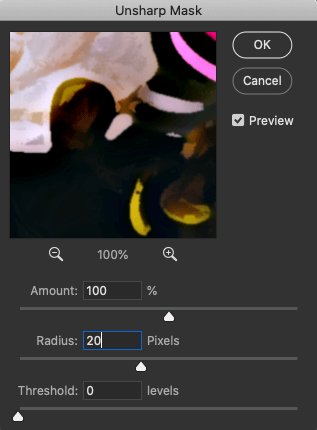
Move this filter to the bottom of the stack – The unsharp mask filter will bring out the color details so it looks more like paint and less like an image.
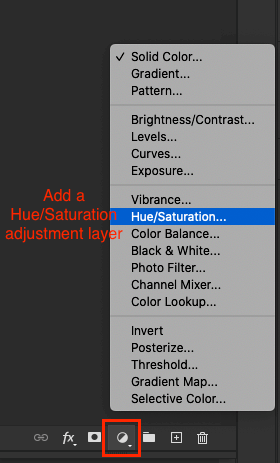
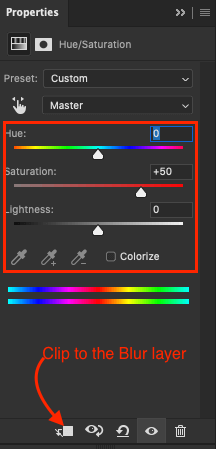
Step Six
From the Layer menu, select Hue & Saturation. In the Hue / Saturation dialog, enter +50 for Saturation, leave hue and lightness as they are and click OK.
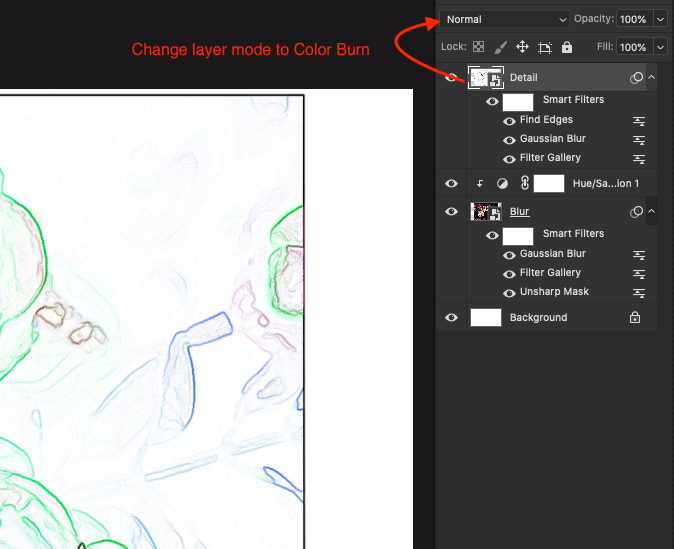
Step Seven
- In the Layer panel, turn on visibility and select the top layer (detail)
- From the Filter menu at the top of the screen, select Stylize, then Find Edges.
- In the Layers panel, select Soft Light for light images for our dark image we will choose “Color Burn” as the blending mode.

Step Eight
Select both photo layers and the Hue & Saturation adjustment layer and group them command+g (Mac) or Ctrl+g (PC) and set the mode to Multiply for the entire group.
Step Nine
Add a color adjustment layer: color d4c8b6
Step Ten
Add a texture overlay and expand the texture over the entire canvas, set the mode to Screen. Please see the resources section for the website to download the texture used in the tutorial.
Premium Products You Might Like