

Rusty Metal Photoshop Tutorial
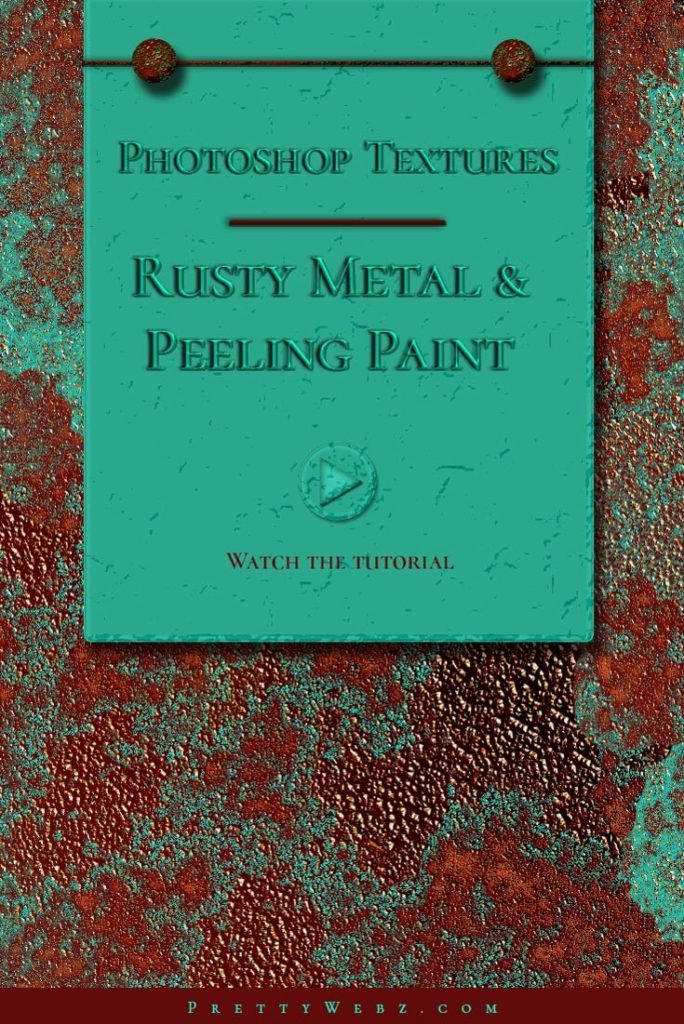
Learn how to make a rusty metallic texture from scratch inside of Photoshop. Get the look of rusty metal and peeling paint in any color you want! This realistic rust texture will help you get a worn and weathered look for digital drawing and graphic design projects. This is a super easy and fun project that you can create in just a matter of minutes.
Download the gradient pack below but the gradients are not necessary to complete the rust Photoshop texture, everything is in the video. The gradient download is only for your convenience.
LEARN DESIGN TOOLS ONE STEP AT A TIME
Learn and master the most frustrating aspects of overwhelming programs like Photoshop and Illustrator in a fun and entertaining way with PrettyWebz design tutorials.
Tutorial projects like the ones we share here on the blog are meant to help you grasp the use of the most powerful aspects of design software one step at a time. In the process, you will build your design assets so that you can create a stunning marketing design for your business.
Don’t forget to sign up below in the footer to become part of the Prettywebz family and never miss another tutorial.
Also join me on YouTube as well to check out the playlists I’ve set up for Photoshop, PowerPoint and other software you can use to design your online graphics.
Resources used in this tutorial

More Posts on this Topic
The Rusty Paint Texture Tutorial
Create a new document 1000×1000 pixels

In the layers panel, click the lock on the background layer to unlock it. Right-click on the layer and choose “Convert to Smart Object”
Set the document foreground color to black #000000 and the background color to white #FFFFFF
First Layer Settings
On the top bar menu choose Filter>>>Render>>>Clouds
On the top bar menu choose Filter>>>Pixelate>>>Mezzotint
Mezzotint settings: Course Dots

On the top menu bar, choose Filter>>>Noise>>>Add noise

On the top bar menu choose Select>>>Color range

Fuzziness is 30
Check off “Invert”
Click the eyedropper tool
Use the eyedropper tool to select the color white from the background color swatch

With the selection active, add a new layer. Set the background color to black then press command+delete (mac) Ctrl+backspace (PC) to fill the selection with black.

Press command+d (mac) Ctrl+d (PC) to deselect the selected area then select layer 1 right-click and choose “Duplicate Layer” you should now have three layers in the layers panel.

Click on layer one (optional right-click and select “convert to smart object”) With layer 1 selected, select “Filter” from the menu at the top of the screen then Blur then Gaussian Blur and set the radius to 5 pixels.

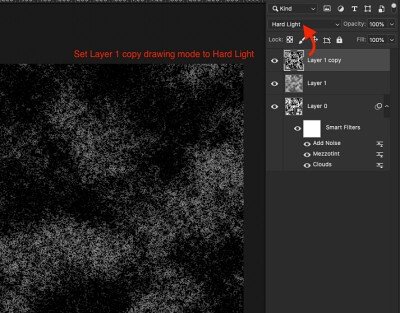
Set layer 1’s blend mode to Multiply

Set layer 1 copy blend mode to Hard Light
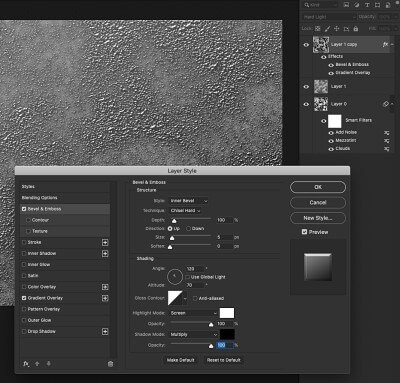
For Layer 1 Copy add a gradient overlay and bevel and emboss with the following settings.

Add a gradient map layer adjustment to the top of all other layers.

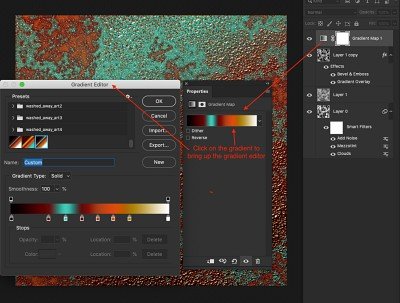
Create a rusty metal gradient, pay attention to color-stop locations and colors and set the following settings:


Remember, you can also download pre-made gradients here.