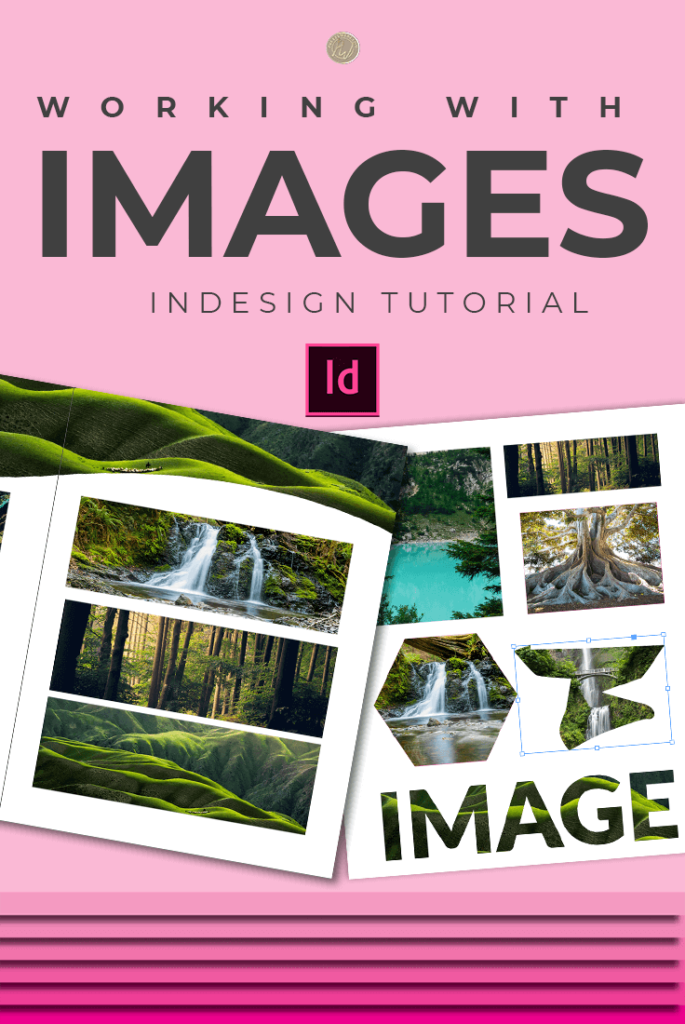
Images In Indesign
Frames and Images in Indesign
Working with frames and images in Indesign can be one of the most frustrating aspects of putting together your document if you don’t understand how they work together. Images in Indesign work much differently than you may be used to in Photoshop or Illustrator.
In this video, I will demonstrate how to resize images in Indesign, how to crop an image in Indesign, how to create a frame in Indesign. Most importantly, you will understand the relationship between images and frames and how to work with them in the best way possible.
Information About Indesign
If you’ve never used Indesign before you may be wondering how this program will benefit you, especially if you’re not a designer. If you’re a digital marketer, online business owner or a blogger Indesign is the ideal design platform for you.
Before I get into working with images in Indesign I want to share a little more information about the program and why you should use it. If you’re already convinced about how amazing this program is, skip this part.
When to Use Adobe Indesign
Indesign shares many of the same tools you will find in Photoshop and Illustrator but this is a very different tool. Indesign is very powerful. In fact, you can create an entire publication such as magazines and full-length books or something as simple as a business card.
Indesign is best for print and interactive media such as clickable checklists or fillable worksheets. However, this design software isn’t just about creating published work, you can create graphics with it as well. In fact, it’s not uncommon to come across people who prefer Indesign for creating their blog and social media templates.
If you are a blogger doing business online or an online marketer creating lead magnets, opt-in cheat sheets and all of these things to get people through your funnels this program is where you should focus your design learning time.
More Posts on this Topic


Adobe Indesign Vs. Online Design Software
You can use online design software to create a variety of different design assets for your business, that’s true. However, I find I can never get my designs as clean and professional looking as I can get them using Indesign. The availability of grids and alignment tools not present in most online design software.
Alignment is a very important factor that will make all the difference in your work. Online design programs are not an alternative to a program like Indesign because the tools used to apply basic design principles such as text and image alignment are not there.
Finding Your Style is Easier with Indesign
I find that when using online design software it is very easy to go for a template pop it in and change the image and the text the problem with this is that everyone else does the same thing. Using templates may seem like a good idea on the surface, but when you use them the designs tend to look typical and you never develop a brand style.
When you’re working with online design software try to start from scratch. At the very least, have an idea of your layout. If you must, modify a template but choose one that lends well to an established style.
Interactive Media
The other issue with online design software is you can’t use it to create interactive media. It’s impossible to create clickable checkboxes or fillable spaces on your worksheets without first downloading it to your computer and then uploading it into something like PDF Escape for yet another round of editing and then downloading it again.
If you want the best of online editors you have to pay for premium features. At this point, you may as well pay for Indesign. Seriously, you’re better off learning the better program and getting well over your monies worth from this program.
Using Images in Indesign – The Tutorial
Everything I’ve put in this tutorial is also demonstrated in the video above. If you’re a visual learner, I suggest checking out the video to get a better understanding of everything I will explain to you here.
Importing one image in InDesign
Import an image by dragging the image in Indesign with your mouse from somewhere on your computer. You can also give yourself a few more options by placing the image via the file menu but in general, it all works the same.
Choose the images from your computer that you would like to use for your design project. From there you have a couple of options.
- Click with your mouse just to drop the image in it’ll drop a full-size image
- You can also click and drag the mouse across the canvas to create a custom frame for your image.
Are Your Images in InDesign Pixelated?
Don’t worry, there’s nothing wrong with your image. Indesign adds preview images to your document at a much lower resolution so that an image heavy document does not slow down the program and cause lag. If you’re making a simple worksheet or graphic, you probably won’t have this problem. Indesign can handle very large format publications such as magazines and books, this is why the option to pixelate images is available.
To change how your image displays
Right click on the image and choose Display Performance there are three options available to you.
- By default, you will see a blurry, pixelated version of your original high-resolution image, this is called the Typical display. This pixelation allows you to have a quick visual reference of your image but not the high-resolution image that will be part of your final file.
- The second option is Fast Display, this is a placeholder. Basically, it adds a big gray box with an X through it. This is to denote the place where an image will be when the project is exported. Your image is linked to the document here. This means InDesign knows what image belongs in that space but it won’t show it to you if you have this mode selected. This is a way to save your computer tons of memory when working with large projects.
- The third option is using the original high-quality displayfile in your working file. Most of the time when you’re working on a small project like worksheets and small workbooks you can get away with doing this. However, you may want to switch to a pixelated lower resolution preview or just a simple placeholder for your images if you’re working with large documents like magazines and full-length books. The number of images you have in your document for a project like this may slow down your workflow considerably.
Importing and placing single images in InDesign
Let’s import our first image. You can do this by dragging them into Indesign from another window but the best way is to use the Place function.
Go to File menu at the top of the screen then Place then search for an image that you want to import into your Indesign document. From here you can import several at once by holding the shift key on your keyboard and selecting the images you want to import. You can also start with importing just one image.
Once you choose your image you can see that your cursor will be loaded with that image. Though you see a small version of it there are a few ways that you can put this image in the document. The first is just simply to click anywhere. Clicking inside the canvas will drop the full-size image inside your document.
You can also create a frame with the image loaded. Do this by clicking, holding and dragging your mouse to the size and proportion you would like your frame to be. When you let go the image will be restricted to the frame.
Lastly, you can replace objects in your design with images. Shapes, text, and drawings can all be turned into frames for your images. Make sure the object is selected before you place the image. Indesign will automatically turn the shape, text or drawing into a frame and place your image inside. I’ll give you a demonstration of this a little later.
Frames and images – understanding the happy couple
If you’re used to a program like Photoshop, you’re probably not used to your images also having frames. Photoshop does have a frame tool but in general images are not married to the frame as you will find in Indesign.
In Indesign, a frame is used to hold or contain the image. Unless you understand the relationship between a frame and an image it can get a little frustrating to work with them. This is especially true when you’re trying to resize or move images in InDesign. In some cases, you end up losing your image altogether. This can happen when you don’t know the difference so we’re gonna talk a little bit about that here.
Basics of Images in InDesign
An image is pretty straightforward. The image you’ve chosen to go inside of the frame. It is typically a square or rectangle unless you’ve manipulated it with another program like Photoshop. When selected, you will see a yellowish red outline. The image will also have a circular handle in the center. If you click on the handle you can move the image around in the frame. It also selects the image so the image handles and other controls are available. If you are in the direct selection tool the image will always be selected.
In order to move the image and the frame together, use the selection tool and click and drag anywhere on the image but the center handle.
Image adjustment options
Like a picture and a frame in the real world, the picture has to fit the frame. If the picture is too big, you need a better size picture. Crop the picture or get a different size frame. luckily for us, this is digital so we can do this very easily by manually adjusting the size of the image or frame. You can also do this by using some of the automatic adjustment features inside of InDesign.
Image adjustment presets – If you select the frame and then go to object menu at the top of the screen then Fitting you can choose how to fit the image inside the frame based on whatever option suites your image best.
The frame
The frame is represented by a blue outline with small nodes at intersections and a link icon at the upper left-hand corner. When you see this link icon you know that the object contains an image and that makes it a frame.
There are several ways to make frames
- Image frame tool – You can use an image placeholder similar to what you’d see in any wireframe. If you’re familiar with web design then you will understand this. It’s basically a big box with an X through it. This graphic is there to let whoever is working on the project know that an image will go here.
- Using shapes – any object or shape created in or outside of Indesign can be turned into a frame.
- Using text – InDesign allows you to vectorize your text or Create Outlines from any text. With the text selected, go to the Type menu at the top of the screen then choose, Create Outlines. This will turn your text into a vector shape. You can no longer edit the letters but you can now use it as a frame.
- Using custom shapes you create with the pen tool.
Importing and working with multiple images
Cursor navigation
- Flip through images using the arrow keys on your keyboard to scroll through before placing to find the perfect image.
- Dropping and framing as demonstrated before
- Grid placement – command + shift to make an image grid with multiple images loaded in your cursor When you see the grid icon load onto your cursor you can click and drag across your document to determine the size and shape of the grid. The grid works best when all of your images are the same Aspect ratio. You can also use your arrow keys on the keyboard to set the number of columns and rows for your grid.
There are so many amazing things you can do with images in Indesign. Play around with some of the ideas we’ve discussed here and I guarantee you will be inspired to create eye catching and unique designs for your business. Happy designing!
What Next?
Do you like the video tutorials that we share here on Prettywebz? Tutorials just like working with Images in Indesign tutorial. Make sure to subscribe to our newsletter to receive a notification every single time we send out a new video or a blog post.
I have a growing collection of tutorials using the Adobe Design Suite. Follow along with my Photoshop tutorials to help you better understand the finer points of this software such as working with filters and other features you can only find in Photoshop. Sign up below in the footer to become part of the Prettywebz family so you never miss a tutorial.
Also join me on Youtube as well to check out the playlists I’ve set up for Photoshop, PowerPoint and my latest playlist that will feature nothing but Indesign.
Did you like the working with images in Indesign tutorial? Share it with a friend or save it for later by pinning this image!