

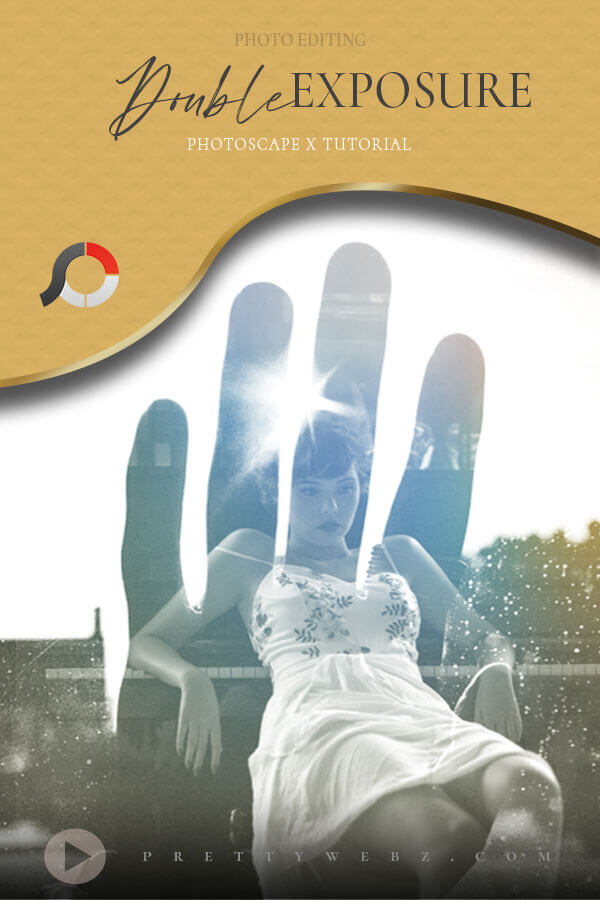
Photoscape X Tutorial Double Exposure
In this Photoscape X tutorial I’m going to show you how to layer images to create a double exposure effect. Photoscape X is a free photo editing software that does a whole lot more than just color ajustments and corrections. This amazing software, even the free version does so much more than you would think. It’s meant to be a comperable alternative to software like Lightroom but you can do a lot of editing and manipulation in this software as well.
If you’re interested in learning more about Photoscape X make sure to watch my other tutorials to learn how I use this software for batch editing for social media. Plus, get a full walkthrough of the software in this Photoscape X tutorial.
Personally, I have used Photoscape X to arrange images for product displays, create hashtag related social media campaigns, resize large groups of images and more.
LEARN DESIGN TOOLS ONE STEP AT A TIME
Learn and master the most frustrating aspects of overwhelming programs like Photoshop and Illustrator in a fun and entertaining way with PrettyWebz design tutorials.
Tutorial projects, like the ones we share here on the blog, are meant to help you grasp the use of the most powerful aspects of design software one step at a time. In the process, you will build your design assets. Before you know it, you will have created a good working knowledge of Adobe design software and a nice asset library for your business.
Don’t forget to sign up below in the footer to become part of the Prettywebz family and never miss another tutorial.
Also join me on YouTube as well to check out the playlists I’ve set up for Photoshop, PowerPoint and other software you can use to help build your online presence.
Resources for This Tutorial
Click for a direct download of the resources mentioned in the video. Resources are for reference, or in personal or client work. Tools can be used for creating your own resources but cannot be repackaged and sold on their own. Thank you!
____________________
More Posts on this Topic

Premium Products
Photoscape X Tutorial Double Exposure VIDEO TUTORIAL
Photoscape X Tutorial Double Exposure Transcript
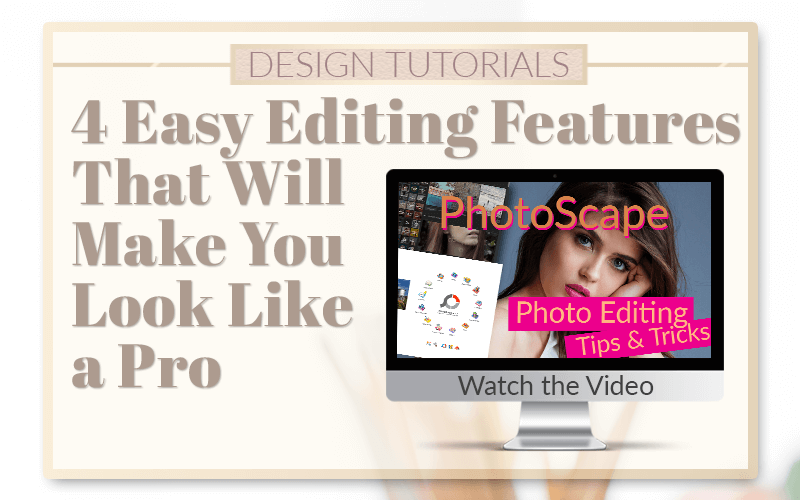
Hey there, Mercedes here from Prettywebz.com and today I have a quick Photoscape X tutorial for you. We’re going to be learning how to create a double exposure in this software.
Downloading Photoscape X
Photoscape X is a free photo editing software that you can download right here x.photoscape.org.
They do have a Windows and a Mac version.
This type of software is going to be more like Lightroom than it is going to be like Photoshop but you can do some light editing here.
In other videos, I’ve shown you how to do batch editing. I like to use it a lot for social media.
So, if you’re interested in grabbing this software you can just come to this website and of course I will also add this to the video description.
Double Exposure Method That’s Limiting Your Design
Before we get started with the actual tutorial I want to show you what I think a lot of people might be doing that’s probably limiting the options that you have.
That would be starting with an image. So I’m using these two images right here to create this.
I’m going to start with this image right here. This is now my background image.
So, I’m right here in edit. Just make sure the edit is selected and I’m going to click on insert and I’m going to insert an image which is going to be the one of the girl.
I’m going to open that up and add that in there and then just, you know, kind of place her where I want the image to go.
And then from here you come over here and you play with the blend modes and you might get something nice.
You know, similar to this. Maybe you’ll move it around a little bit and this is all fine.
But you can see right here with the layers you’re, kind of limiting what you can do with this.
As far as, you know, the blend mode for the back image and where, you know, just placement in general.
A Better Way to Get Double Exposure in Photoscape X
So, what I wanted to do is just show you how I usually do one of these in Photoscape X. So, I’m going to go ahead and just close all of this. Get out of that. I don’t want to save it
So, when you’re in this screen, I’m here in editor. I have my two images here and right here.
So instead of just dropping an image in here what I’m going to do is click right here on new.
So, make sure you’re in the editor and then you’ll see this screen right here.
You’ll click on new and I’m going to choose a color. So solid color background.
Match the background to the image color tones
And I’m, kind of, going to go off of this image right here. It’s kind of like a bluish-green color.
So maybe this and you can see right here that these two images have similar color tones to them.
This one has that like bluish green and this one also has something like that in there.
Just make sure that the images that you’re using do have similar color tone. If they don’t, you can always prepare both of the images beforehand.
Also in Photoscape you can do that easily or you can just put them together like we’re going to do right now.
And then change the color tone later on.
So I’ll show you how to do that here in a minute.
But I’m going to use this color. I’m going to go ahead and click ok and we’re just going to get this basic solid background from here.
Inserting the Images
I’m going to come here to insert. I’m going to go to the image and insert both of these images.
So, I just held the shift key and then, you know, clicked on both of those and then I’m going to click open.
That’s going to open both of those images. Now you can see right here in the layers that I have two images to work with.
So I can place them any way I want to I’m just going to make it really simple for the both of them.
Because I just want to show you the concept or the idea of it, you know, rather than creating a whole image.
So what I’m going to do is just make this really big, kind of place her in there and at this point the image of the girl is above the hand.
Blending The Images
I have that selected right here and I have all of my image settings open here.
What we’re going to work with right here is blend mode.
So, we’re going to change the blend mode to something like screen or lighten.
Okay so we’ll go with screen on this one. And now I’m going to come to the hand and click on that.
And I’m going to do the same thing so I’m going to work on the blend mode.
I’m going to go with, I think we’ll go with lighten on this one.
Making Position Adjustments
I’m going to come back to the layer with the girl and then just kind of adjust that as well.
And don’t worry about this down here, that’s not going to be part of the final image.
The only part of this that’s actually going to show up is where that big block of blue was at.
So, this will show up, so you have to be really careful with that.
Kind of move this over to make sure that that’s not going to affect it.
This is more or less what I have. I just kind of wanted to have her face visible here.
But we do have that double exposure effect happening.
You could even add a third image here. Add other effects.
What I’m going to do now that I have everything placed the way I wanted, and I like the positioning of this and the way that they’re blended together.
Merging and Cropping the Image
I’m going to come here to merge. I’m just going to click on that and that’s merged everything together.
So you can see how, you know, all of that stuff that was at the bottom has been cropped out.
Adding Effects and Color Adjustments
From here you can come back into edit. Okay from here, if you don’t like the coloring you can adjust colors, add filters to it and do a whole bunch of other things.
So, I can, you know, like add bloom. So maybe I want it to look a little more dreamy. You know, to see if I like that.
I’m just going to cancel that. You can check out different color grades here or create your own.
You know, using all of these filters but it’s a pretty easy and straightforward once you understand where everything’s at.
Conclusion
I hope you found this video helpful. If you did make sure to like and share it.
And if you like this type of content I do have a whole
playlist on Photoscape X tutorials.
I’ll go ahead and link that up at the top and down in the description for you.
Make sure to subscribe so you don’t miss any more videos and visit prettywebz.com for more design resources and tutorials.
Until next time thanks for watching this video.