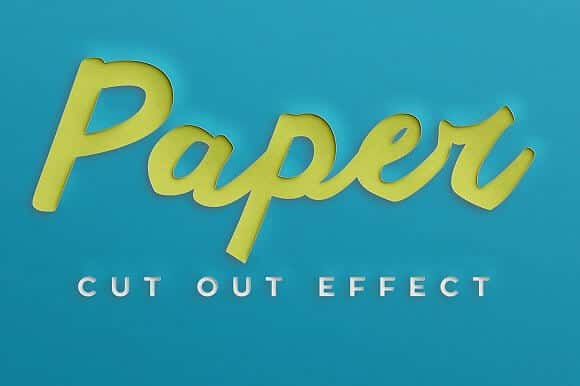
How to Make an Easy Paper Cut Out Effect In PowerPoint
Since back to school season is upon us, I thought I would show you how to create a paper cut out effect in PowerPoint similar to the ones that you see done in Photoshop and Illustrator. Graphics objects created using this effect look very intricate, and the finished product is eye-catching and beautiful.
The best part is if you don’t have Photoshop, you don’t have to go out and buy it to get this fantastic look. The paper cut out effect can be done without fancy software.
Note: Learn how to export the graphics you learn to make in the tutorial below in this supplemental tutorial on exporting methods for PowerPoint.
How to Use the Paper Cut Out Effect
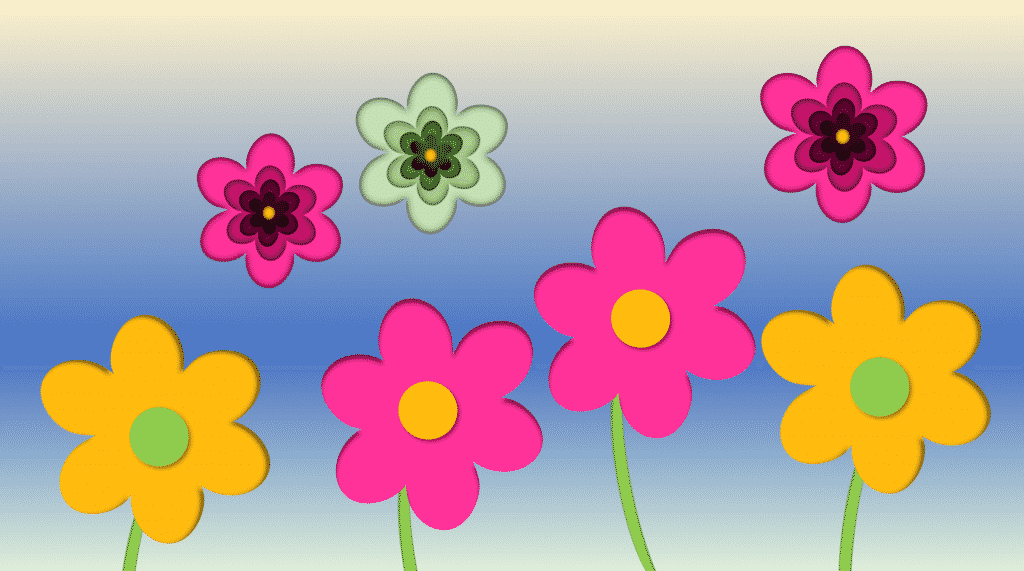
You can use this Effect to simulate cut out pencils, school supplies, flowers. You name it, just about shape can be reproduced with a paper cut out effect. Even if it’s not related to back to school, this effect is fantastic for social media and promotional design elements. The more colors and contrast you use, the better this effect looks!
What Types of Images Should I Use?
You will need to use a vector object or a PNG file to get the correct contours. You can also use the shapes available right inside of PowerPoint without importing anything. It’s important to note that you don’t need a full-color image. The paper cut out effect is meant to look like layered pieces of paper with shapes cut out. Anything with the gradient is not going to work.
Try to choose images that are silhouette or vector-based so that you can separate each piece and layer them to look like paper cut-outs layered on top of each other for a nice back to school or crafting look.
By the way, if you want the paper cut out images, we’re creating here in the video tutorial to use in your design work you can download them right here.


•••Please Note: The following is a loose transcript of the video above•••
How to make simple shapes look like 3-D paper cut out objects in PowerPoint.
Creating this effect is super simple, and you can use it with your branding colors which is why I wanted to show it to you so I’m I have a few examples here so you can see what we’ll be doing.


I want to go ahead and show you how I did it
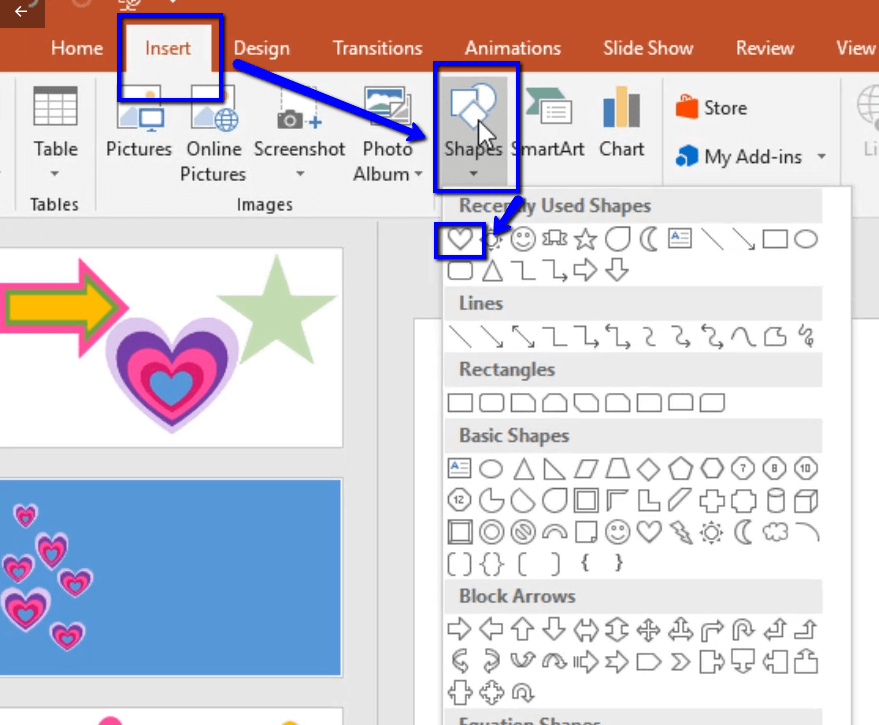
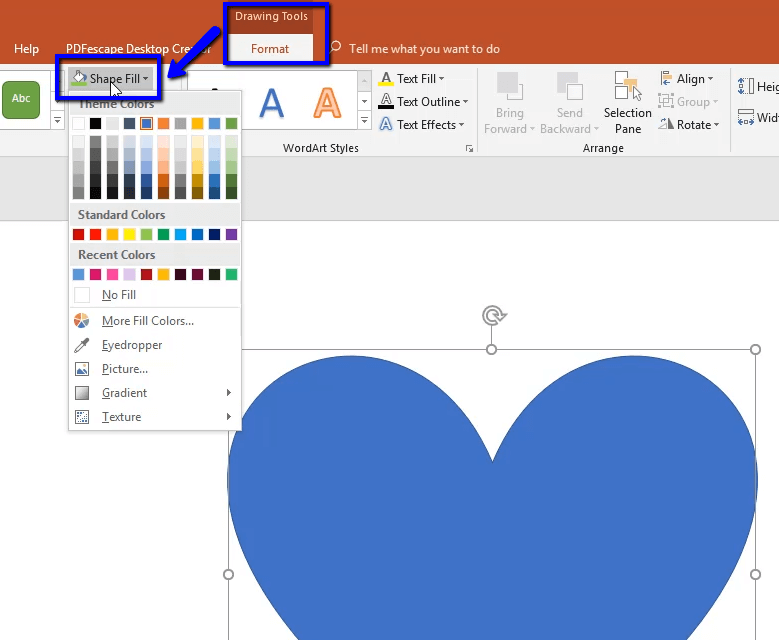
We’re starting with the new slide. I’m just going to insert a shape. We’ll start with a heart.
- Come up to format
- Change the color to anything, but for this example, we’re going to go ahead and keep it pink. Don’t forget to remove the outline.
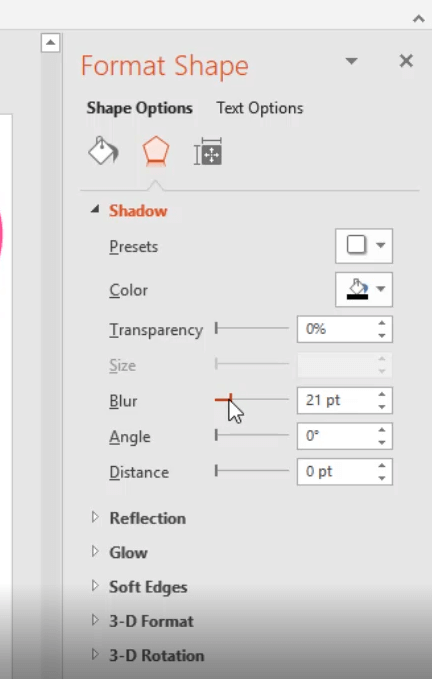
Add a shadow effect
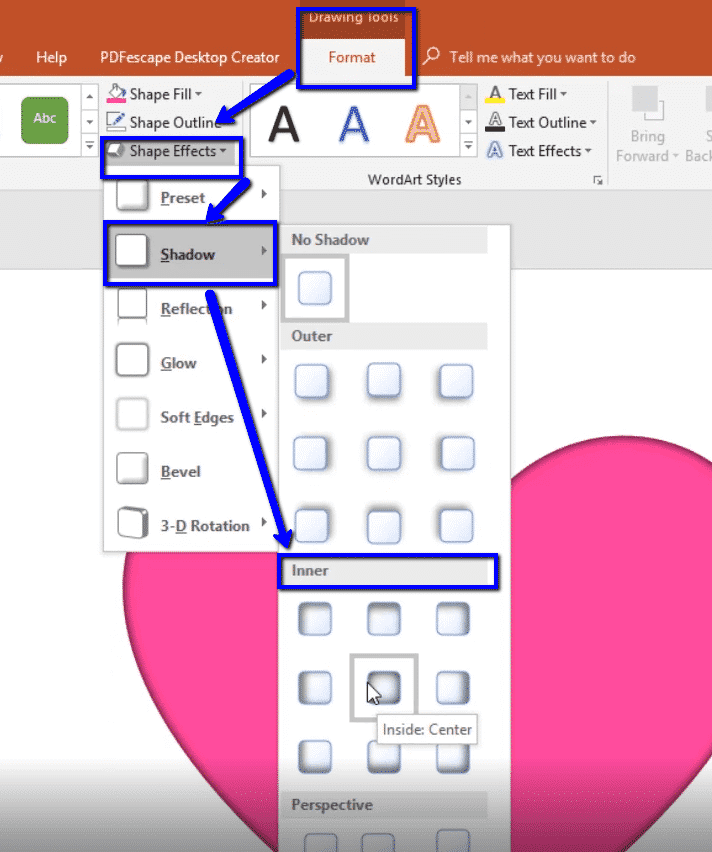
If you come in here to the drawing tools, format, shape effects, and shadows, it’s going to be an inner shadow that we’re going to add here.
Once we have this basic shapes here, noticed that on the outside, it looks like we laid a piece of paper on top of this pink, this is what we want.
Now what we’re going to do is right-click, copy, and paste the second heart. Use the bounding box handles to resize to adjust the size and nested inside the large heart shape.
Once you have the smaller heart nested where you want it change the color.
You can copy and paste another heart shape, shrink it down and nest it again. Do this as many times as you like for your desired effect. The more shapes you’re nestled inside each other the more intricate and detailed the paper cut out effect final graphic will look.
These are the necessary steps that show use for any shape.
Group the Shapes to Make One Shape
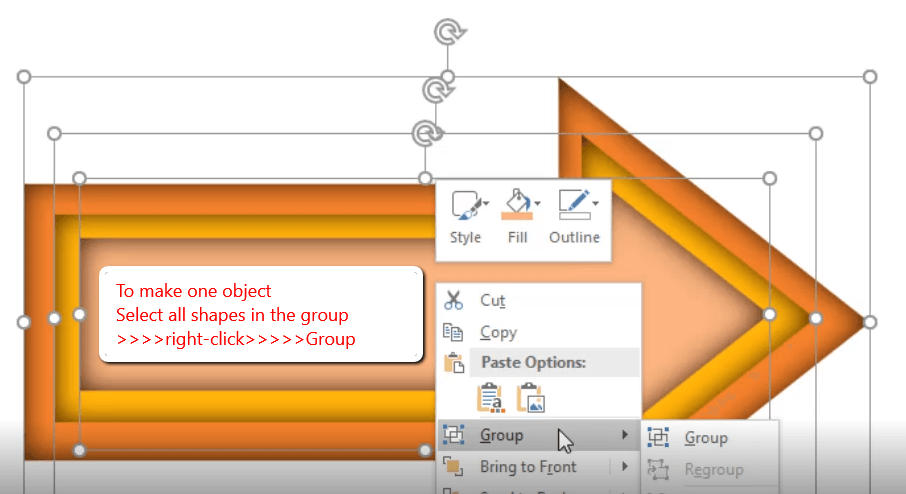
At this point, you can select all of the shapes by clicking on each wall holding down the shift key right click and select group. At this point you can shrink it down, enlarge it and place it where you want it to go. Once you have this first object, you can duplicate it to create patterns or backgrounds.
You can change the colors very easily by grouping and by selecting each item individually. Creating your own graphics objects is flexible, this paper cut out effect looks great on back to school marketing social media and promotions graphics. The Papercut out graphics are beautiful and go well with those types of promotions and marketing.
Accessing and Using the “Format Shape” Panel
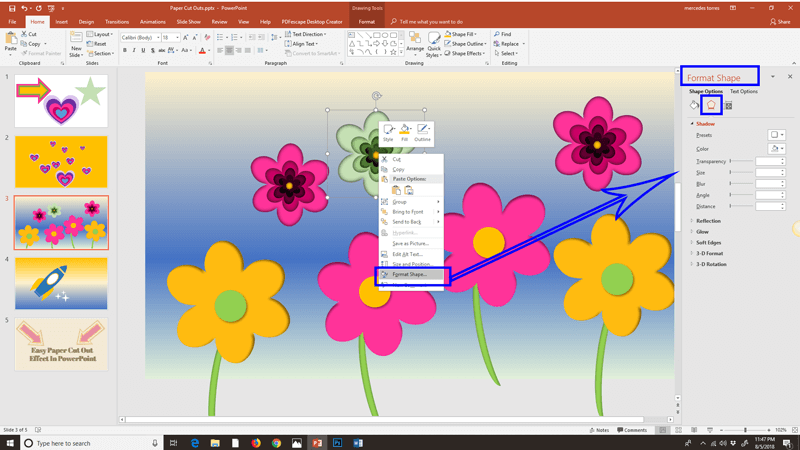
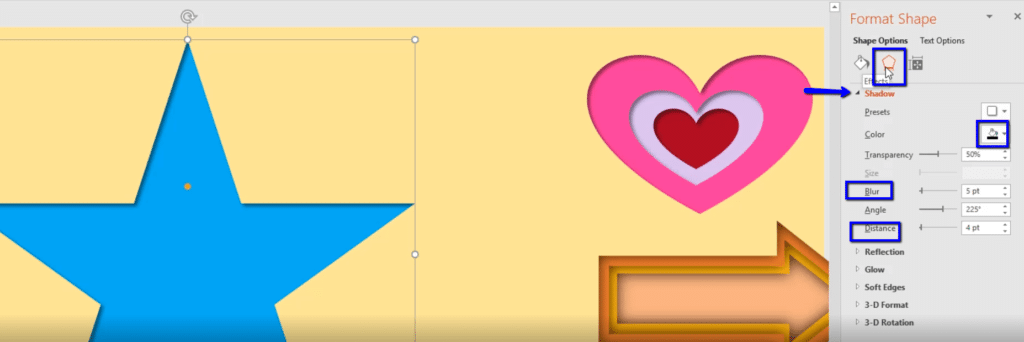
If you want to have more control of the depth in your cut out, color and position of the shadows you can access these controls in the “Format Shape” panel.
- Right click on the image
- Choose the “format shape” option when the pop-up menu apears, and the “format shape” panel will pop right up.
- In the “Format Shapes” panel we’re going to work with the effects section.
Adjust the settings Just as you want them, once you have the shape effects to your liking just right click copy paste and nestle as many times as you want.
Do You Want More Examples?
If you’re interested in learning how I created the arrow and the star, please watch the video above where I will show you several demonstrations using the PowerPoint shapes tool to create a variety of different cut out graphics. Remember, you can use your branding colors, and you don’t have to buy graphics you’re building your custom graphics assets in literally seconds.
Are You Using PhotoShop?
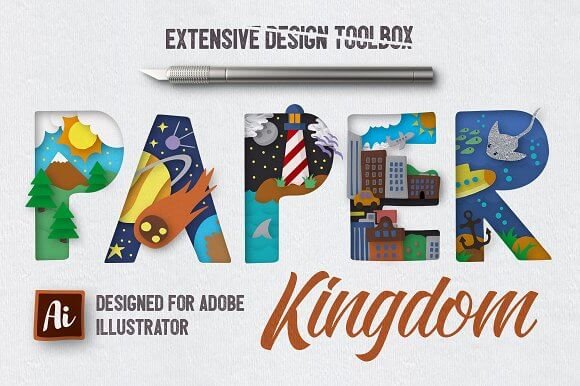
My all-time favorite place to find resources that will make my life easier is the Creative Market. Check out these premium resources for creating a super simple paper cut out effect.
For Photoshop
For Illustrator
What’s Next?
I hope you enjoy this video. If you like it subscribe to my Youtube channel. I will notify you every time I put out a new video! You can also join the PrettyWebz newsletter to get resources and freebies for your social media campaigns marketing and blog graphics sent straight to your inbox every single month. Just type in your name and email address in the form below, and you’re in!
Want to save this post for later or let someone else know about it? Pin this image!