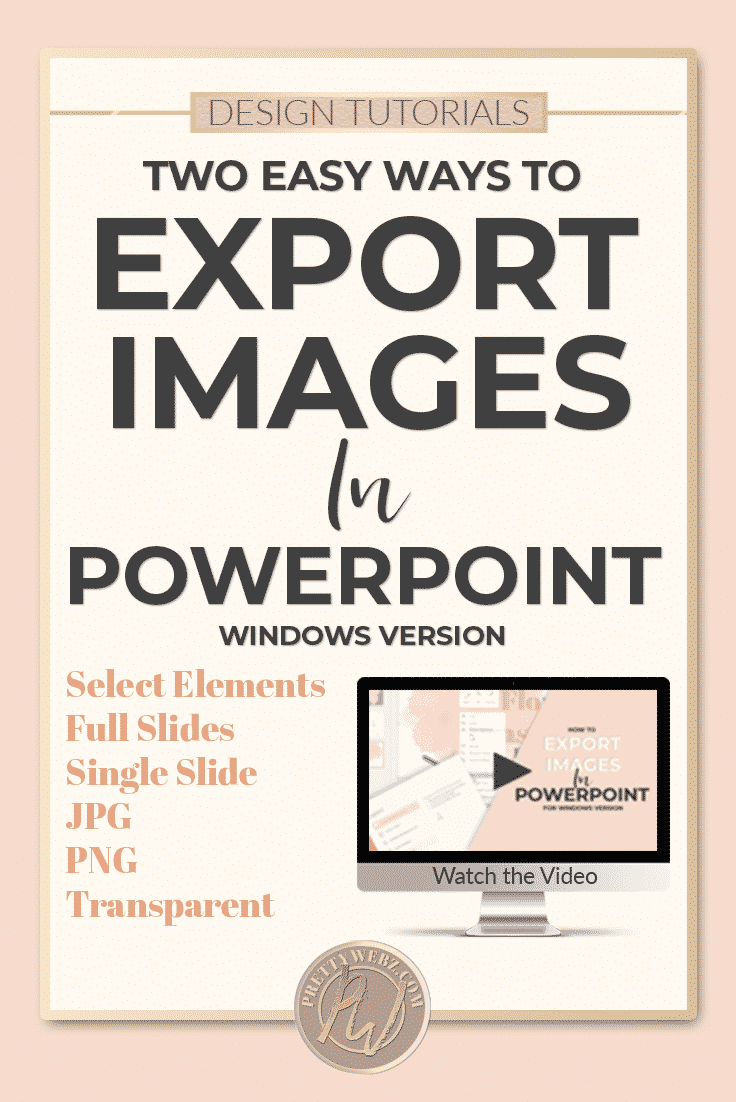
2 Easy Methods for Exporting Images in PowerPoint
Have you ever created a beautiful template or set up a great template in PowerPoint but couldn’t figure out how to export it? In this tutorial, I’ll show you how easy exporting images in powerpoint is. I’ll show you how to export entire slides and individual portions of slides to create graphics assets outside of PowerPoint. You can create transparent PNG, PNG and Jpeg files and use them in any program you want. Drop them into Canva or any other online editor or use them in word or Photoshop.
Creating Graphics in PowerPoint
If you need some ideas and tutorials for creating your own graphics inside of PowerPoint check out these posts to get you started.
- Learn how to create 3D custom paper cut out graphics in seconds
- How to create rose gold font effects
- How to add patterns and textures to text
- Learn how to use fonts to create custom frames for your images
- How to make mood boards templates
To demonstrate how to export your creations, I’ll be using our Feminine Flowers giveaway headers you can download load these free headers in the PrettyWebz shop and read a little more about using the blog headers in this post.

Exporting Images in PowerPoint Tutorial Video
•••Please Note: The following is a loose transcript of the video above, this written tutorial will help you follow the steps in the video at your own pace•••
Exporting Images in PowerPoint Method #1
Step One
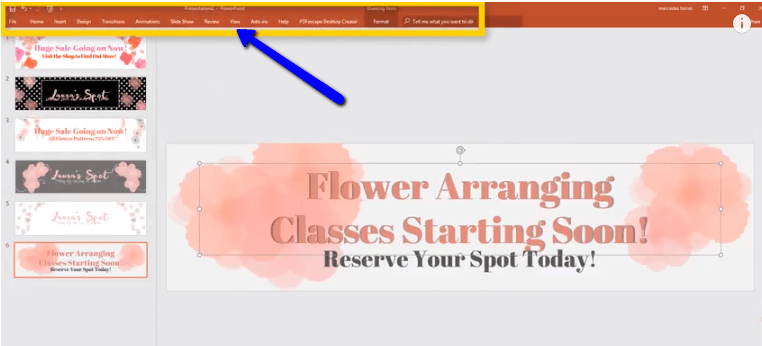
OK, so I’ve got six slides that I want to export as individual images. I’m going to use these on my blog so I’m going to come over to the top main tabs as shown in the photo.
Step Two
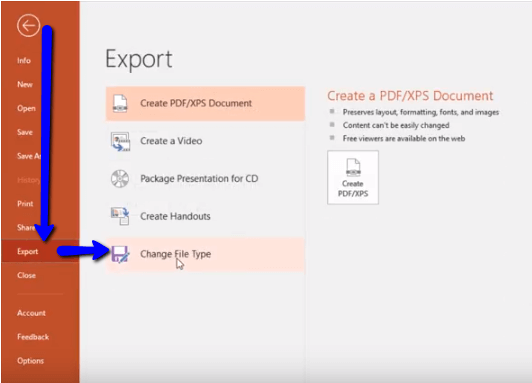
I select “file” in the file menu come down to export and I’m gonna change the file type (see image below).
Step Three
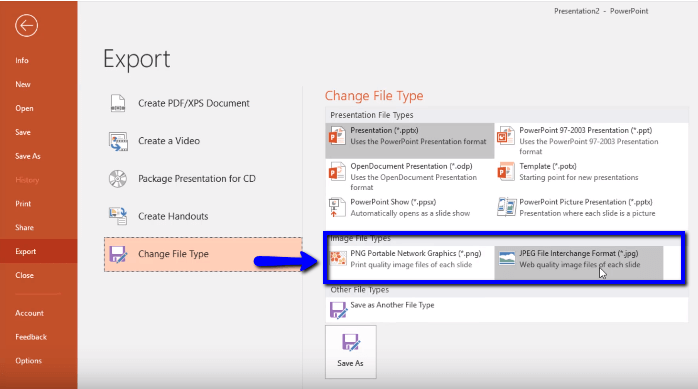
For images, we have the choice to export in PNG format or JPEG format. In our case, because a header is a large image a jpg is a better choice. A Jpg has a smaller file size and will load faster on our website so I’m going to go ahead and use that. All we have to do once we’ve selected the export format is click “save as” (see image below).
A window will pop up asking you where you want to save it. For our demo, I’m just gonna go ahead and save it to the desktop.
Step Four
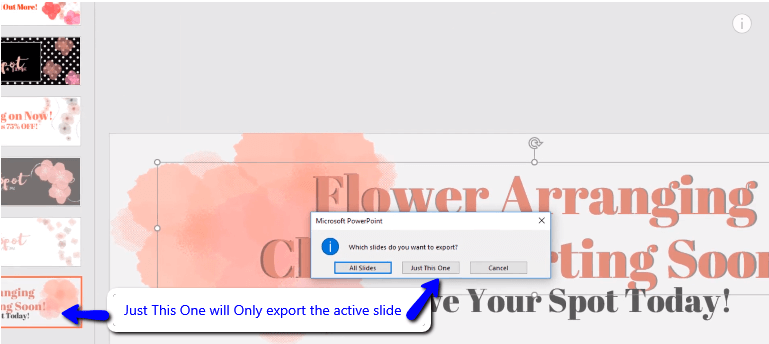
Next, you will see a pop-up window asking you which slide you want to export. When exporting images in PowerPoint you have the option to export them all at once or be selective with what you export. It can be super simple but you also have a lot of control here.
On this pop-up, you can choose all slides or just this one. If you choose to export just this one it will only export the selected slide. On the other hand, if you choose all the slides it will export every slide in the PowerPoint presentation. For our example, we will export all slides.
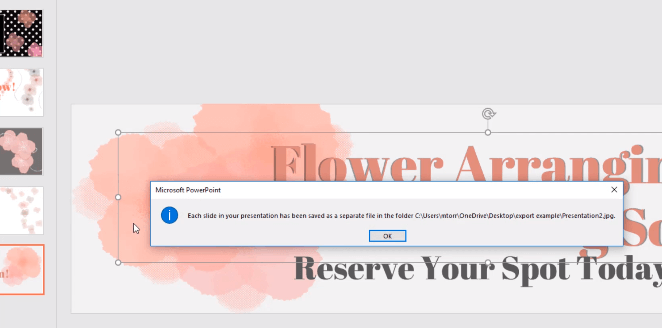
When the program is finished exporting you will receive another pop up to notify you that your files have been exported properly (see the image below for an example).
All Done (Well, Almost)
That’s all there is to it! Now all you have to do is navigate to where you saved the image files to access them. Exporting images in PowerPoint is very fast and easy once you know how to do it. However, there are other ways to export images in PowerPoint if you want full control of every element that is exported on a specific slide or simply to have more control over exporting images in PowerPoint.
Exporting Images in PowerPoint Method #2
More Control of Slide Elements
Let me give you one more example of how you can save partial images using PowerPoint. There are times when you don’t want to export an entire slide or you want to keep the transparent properties of the image. If you only want a portion of the actual slide saved as an image, this is perfect. Exporting in this way will give you a transparent PNG image. Use this method when you don’t want to export the background of a slide when you want to preserve the transparency. You can also use this to pick and choose which elements you want in your final image.
In our example, you may want to keep your background color flexible and changeable. You can do this by saving the header as transparent PNG without a background. This way when you upload it to your website the header and text will show up but the background you have chosen for your website will stay intact.
Selecting Individual Elements
In order to get just the elements on your slide and not the background, you will have to select each element that you want to keep in your image individually. You can do this by holding down the Ctrl key on your keyboard and selecting each item that will be in the final image.
Selecting All Elements
Alternatively, if you want all of the elements except the background you can rubberband select everything on the slide by holding down your left mouse button and dragging your mouse fully across the screen to capture the entire slide.
When you have all of your element selected right click on the canvas and choose to “save as a picture” your image will be saved as a transparent PNG by default.
Image Types, Quality and Size Issues
Keep in mind that this kind of flexibility with background colors also means that your image will be larger due to the PNG format. You may want to use a service that shrinks images size like TinyPNG to shrink your image size without sacrificing quality.
All images exported from PowerPoint have a default resolution or PPI of 96 pixels per inch this is more than adequate for any website or graphics used online, However, there are methods to get print quality images from PowerPoint. I may cover this in future videos but in this case and for our purposes 96 PPI is more than enough.
What’s Next?
I hope you enjoy this video and found it helpful. If you like this type of content subscribe to my Youtube channel where I share demos for products I offer in my shop along with design tips and tricks on designing for business. I will notify you every time I put out a new video!
You can also join the PrettyWebz newsletter to get resources and freebies for your social media campaigns, marketing, and blog graphics sent straight to your inbox every single month. Just type in your name and email address in the form below in the footer of this page, and you’re in!
Want to save this post for later or let someone else know about it? Pin this image!