

Bulk Image Resizer, Part of this Free Software
What is PhotoScape?
PhotoScape, a free image editing software has a bulk image resizer feature that can save you tons of time. If you create bulk social media images, product display photos or if you create blog posts by the dozens because you’re that blogger☺ you’re going to want this. In any case, you’ll wonder what you did without this software for so long.
This software has a large variety of functions and features that I’m so excited to share with you. First things first though. Let’s get the bulk image resizer feature out of the way. It’s not fun, but it’s oh so convenient when you’re working with a lot of images. You will be amazed at all the time you save and how effortless it is to use.
Working in the Bulk Image Resizer Preview Window
Please note, this editor does not replace or delete your original images. The software calls up previews of your pictures, and it creates another folder for the resized images with the settings you specify. If you delete a photo from the bulk image resizer preview window, it will not delete your pictures. Doing this will only remove the preview.
PhotoScape 3.7 vs. PhotoScape X
When I made the video for the 3.7 version, I didn’t know about PhotoScape X. Therefore, I didn’t go into any detail about the difference between the two. Unfortunately, I assumed PhotoScape X was an upgrade, but there are some differences I would like to go over with you quickly.
PhotoScape X has a Lightroom-like interface
Like I mentioned, there are two versions of PhotoScape, PhotoScape 3.7 and PhotoScape X. As far as I can tell after downloading and using PhotoScape X, I’ve learned that it is a pro version of the software. It has a user interface that is more similar to Lightroom. Therefore, if you’re familiar with Lightroom and you like that interface, this might be a better option for you.
PhotoScape v3.7 decorative elements
If you like using fun stickers and appreciate a bigger selection of decorative items, then stick with PhotoScape 3.7. In PhotoScape X most of the stickers and decorative elements are only available in the paid version of the program.
PhotoScape Pro (inside of the X version) for Photographers
PhotoScape Pro is not an expensive program by any means. The program upgrades cost around $30 to purchase. By the way, this is not recurring. The price is a one-time cost which is a phenomenal price as compared to programs like Adobe Lightroom. In spite of the value, the upgrade is not necessary unless you’re a professional photographer and will be using a lot of advanced options.
On a side note, if you are a Photographer or do a lot of photo prep work for graphic design. The program does have options for optimizing GPU vs. CPU usage that might be helpful. This option is available in the free version.
<<<<<To view the video demo for this post scroll all the way to the bottom of the page. >>>>>
Bulk editing (prep work for images) in PhotoScape v3.7
Step-By-Step Instructions
Downloading the software:
Download link:
http://www.photoscape.org/ps/main/download.php this is the original link for an earlier version of the software (v3.4) from the PhotoScape website which will lead you here:
https://www.filehorse.com/download-photoscape/ where you can download the latest version of the software.
I know I’m giving you extra steps, but I’m always wary of downloading software from the internet. For this reason, I wanted you to know that this Filehorse link is a redirect from the PhotoScape website and not just some random site. Of course, you should scan the file with your anti-virus before installing but I installed it, and all is well on my end.
Directions for Using the Batch Image Resizer in Photoscape v3.7
For this post, I’m going to focus on v3.7 because I feel that it has better options for social media and blog posts whereas Photoscape X is a better option for Photography.
Batch Image Resizer
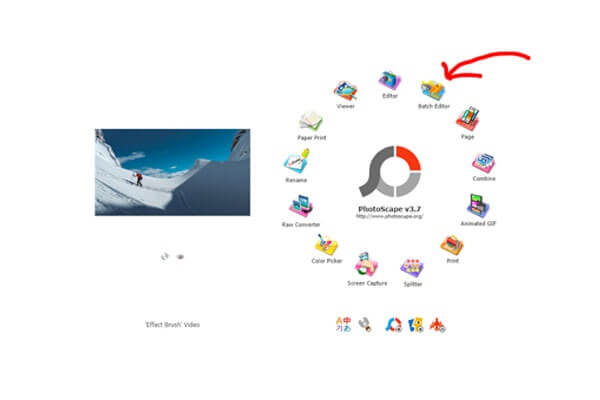
Open PhotoScape you will see a circular menu, towards the top click on the “Batch Editor” icon.
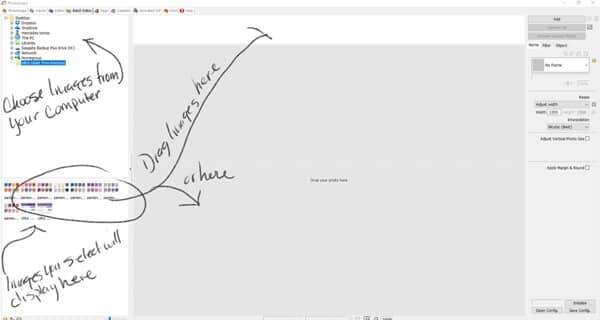
In your photo folder, highlight all your images and drag and drop them into your PhotoScape window.
Bulk Resizing
- On the right side panel on the “Home” tab, select the “Adjust width” drop-down menu to choose the size options you would like to use.
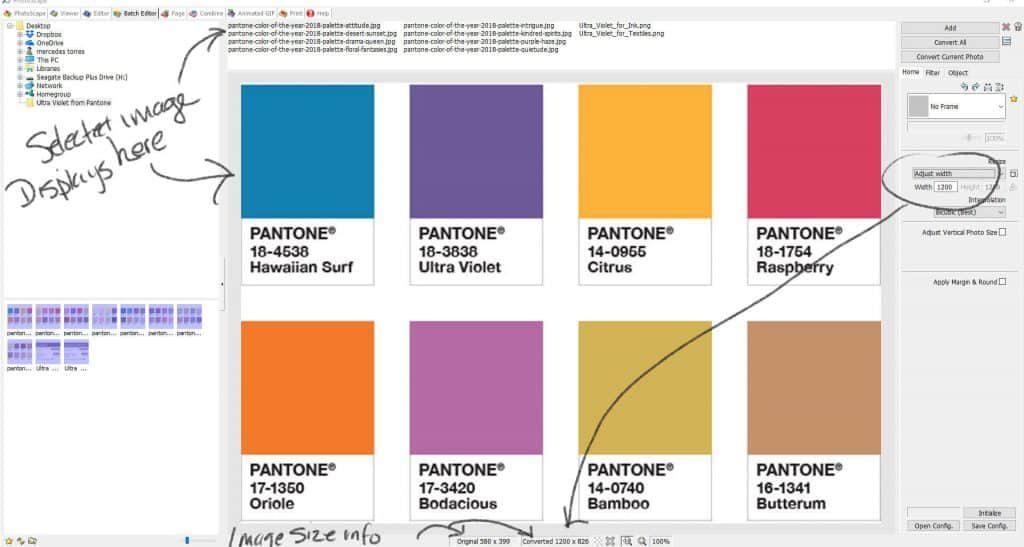
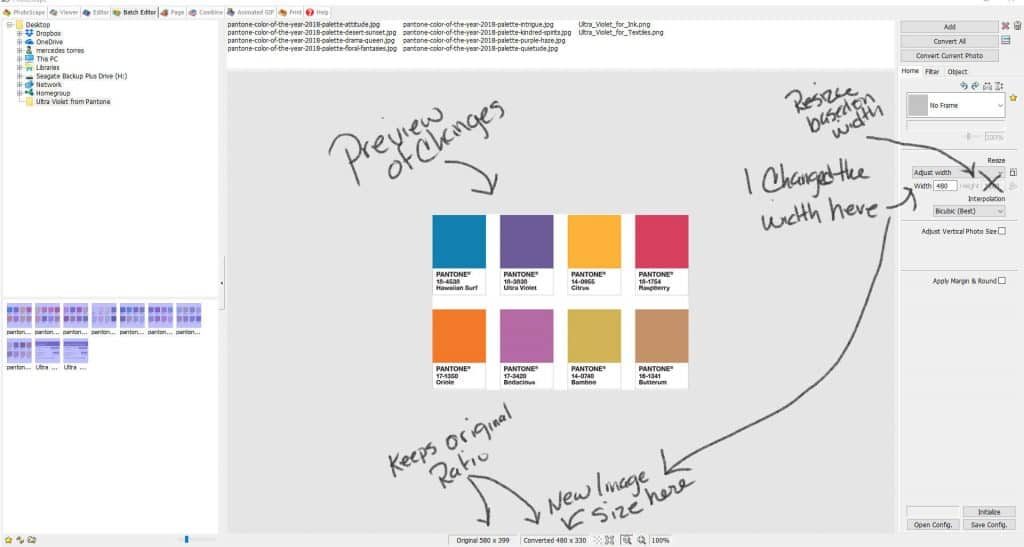
- You can type the custom width or a custom height, and the photo will be resized based on its original aspect ratio.
- There are several options for resizing, including crop and stretch, play around with these settings until you get the look you want.
- Select each image one by one to preview the changes before they are applied. If you choose a standard width or standard height all photos in the editor will be reduced or enlarged to that size depending on the original size.
- From the right side panel select “Convert All” a dialog box will appear
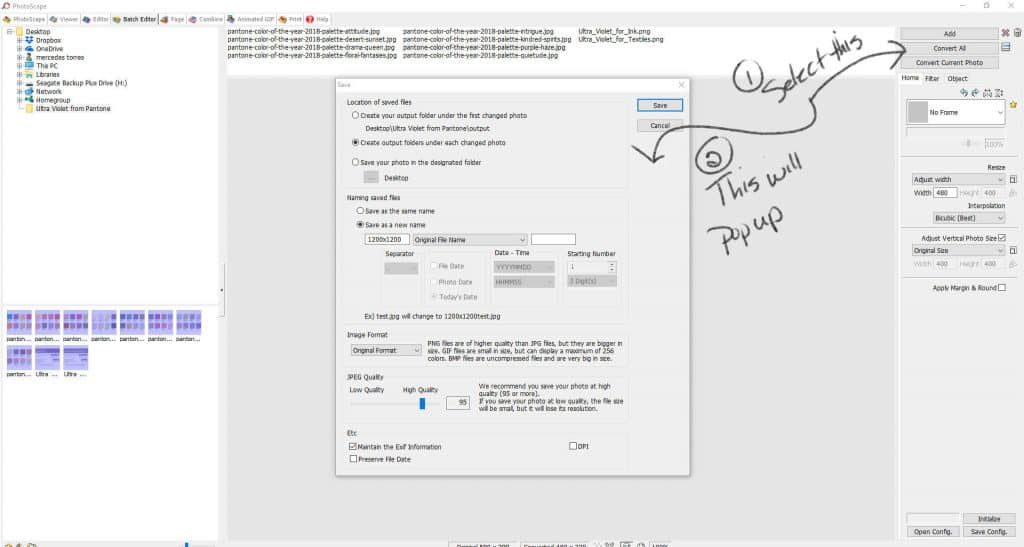
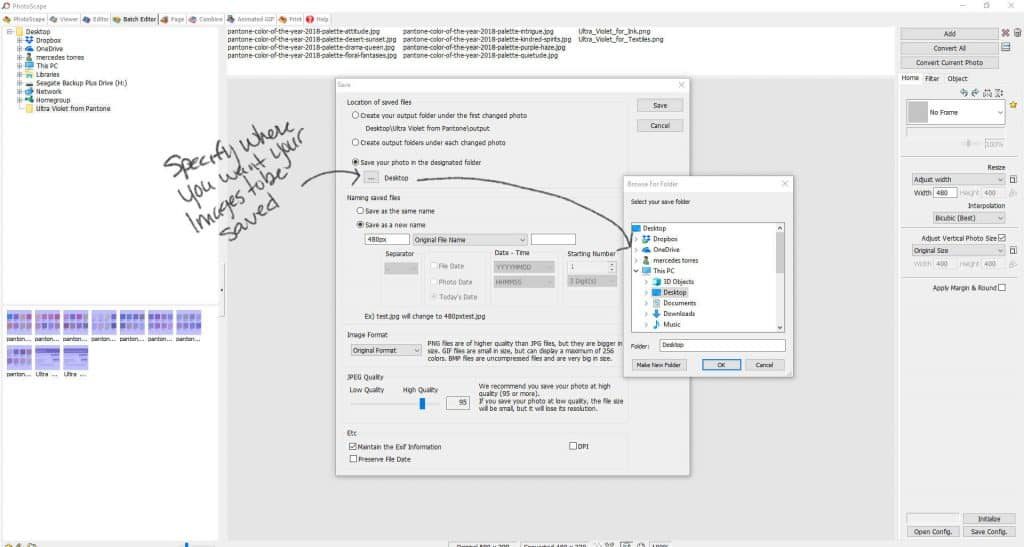
- Specify where you want to save the file on your computer.
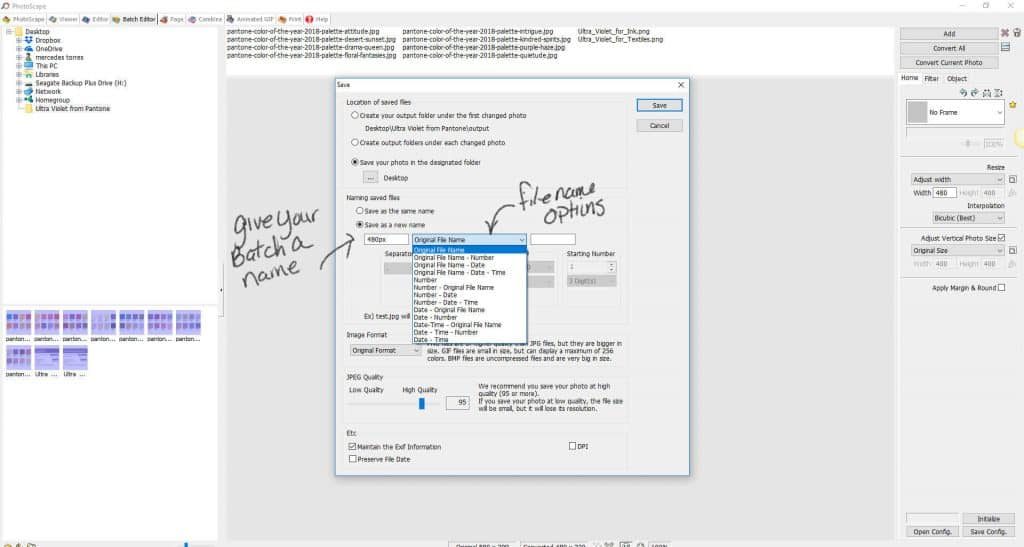
- Specify a name for the batch, I usually use the new file size and the original name, but there are several options for naming your batch.
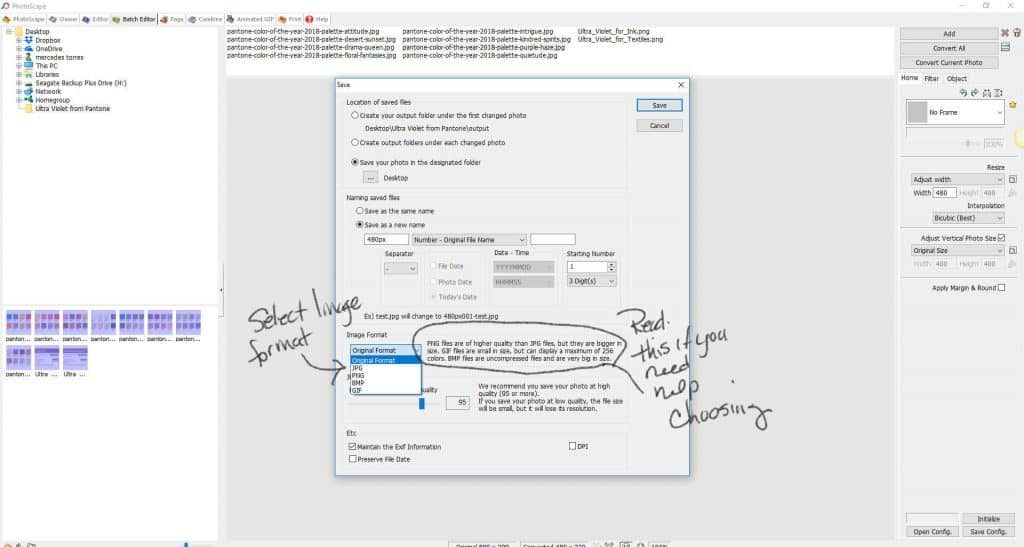
- Choose your file format type, i.e., PNG, JPG If you don’t know what file type you need there is a short paragraph next to the file choices to guide you. The file you choose will depend on the purpose of your images. For example, use PNG if your photos have text and fine lines. For ads or blog feature images, you may need higher quality photos. That way you don’t lose the detail. If these are images for social media or pictures that don’t require a lot of detail, JPG is fine
- Hit save at the top of the screen. Important: The bulk image resizer feature will not alter your original images only create new files with the dimensions you’ve specified.
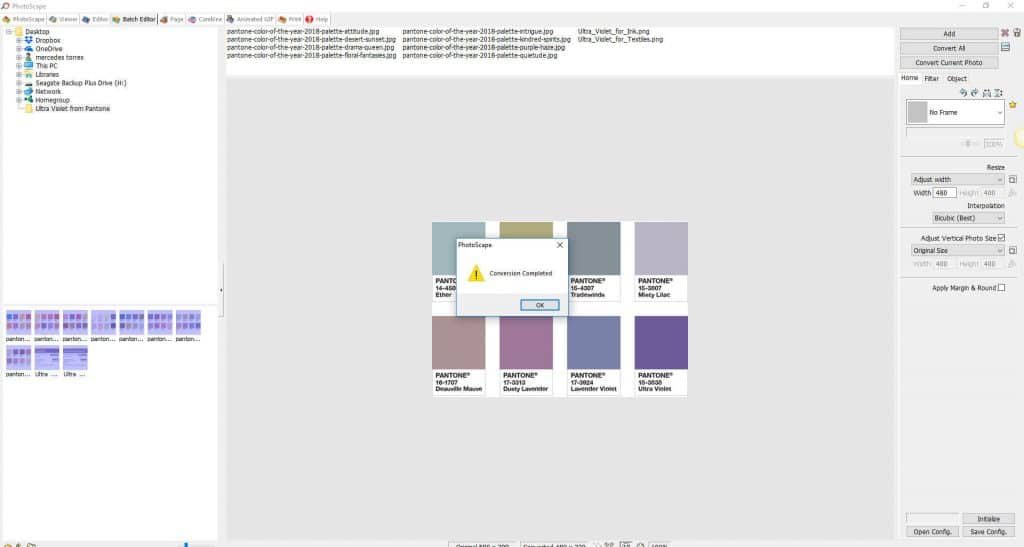
- When the photos have processed, a new pop up window will come up. This pop up lets you know the program completed the job. The new resized files will be in the folder you specified. This process will take just a second or two to complete once you hit save!
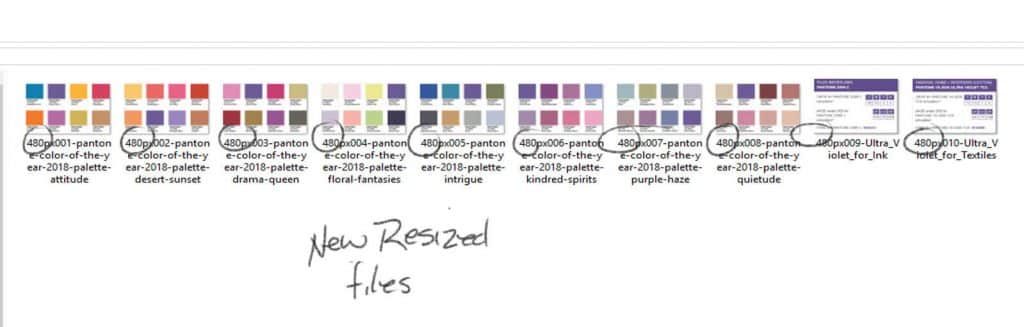
Here’s a screenshot of the folder created by the bulk image resizer feature in PhotoScape. This screenshot shows the new specified sizes and names for each image.
What’s Next?
For more tips and tricks for creating blog graphics, social media graphics and more without Photoshop, I have a few options for you. Learn how I use PowerPoint as an image editor and more resources on image editing in my video libraries:
Web Graphics – Creating and using website and blog graphics
Mockups – How to use mockup kits for more faster designing.
Graphic’s for Business Owners & Bloggers – Just like the name implies, general tips and tricks for online business owners and bloggers.
If you would like to receive exclusive PrettyWebz family discounts sign up for the mailing list!
Not only will you get discounts but, you will also get a monthly roundup of free graphics and resources. All of this with direct links to everything.
You don’t have to go through the hassle of inputting your information again. Just click and download! Making life easier is how we take care of our family!
