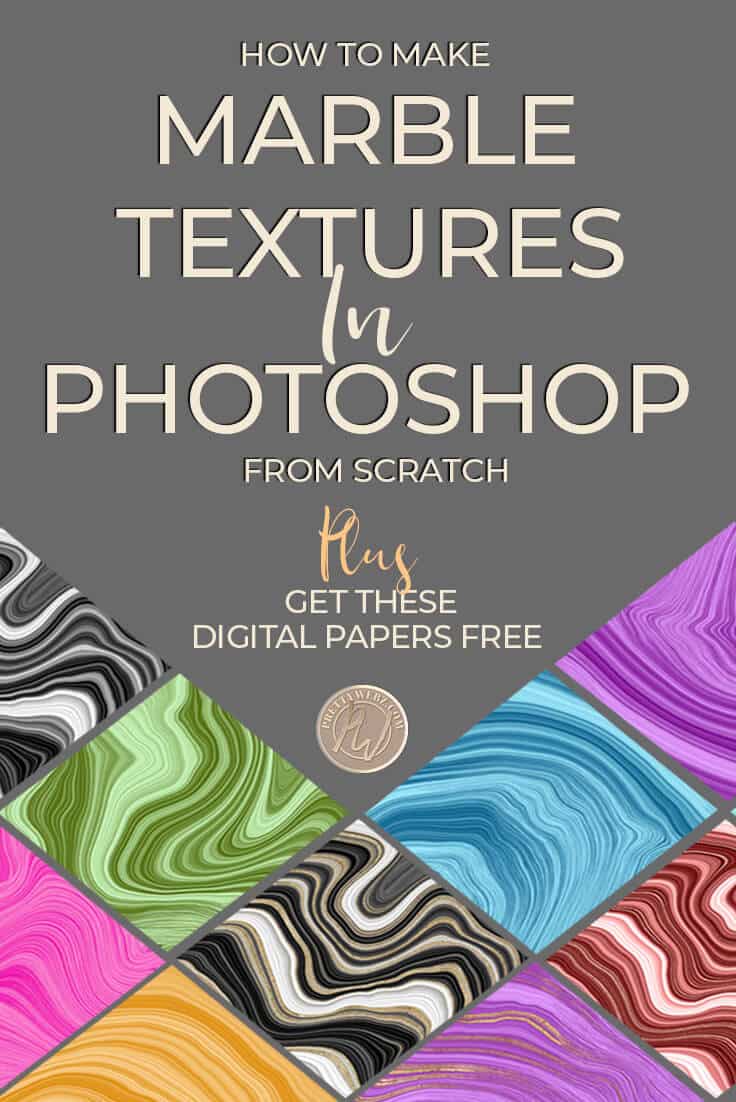
How to Make Easy Agate Photoshop Textures
How to Create Easy Agate Photoshop Textures
Agate stone Photoshop textures are dramatic and colorful abstract pattern known for their bold jewel tones. These bright and vibrant colors will command attention.
You can use Agate in many different design applications. This lovely and bright texture is striking in everything from website design to worksheets, social media posts.
These Photoshop textures are beautiful as an accent piece as well as a big bold, dramatic centerpiece in printed designs such as a poster and so much more.
The design is so abstract you can easily incorporate it into a multitude of different subjects.
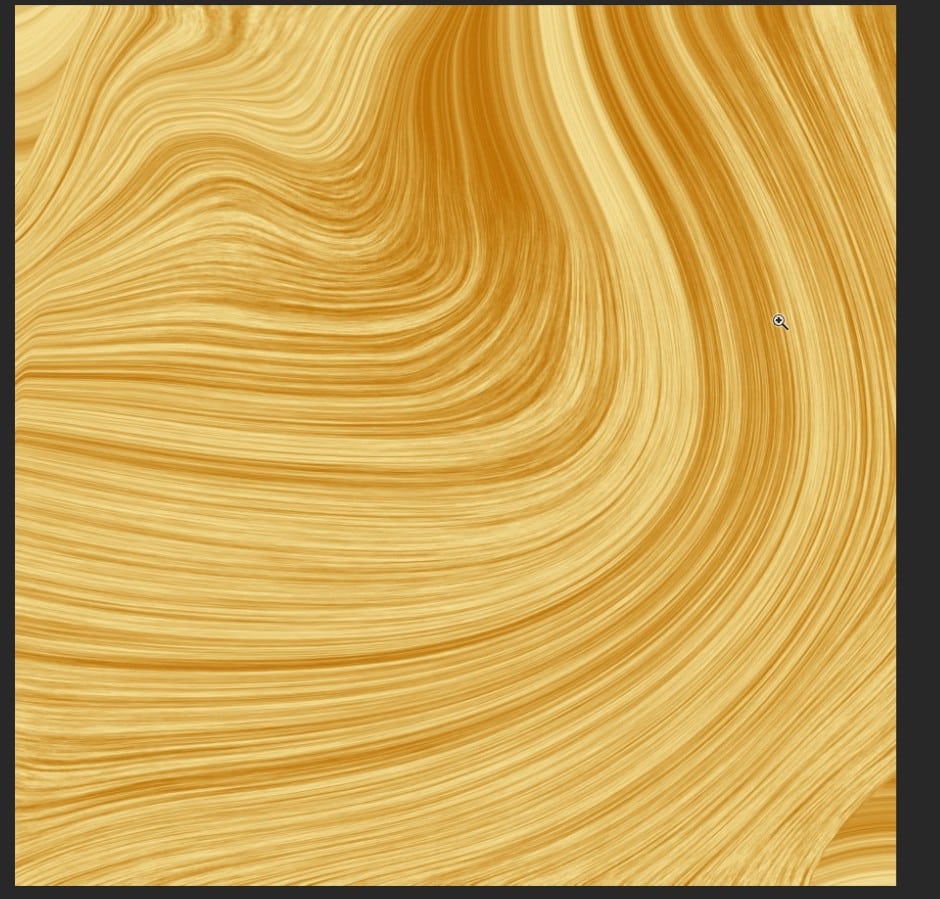
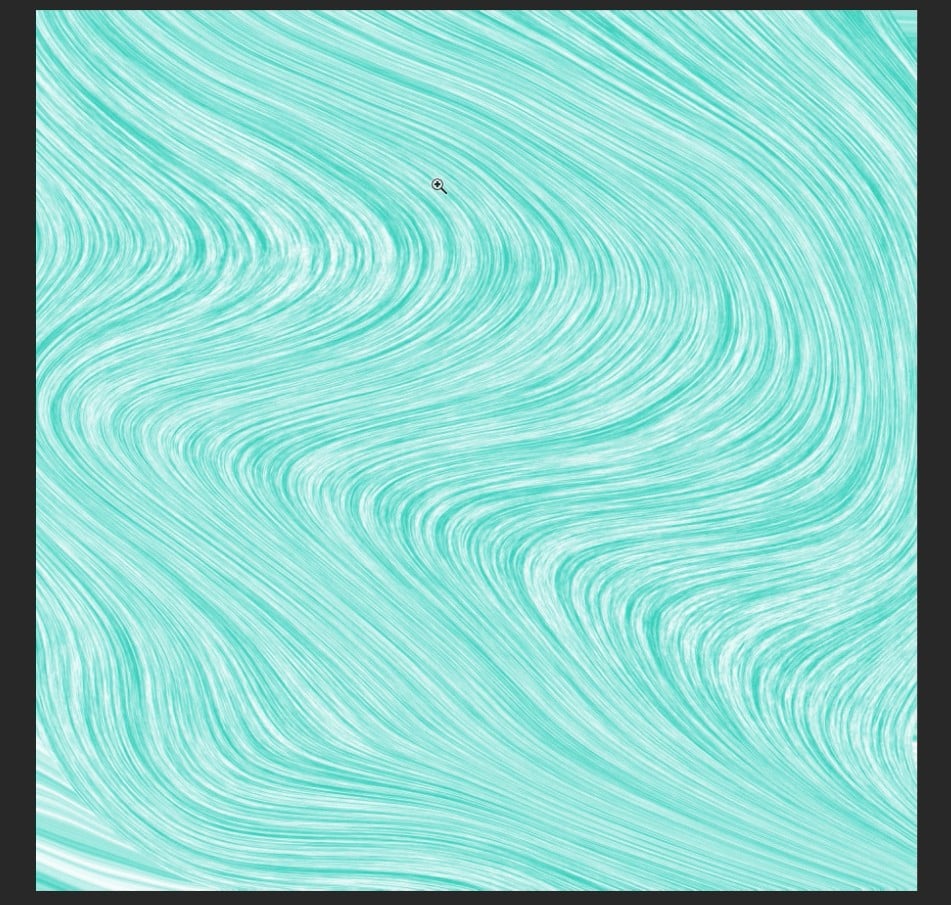
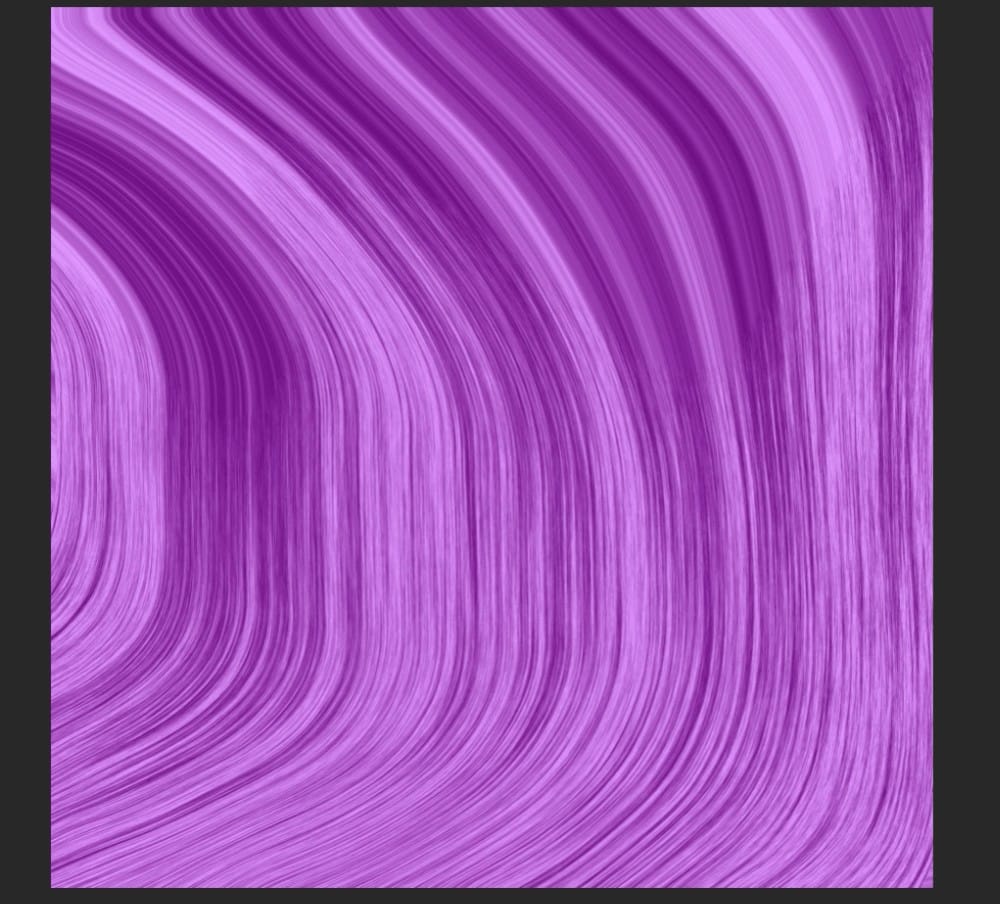
Agate Photoshop textures are also super easy to recreate in just a few steps. This flexibility is why I love these abstract Photoshop textures so much. Ease of design and flexibility are the main reasons why I’m excited to share this tutorial with you.
Agate is one of those textures that you’ll want to keep in your arsenal to create and use for a variety of different applications. You can also create these textures with your brand colors or custom design colors.
Download This Photoshop Texture Free
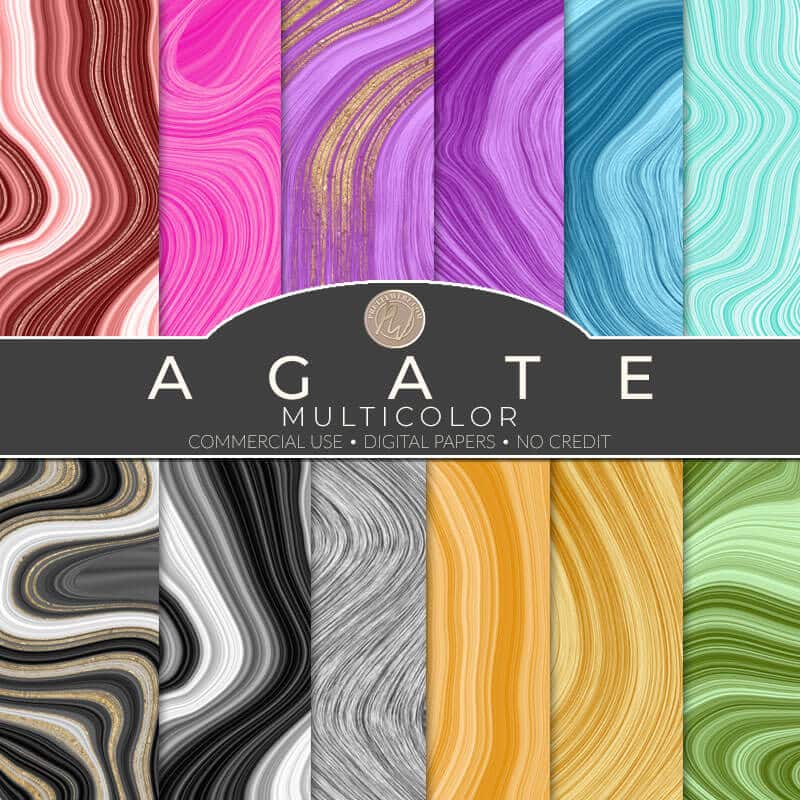 Additionally, if you would like to download the Photoshop textures, I used as examples in the tutorial video. I showed about eight different texture styles and also added four more with more shimmer and thicker lines for an even more significant dramatic effect.
The digital paper pack has a total of 12 agate textures. I’m confident you will love the styles and multiple colors offered in this pack. Still, I would like for you to watch the video and learn how to create this on your own. You can download the Agate textures here in the PrettyWebz shop for free.
These are 3600 X 3600 72 PPI. Remember, I created these agate textures for digital use. Therefore it is not recommended that you use these for printing projects.
Other Free Digital Paper Downloads
You can also download two additional texture sets in the PrettyWebz shop. I created these as part one and two of this series on Photoshop textures so far.
In part one, we have the gold textures which includes three silver, three gold and, three rose gold texture digital paper packs.
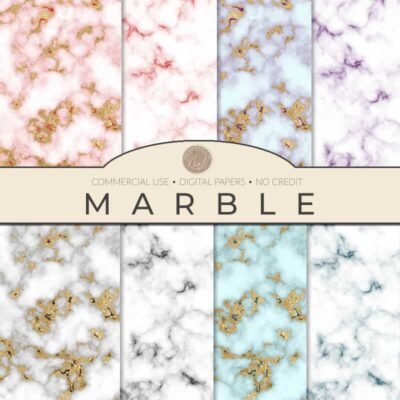
In part two, we have the marble texture I created in last weeks video tutorial. This set includes a collection of eight marble textures. Some of these images come with encrusted gold, and others are colored marble. All of them are stunning.
All of these packs are available for free in the PrettyWebz shop. You can learn how to make all of these Photoshop textures on your own by following the video tutorials that are accompanying the blog post. You will, however, need a copy of Photoshop in order to re-create these digital papers.

Come back next week for a complete tutorial on how to create a satin effect pattern from scratch inside of Photoshop. This satin pattern is perfect for a romantic wedding, love, Mother’s day, Valentine’s Day and so much more.
Use them in blog posts, promotions, and social media posts or anywhere else you like. The satin texture tutorial will be the final in this series Photoshop digital paper tutorials.
Agate Photoshop Textures Tutorial
This tutorial will walk you through how to create an agate texture in Photoshop from scratch. This is an easy to follow step by step tutorial that focuses on the liquify tool inside of Photoshop to create this liquid marble or agate effect.
Optional Steps for Making the Agate Photoshop Texture
Please note that some of the steps in the following tutorial we’re not in the video. I didn’t want to make the video too long. I intend to give you a baseline on recreating this design to make it more approachable for a non-designer or someone who does not use Photoshop on a regular basis.
If you want to learn how to create higher definition in your Agate Photoshop textures using the hi-pass filter, you can read that in step six of this written version of this tutorial. However, if you would like to achieve a softer feel, this step is not necessary.
Step One
Open up a new document with the following settings:
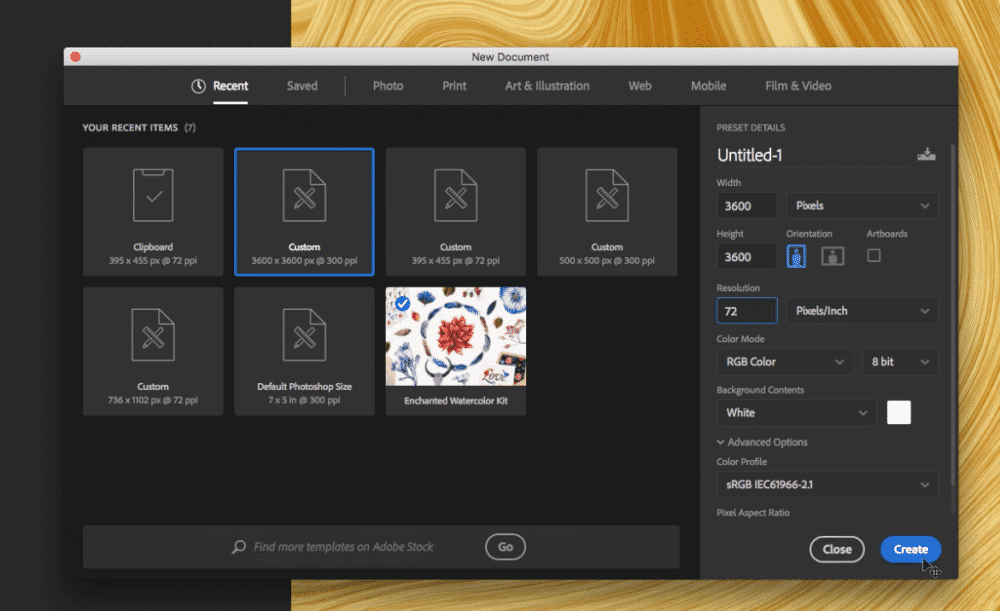
Size
Width 3600 pixels by height 3600 pixels.
Resolution
For this tutorial, set your resolution to 72 for a digital.
For print set the resolution to 300 pixels per inch resolution.
Color Mode
For this tutorial, we will be working in RGB color mode for digital output.
If you are printing your work set the color mode to CMYK.
Click create.
Step Two
Set your document foreground and background color.
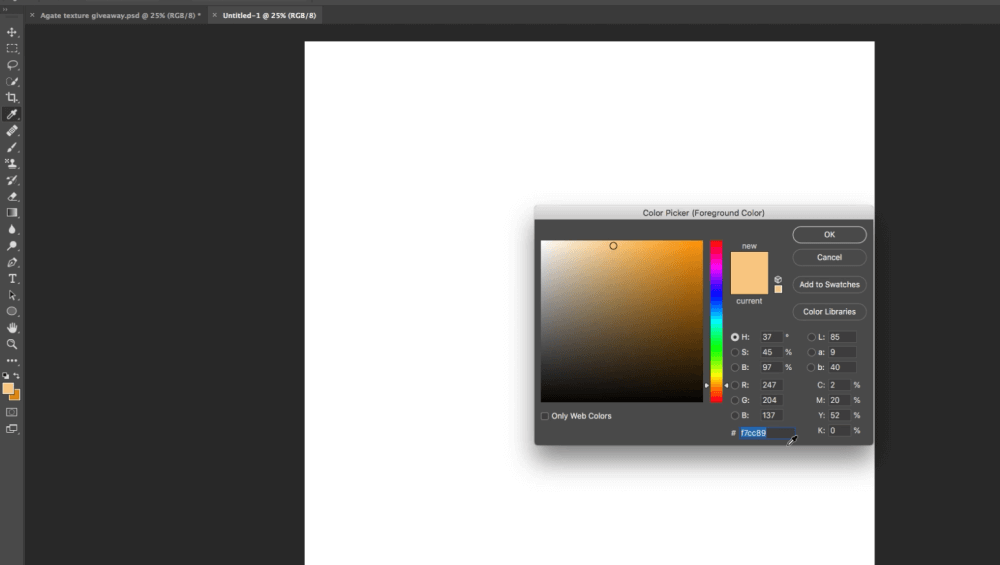 Foreground Color
Click on the document foreground color. A color picker pop-up menu will appear. You can add your hex code if you’re using brand colors or specific design colors. Otherwise, choose your desired color and click OK.
Background Color
Click on the document background color. A color picker pop-up menu will appear. Select the background color from your branding or design colors using the hex code. Otherwise choose your desired color here.
Step Three
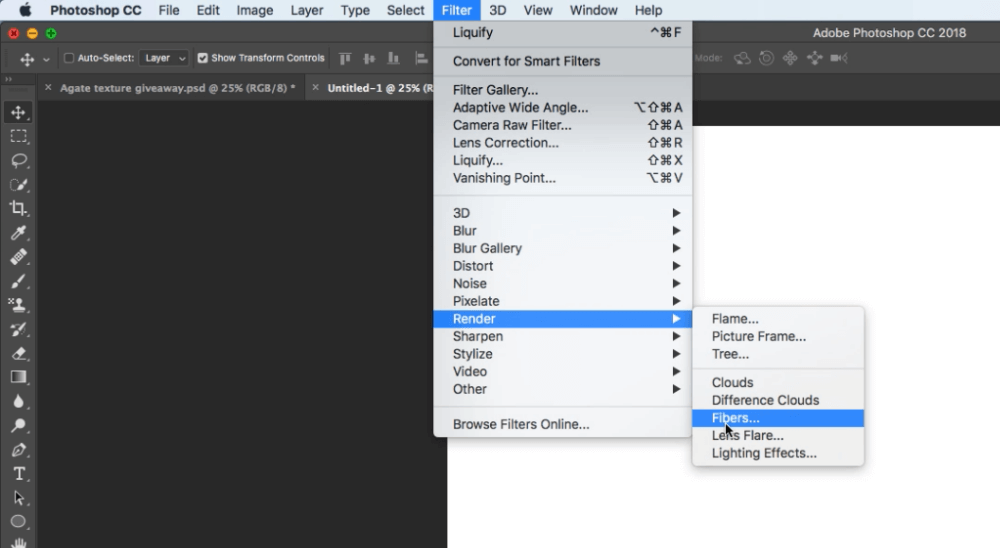 Here we will add a fibers filter. Select <<<filter>>> at the very top menu. Go down to <<<render>>> and then down to <<<fibers>>>
A small window will appear with a preview of your image. You can use this preview window to adjust the variance and strength of your fibers.
For this design, I set both variance and strength to ten.
Click OK
At this point, your canvas is filled with along the stringy colored fibers.
Step Four
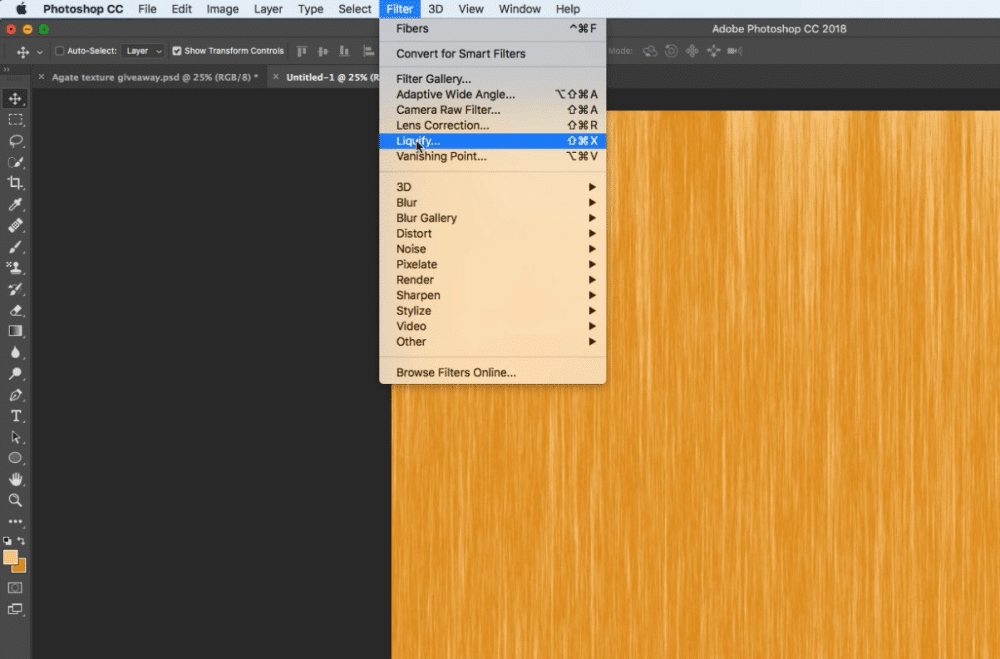 If you’re happy with the color mix of your fiber layer we can add another filter. Go back up to the very top menu select <<<filter>>> and then <<<liquify>>>
Another pop-up window will appear with a preview of your image. Reduce the size of the view to get the entire image inside of the view and to leave a good amount of space around the design for your brush.
Liquify Window Settings
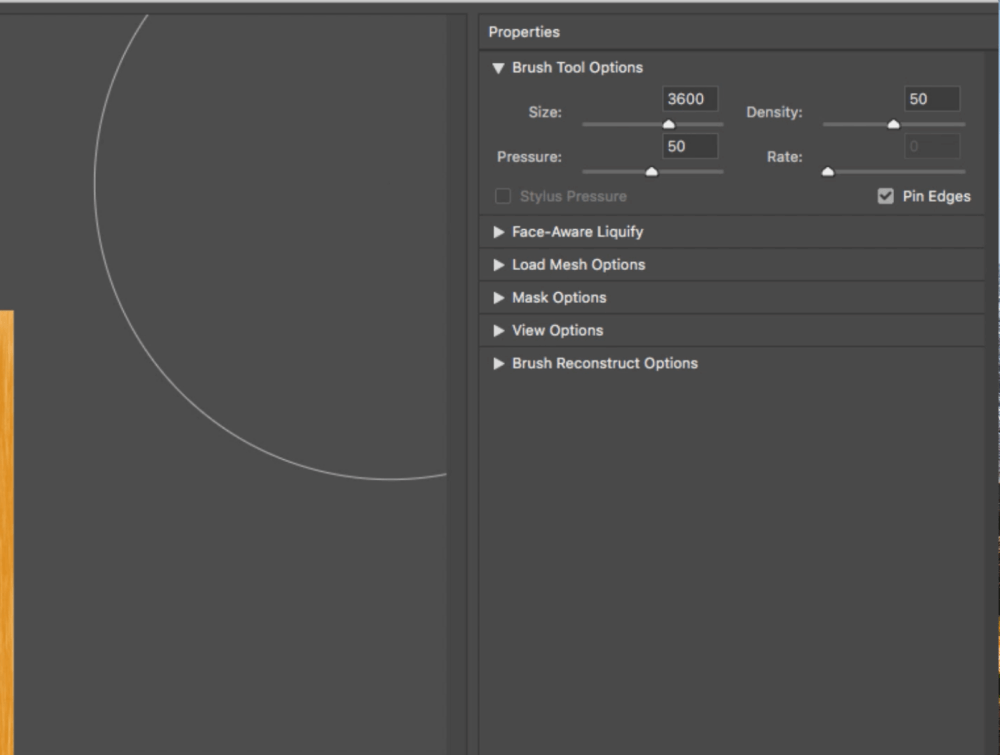 In this window, we’ll adjust the size of the brush to be 3600, the same size as your canvas.
Set <<<Pressure>>> to 50 percent
Adjust <<<Density>>> to 50 percent
Important: Make sure that the <<<pin edges>>> option is checked.
Molding the Design
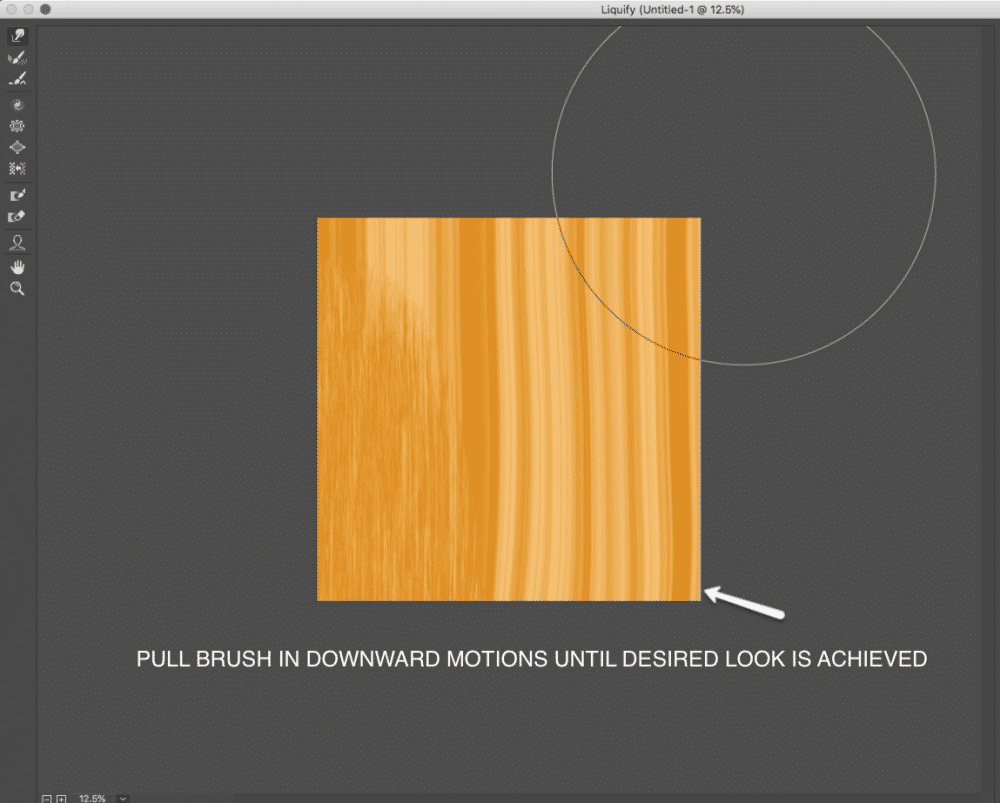 Take your brush to the top of the canvas and drag it all the way across to the bottom of the design to create thicker more distinct lines. Leave fibers as is if you would like thinner lines. Once you’re happy with the thickness of the lines hold down the left mouse button and begin dragging the top and bottom edges of the design to one side to create a curved effect.
Now you can begin to push out some of the fibers to create movement and variety in the strokes. Work with the shape of the lines until you have something that resembles Agate.
If you begin to see the image getting fuzzy in certain spots bring other parts of the image together in that area. This will help remove the fuzziness that can happen when “molding” your shape. When you’re happy with the design you’ve created, click OK.
Advanced Optional Effects
These basic Photoshop textures tutorials are meant to be easy to follow for beginners and for people who do not use Photoshop on a regular basis.
I did not add these additional steps (step five and six below) to refine your design because they are not necessary. However, they will enhance your texture by adding higher definition and interest to your design.
Step Five – Finer Detail (Optional)
To bring out some of the definition in the agate design you can take the following steps.
Duplicate the layer by right-clicking on the layer and selecting <<<Duplicate Layer>>>
With the top (new layer) selected we will be adding one more filter. Go up to <<<Filter>>> on the top menu, then down to <<<Other>>> and choose <<< High Pass>>>
The High Pass filter will create a texture map of your image that will bring out the fine detail in your design. Depending on how much detail you want, choose a radius.
For the design created in the video, I chose 50 pixels. Click OK.
You will see a grayed out version of your image.
Next, we want to change the mode of this High Pass layer.
In the layers panel, change the setting in the drop-down menu from “Normal” which is the default to Soft light. Your original design will show through the High Pass layer. You can turn the eyeball icon off and on to see the difference by clicking on it. If you would like a more dramatic detail effect change the setting to linear light.
When you’re happy with the effect, select both layers by holding down the shift key on your keyboard and clicking on both layers. Now hold down the Ctrl or command button on your keyboard and the letter “E” to merge the layers.
Optional Step Six – Adding Secondary Textures
To add secondary textures click on <<<Select>>> in the top menu bar, then <<<color range>>>
The color range preview window will pop up. Sample colors from the design preview, choosing one of the darkest colors. Click OK.
This will create a selection, at this point, you should see marching ants on your design.
From here click on the <<<create a new layer>>> button at the bottom of the layers panel or from the top menu select <<<Layer>>> then <<<New >>> then <<<Layer>>>
With the new layer selected, press and hold the command/Delete or Ctrl/backspace to fill the layer with color. Command D or Ctrl D to clear the selection.
Import a new texture
Click <<<File>>> then <<<Place inbedded>>> choose the image you want to use click <<<Place>>>
The new texture layer should be right above the secondary texture layer you just created.
Press and hold the option or Alt key on your keyboard and hover your mouse over the secondary texture layer. When you see the down-facing arrow click once on your mouse to create a clipping mask.
Optional Step Three – Changing Colors
Color is defined before you even begin to design but you might change your mind and want to change the color after the fact. Use these steps to make color changes easy.
In the toolbar at the top of the screen choose <<<Layer>>> then <<<New Adjustment Layer>>> then <<<Hue/Saturation>>>
A new layer will be added to your layers panel, drag this layer to the top if it’s not already there.
Double click on the layer (not the white square) to open the hue & saturation properties. From here you can use the sliders to find the perfect color for your design.
Exporting Your Image
To export your texture as an image to use as digital paper take the following steps.
Select <<<File>>> then <<<Export>>> then <<<Save for Web>>> and follow the instructions for saving the file.
Last Weeks Tutorial
I hope you found this tutorial helpful and that it will be of good use to you in creating your design assets. If you liked this tutorial you will definitely love the other videos in the Photoshop textures series.
The first on making gold textures from scratch inside of Photoshop. This tutorial includes three different gold textures, how to create rose gold and silver plus a range of metallic colors as well.
The second video on making Marble textures is a must watch. I demonstrate how to make the beautiful marble texture and how to change colors and add encrusted gold elements as well. You don’t want to miss this one.
Next Weeks Tutorial
This series will continue next week with the last tutorial in this Photoshop textures series. I will be featuring a video on how to create a silky satin texture in Photoshop from scratch.
This beautiful and romantic look is stunning as a backdrop or as an accent texture for designing a wedding, love, Valentine’s Day, Mother’s day and many more themed design assets.
If you like the Agate textures we created in this tutorial don’t forget to download the free textures I’m giving away here in the shop as well as the gold textures and marble texture from my previous tutorials.
You can also check out full playlists for designing in Photoshop, PowerPoint, online editors, PhotoScape and more on my Youtube Channel so definitely check that out as well.
Join the PrettyWebz Family
Join our email list to receive notifications of everything that’s happening here on PrettyWebz from tutorial videos to freebies. You will have access to everything because I’ll send you direct links to everything in my monthly newsletter! Plus get extras that I don’t share anywhere else. Just add your name and email address to the form in the footer, and you’re good.
Did you like this post I want to save it for later? Pin this image!