Use Photoshop Filters & Gradients to make Silk and Satin
Photoshop Filters and Gradients for Beginners

I created this photoshop filters and gradients tutorial specifically for people who are not designers to learn about the more advanced options of using Photoshop. I feel that Photoshop filters, in particular, are very valuable to learn for creating dynamic, one of a kind textures and patterns for marketing projects.
I also realize that some Photoshop filters and even the use of more advanced gradient tools can be frustrating to a beginner. In this tutorial, I’ve done my best to recreate a texture that is difficult to control and make it easy. The silk and satin effect can become frustrating even for advanced users due to the lack of control of gradients. In this video, we’ll be changing it up a bit to put more control into the design for you.
How to Make Silk Background Effects with Photoshop Filters and Gradients
A lot of people love the feminine and romantic look of silky satin but don’t want to spend hours trying to get the perfect layout of gradients to make it happen. To create this look and not waste a ton of time I’ve changed the usual process of creating this silky satin texture using the liquify filter. The liquify tool is one of the most versatile of all the primary photoshop filters.
This filter will give you much more control over how your silk drapes or falls on the canvas. So much so that you can create this style with much more control. The draped satin texture I created in the free Digital textures pack that accompanies this blog post is a perfect example.
Molding Shapes with Photoshop Filters
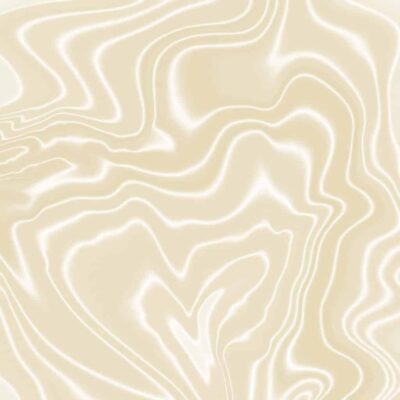
The Silk texture pack comes with a heart-shaped digital paper that was managed into that shape with the liquify tool. The heart shape makes it perfect for anything from honeymoon marketing, romantic getaways, dating and marriage blog posts, and website. This beautiful satin texture can even work for a Mother’s Day theme.
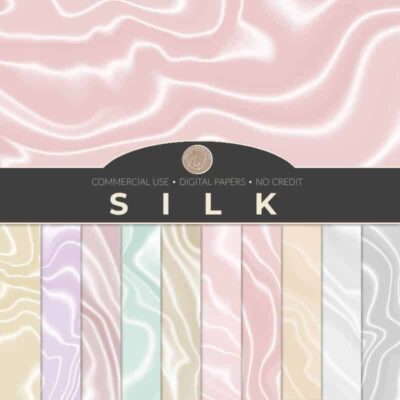
Download this Digital Paper Pack
Silk and satin are luxurious and romantic textures that look great with love and romance such as Valentine’s Day, anniversaries and more. If you would like to download this set, you can get them in the PrettyWebz shop free!
Why this Tutorial has Been so Unpopular for Youtube Creators
In a nutshell, it’s unpredictable. If you’ve ever seen a silk Photoshop tutorial or tried to re-create this using the gradient tool alone, which is how it’s typically done, you get it. You know how frustrating it is to get the perfect layout for your gradients to make it look like silk without creating hard or crispy edges.
If you’re going for a just unfolded crisp from the package look, then the tutorial I’m going to walk you through is not for you. You want to spend a whole lot of time getting the perfect layout for your silk design. This tutorial is not for you. I urge you to watch the other tutorials for that.
Don’t get me wrong, the process of re-creating this look is not complicated. In fact, re-creating a silky texture by following simple instructions will take a matter of seconds. However, if you are a perfectionist and want things just so, re-creating a silk pattern will prove to be frustrating at best and very time-consuming.
No one wants to end up in a frustrating time suck. It’s not worth it, right? This time investment is probably why you don’t see this texture featured in tutorials all that often.
Why this Tutorial is Different
This silk satin tutorial is better than other tutorials you might find because it gives you much more control over your design. That means you spend less time messing with gradients and you can achieve much more customized designs.
I have been using Photoshop for over 20 years, so I know if a thing or two about the program. Still, re-creating the look of silk inside of Photoshop has always been difficult and time-consuming for even me.
More Posts on this Topic
Transparent Overlays 
Crushed Foil Texture 
Wood Textures in Photoshop
Spend Time Designing not Feeling Frustrated
With this Silk Photoshop texture, I wanted to re-create something that was not only beautiful but also very easy to do. Granted, this specific texture will take some time. Don’t worry though. It’s not time suck status. The design process requires you to make a lot of manual adjustments to the layers.
However, you get tons of control. Having control means the time goes into molding your perfect layout and not trying to get the design to work. Once you have something that you love you can change it up and customize it. Change colors, add patterns, form shapes and do so many different things to it to bring it to life and create multiple assets for your design arsenal.
If you want an easy to manipulate method for creating silk and satin textures from scratch inside of Photoshop, then this tutorial is for you. Get more control over your design without needing tons of Photoshop experience.
So I won’t make you read any more about it. Let’s get to work on making it!
Watch the Video
Step by Step Written Instructions
Step One
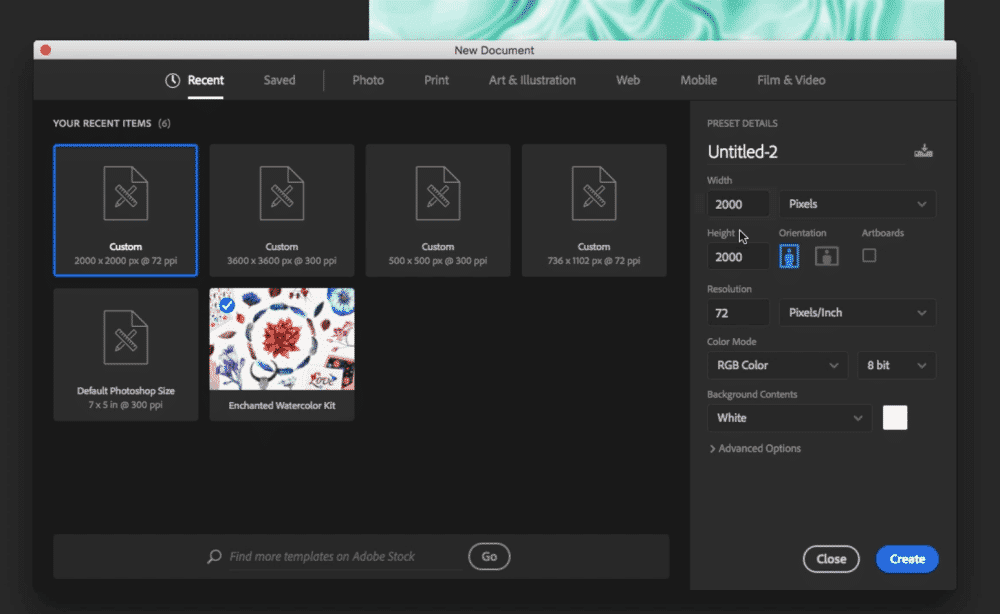
New document settings:
- 2000 x 2000 Height and Width
- 72 PPI resolution
- RGB Mode
- White Background
- Click <<<Create>>>
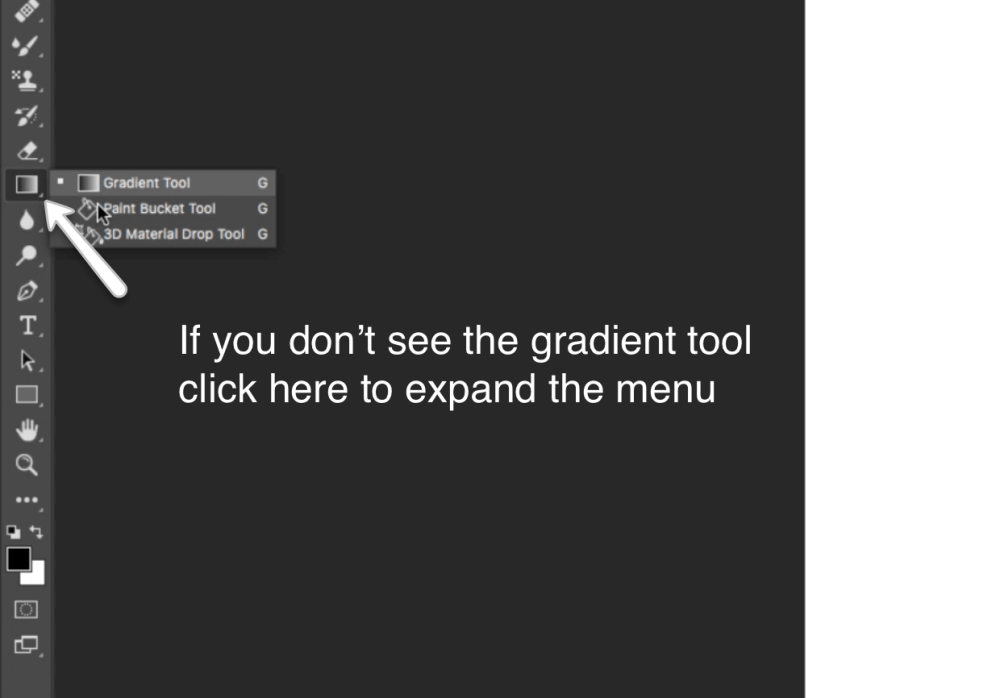
Step Two
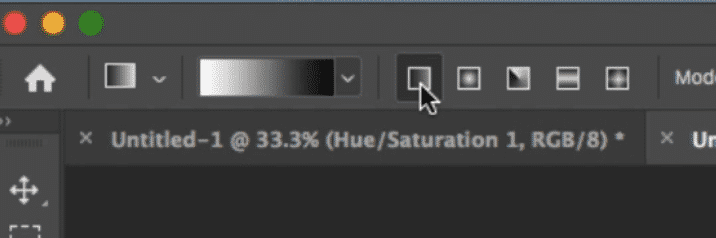
Select the gradient tool on the left panel
Gradient tool with normal diagonal across the screen
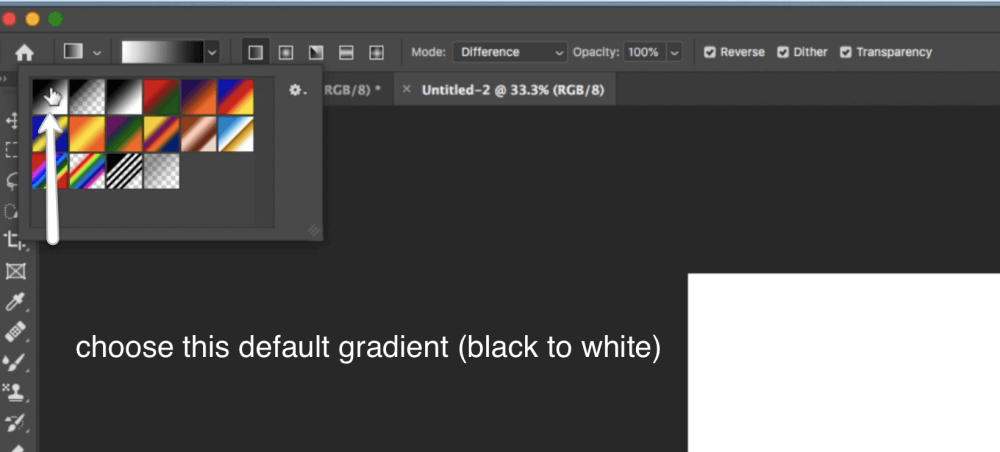
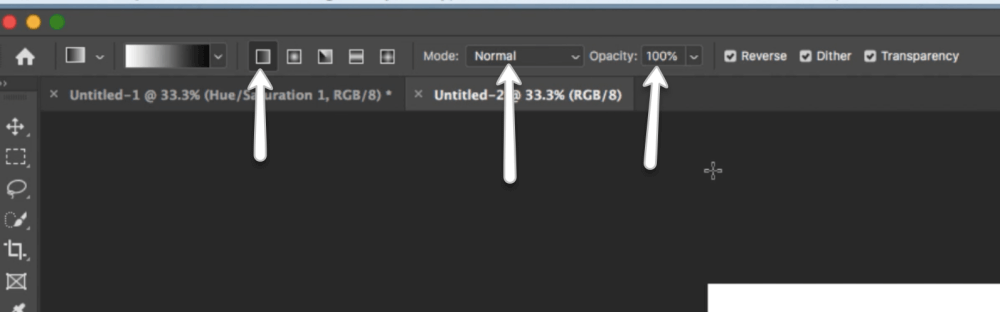
Set the gradient tool with the following settings:
- Set default gradient to <<<Black and White>>>
- Set gradient style to <<<linear gradient>>>
- Set mode to <<<Normal>>>
- Set Opacity to <<<100%>>>
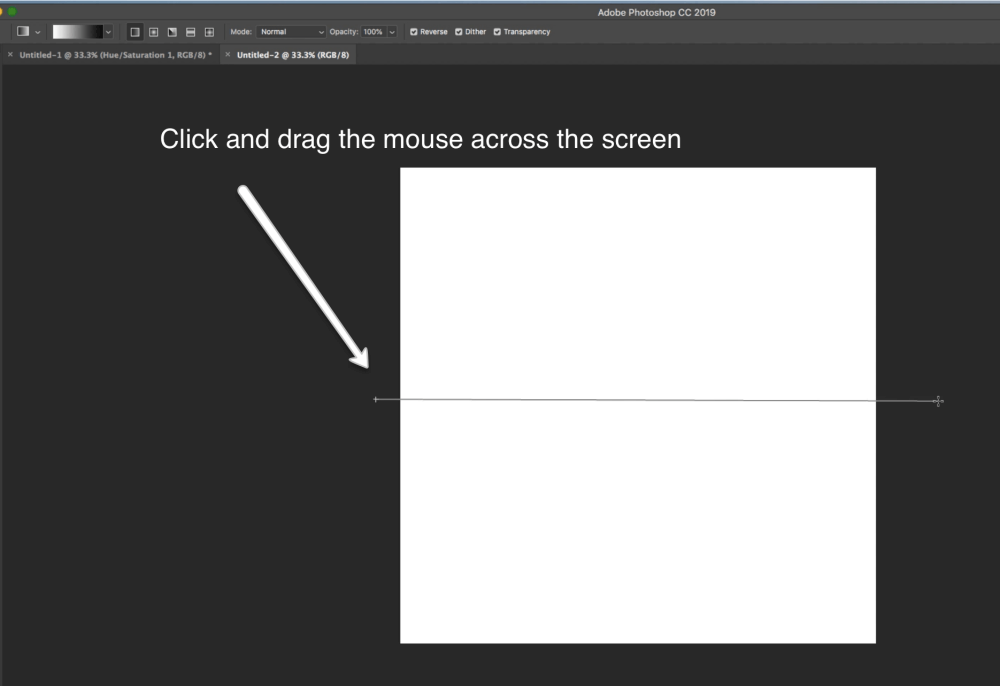
Step Three
Create one long gradient across the canvas from left to right by clicking and holding down the mouse button then dragging from one end to the other.
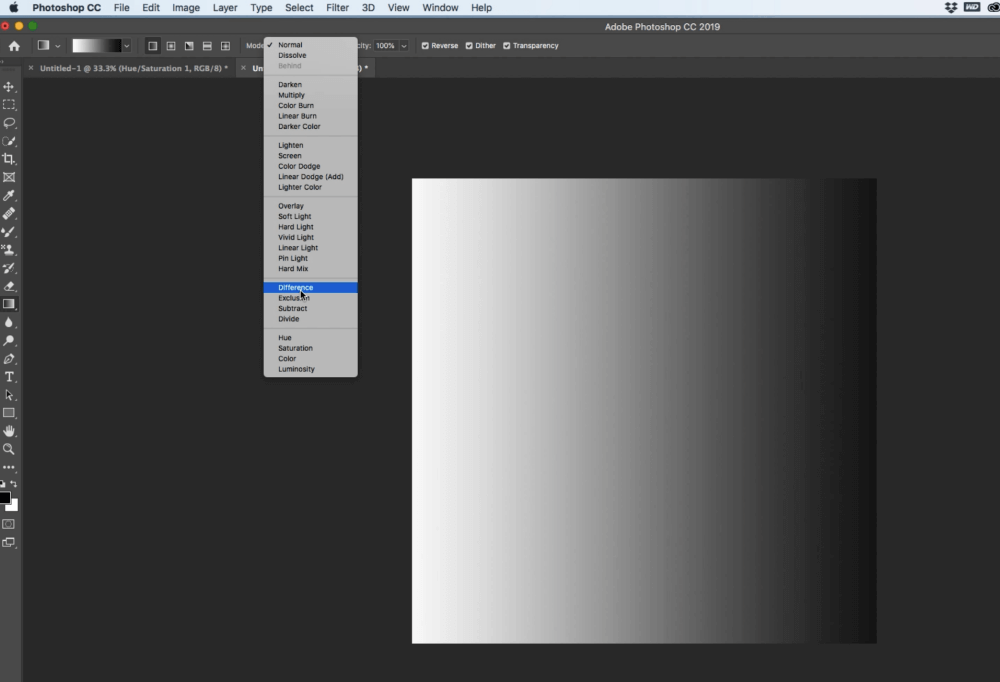
Step Four
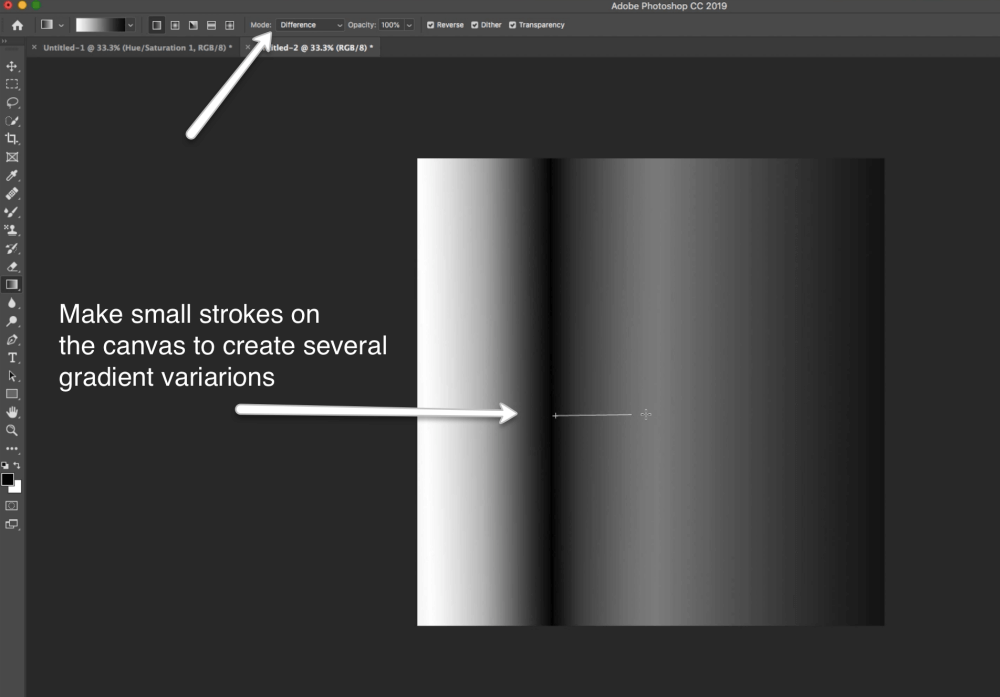
Switch the gradient mode to <<<Difference>>>
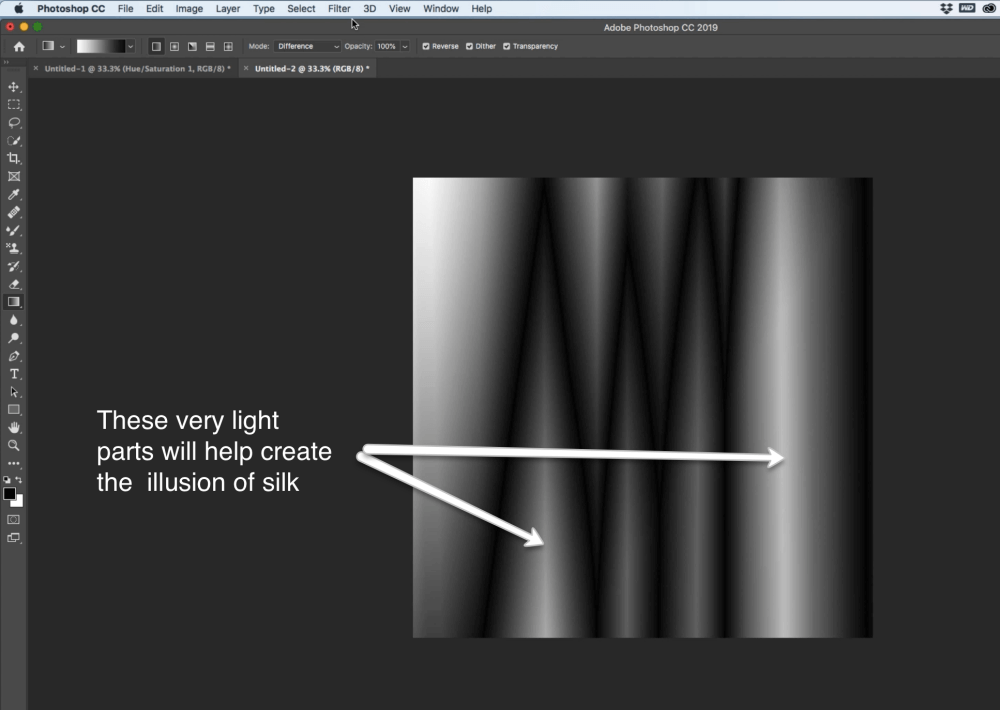
Make small strokes across the canvas until you have varying lines that resemble ripples
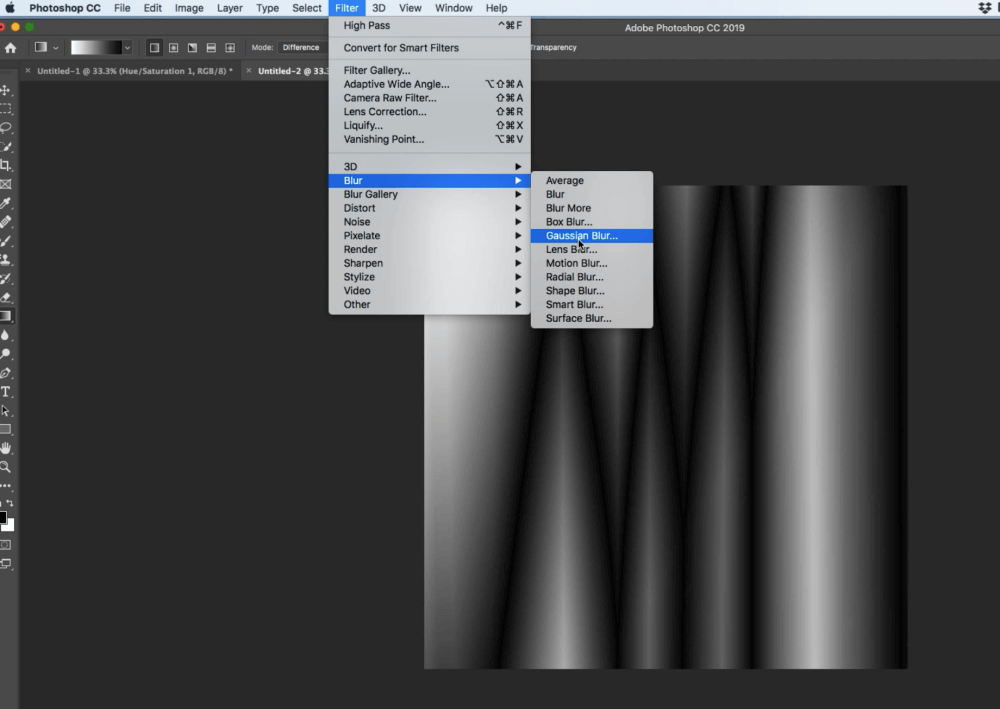
Step Five
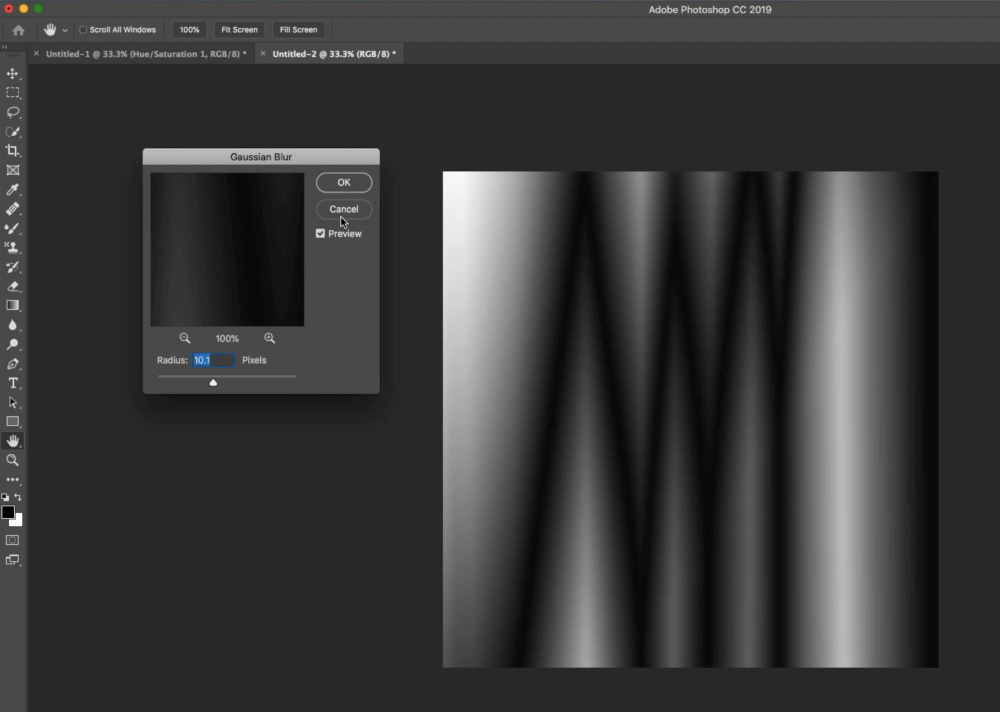
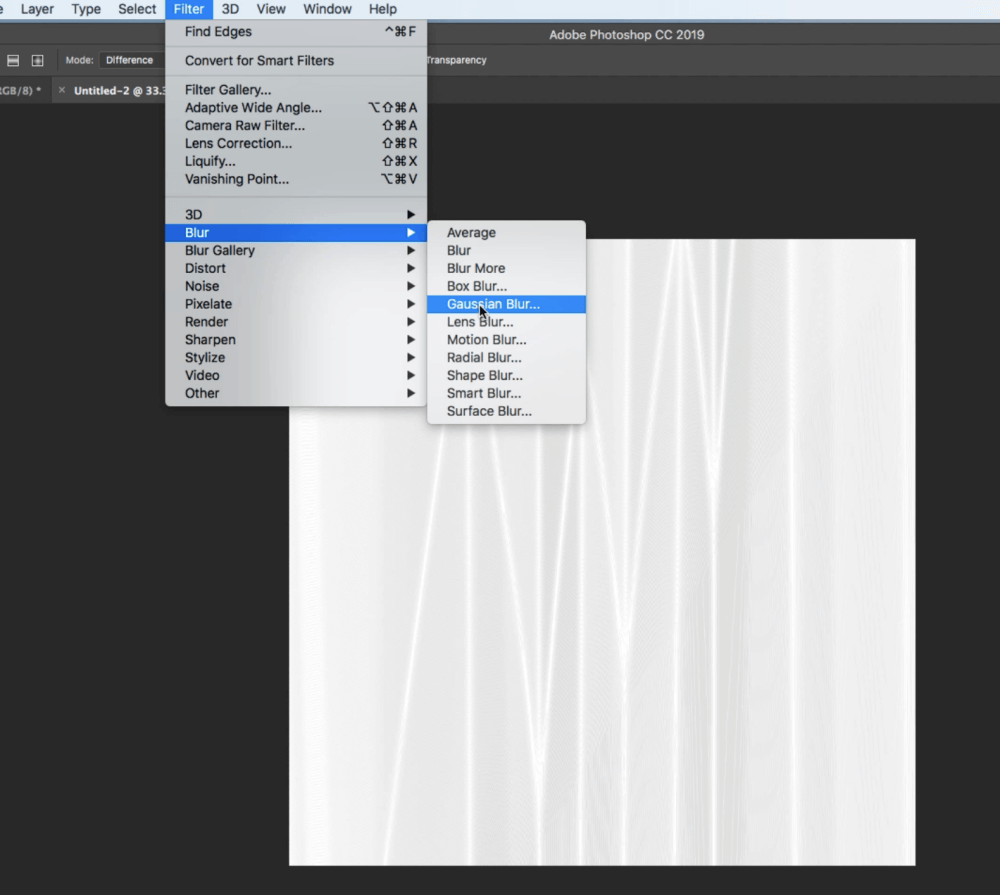
The first of our Photoshop Filters. Go to Filter in the top main menu as shown in the photo below then go to <<<Blur>>> then <<<Gaussian Blur>>>
A pop-up menu will appear, set the Gaussian blur to 10 or 11.
Step Six
The second of our Photoshop filters is the “Find Edges filter. Apply this filter as follows:
In the top main menu select <<<Filter>>> then <<<Stylize>>> then <<<Find Edges>>>
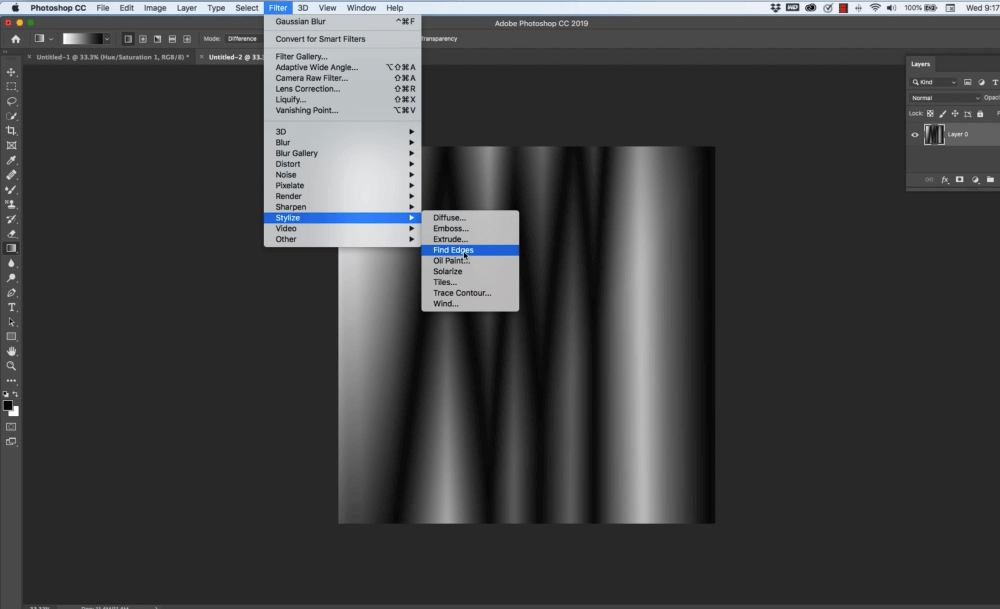
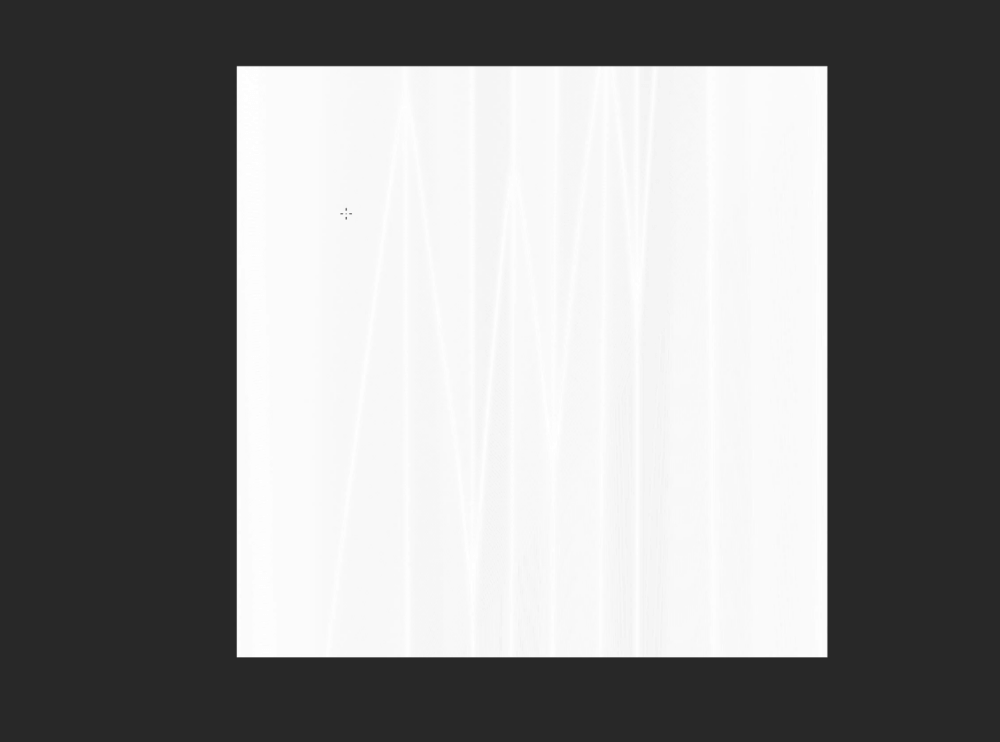
This filter will create a very light, almost white version of your design with strong white lines similar to the photo above. To bring back some of the colors, we will add a layer adjustment.
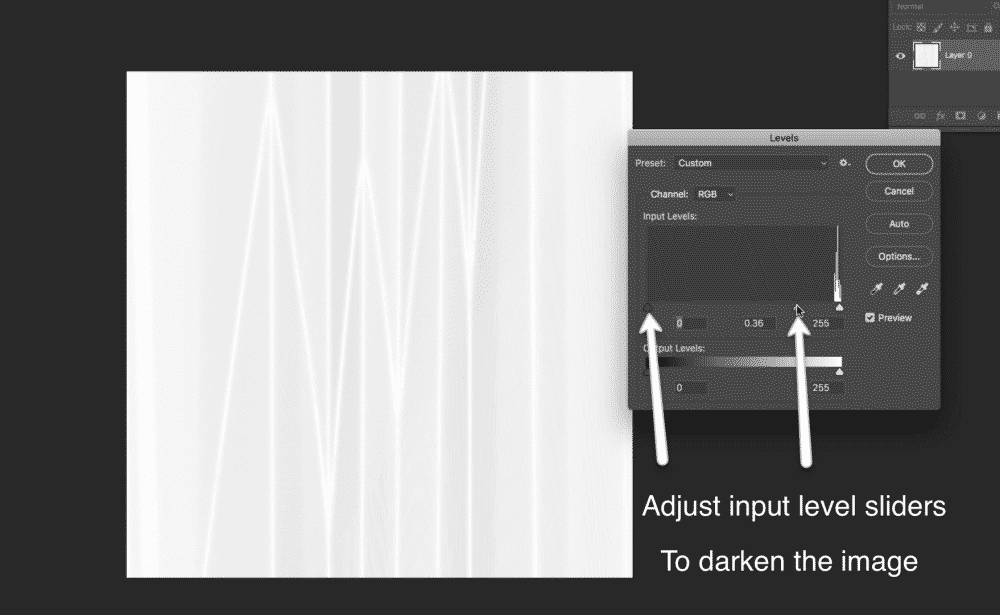
Step Seven
Add an adjustment layer to the design.
Go to Image in the top main menu then <<<Levels>>>
A pop-up menu will appear with control sliders to change the light and dark areas of the image. Move the gray and black slider as close as possible to the white slider without causing banding in the image. See the photo below for reference.

Step Eight
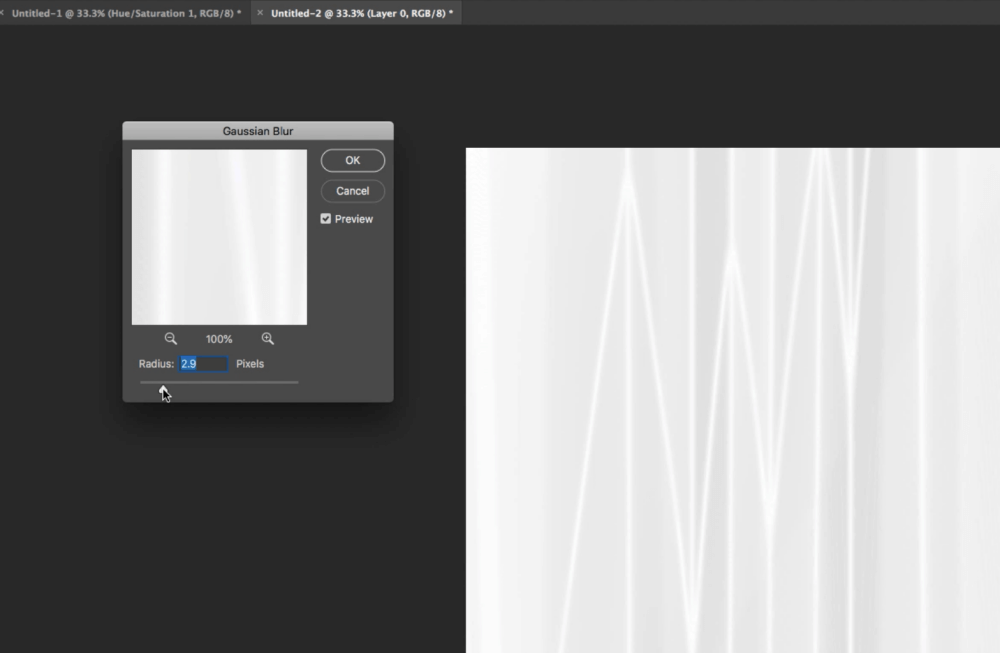
The third of our Photoshop filters will be a second Gaussian blur. We are blurring the image again to smooth out the image and any banding that may have appeared during the levels adjustment. Notice the banding in the darker portion of the image below.
Just as before, you will go to Filter at the top main menu then <<<Blur>>> then <<<Gaussian Blur>>> set low to 2 or 3. Notice that most of the banding visible in the first image, is gone in the second image.
Step Nine (Optional)
Please note: this step is optional, to add even more contrast to your image. Depending on how much definition you were able to achieve with the level adjustment you may not need to take it any further.
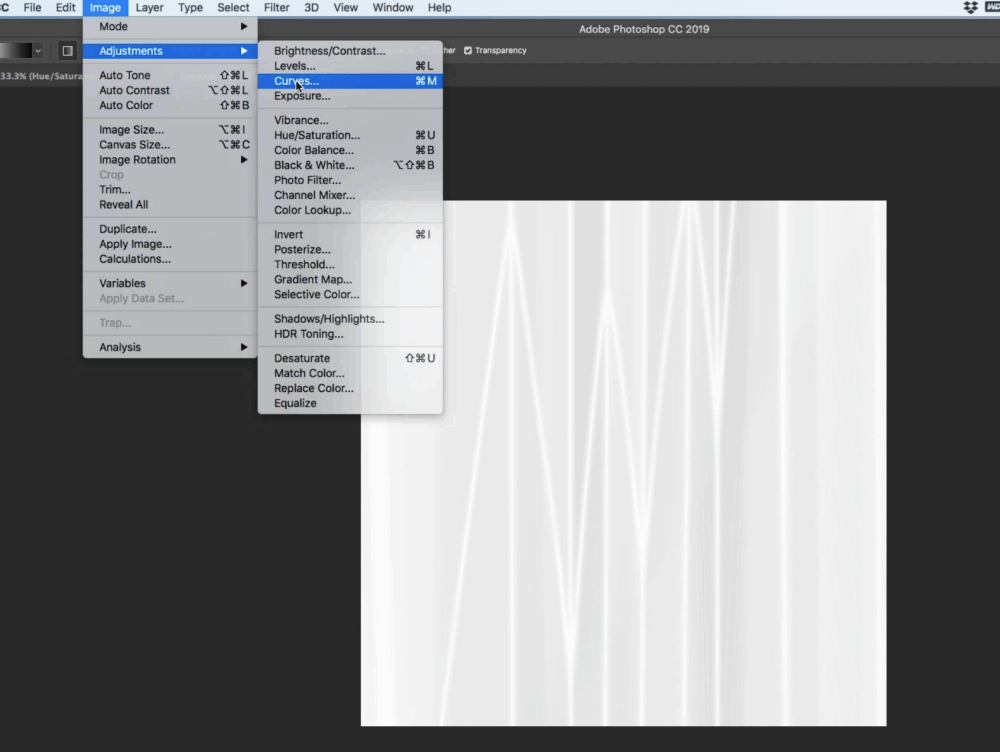
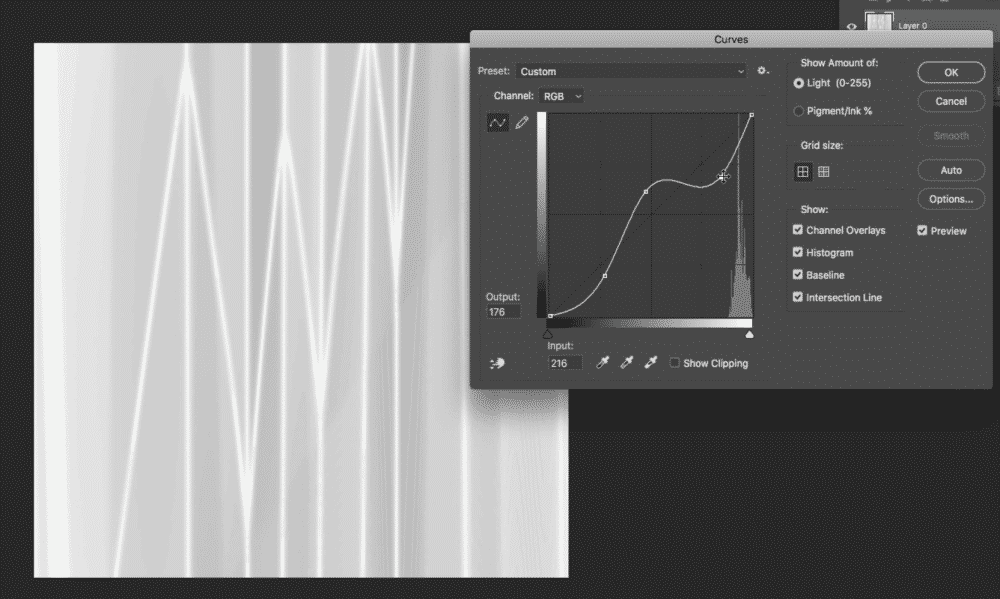
From the top main menu go to Image then <<<Adjustments>>> then <<<Curves>>>
A pop-up menu will appear with a grid-like image and a diagonal line going through it. You can move the line at different points by clicking and dragging the line up or down. Doing this will create a curve that will affect the lighting in your image. Please see the image below for reference.
Step Ten
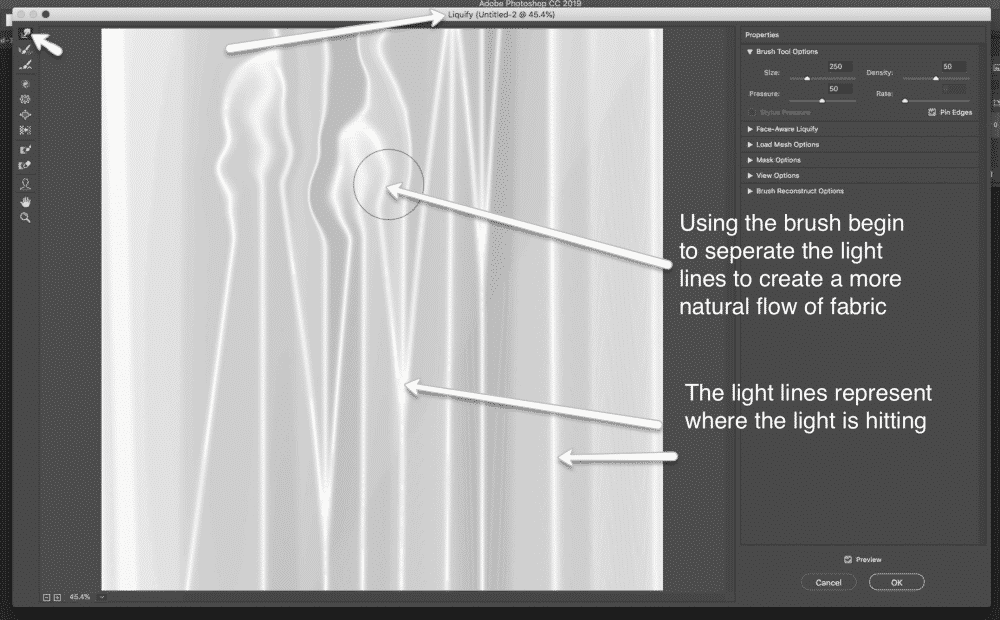
The fourth of our Photoshop filters is the Liquify Tool. We will use the liquify tool to pull out some of the lines that appear as crisp folds in the image above. With the liquify tool you can also give the fabric a flowing or puddled effect as well.
Got to Filter from the top main menu then <<<Liquify>>>
A pop up will come up with a preview of your image. You will manipulate your design in the preview window using the <<<Forward Warp Tool>>> to smudge the lines in any direction you would like. When you’re happy with the layout, click <<<OK>>> and the changes will be applied to your design. Please see the image below for an example of using the forward warp tool inside of the Liquify Photoshop Filter.

Step Eleven
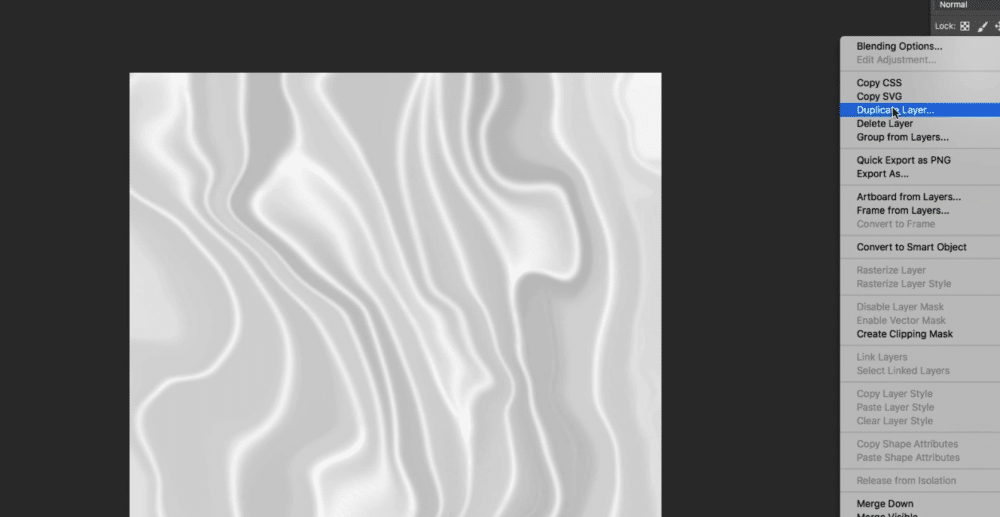
Duplicate the layer and name layer one and two if you like.
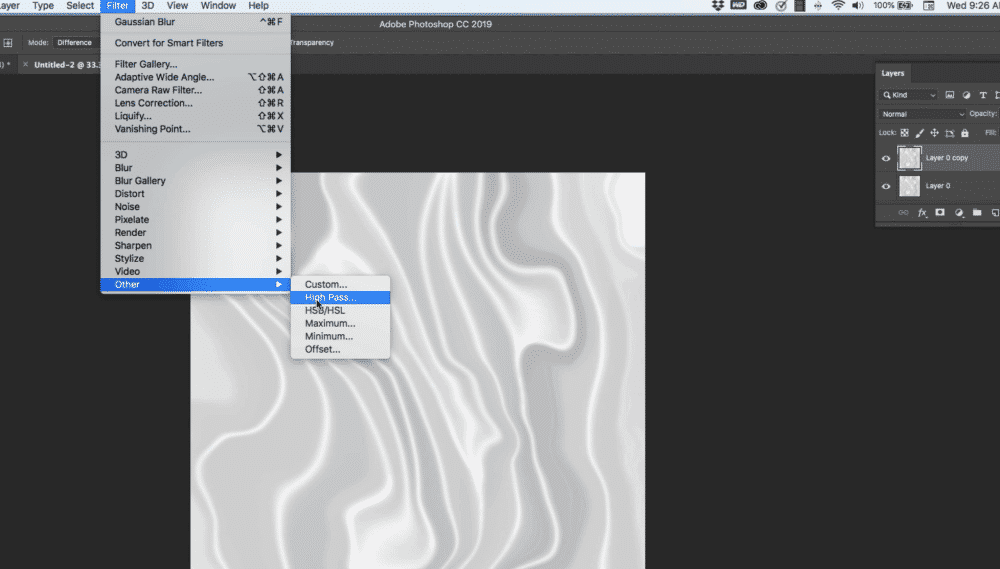
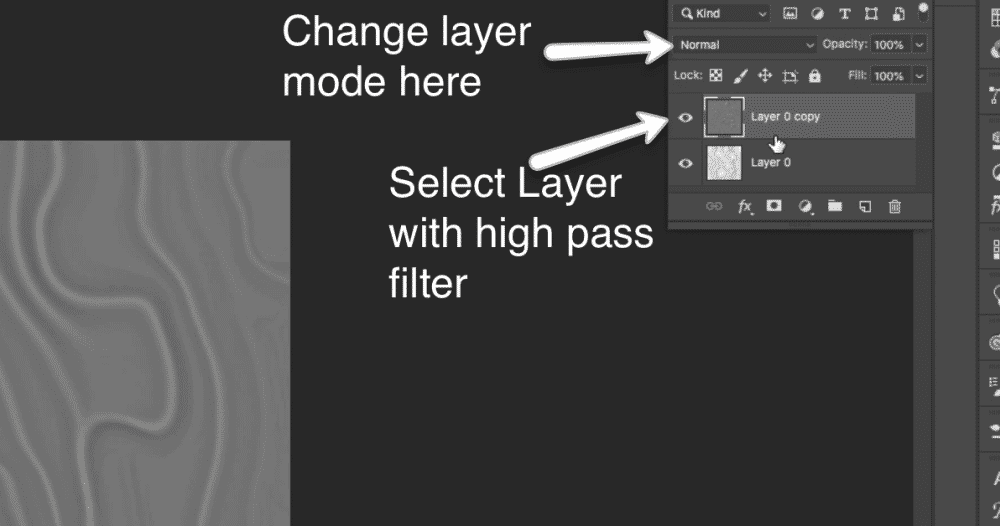
With top layer (copy) selected go to Filter in the top main menu then <<<Other>>> then <<<High Pass>>>
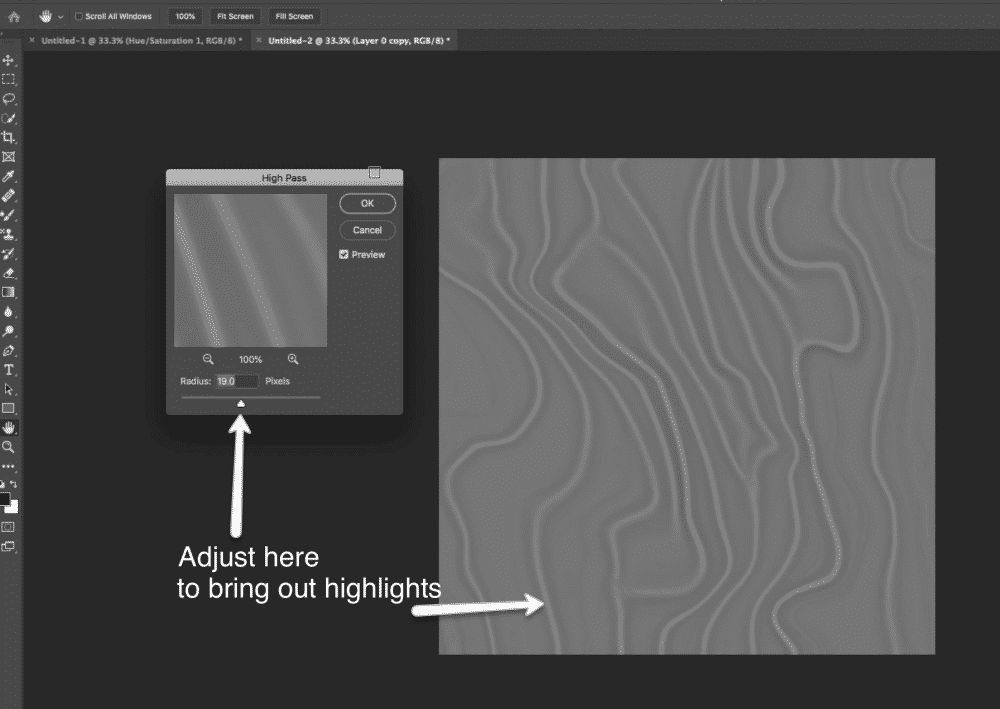
A pop-up window will appear. Adjust the High Pass layer to focus mostly on the lightest portions of the design Click <<<OK>>>
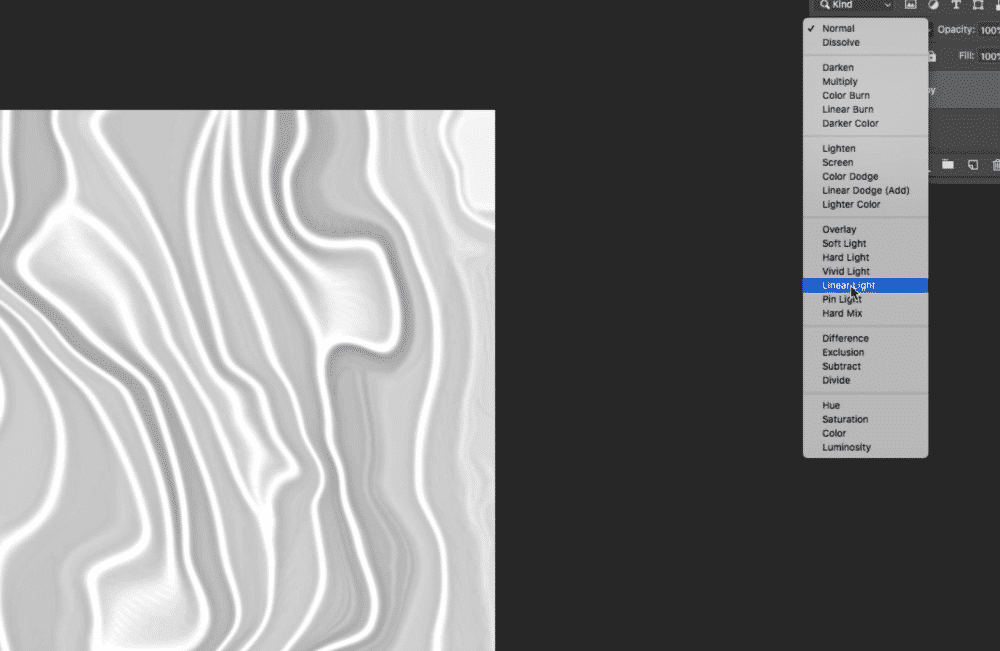
Change the layer mode to <<<Linear Light>>> for the layer with the High Pass filter applied. See the image below for example.
Change the opacity for the “High Pass” layer to create a more subtle effect.
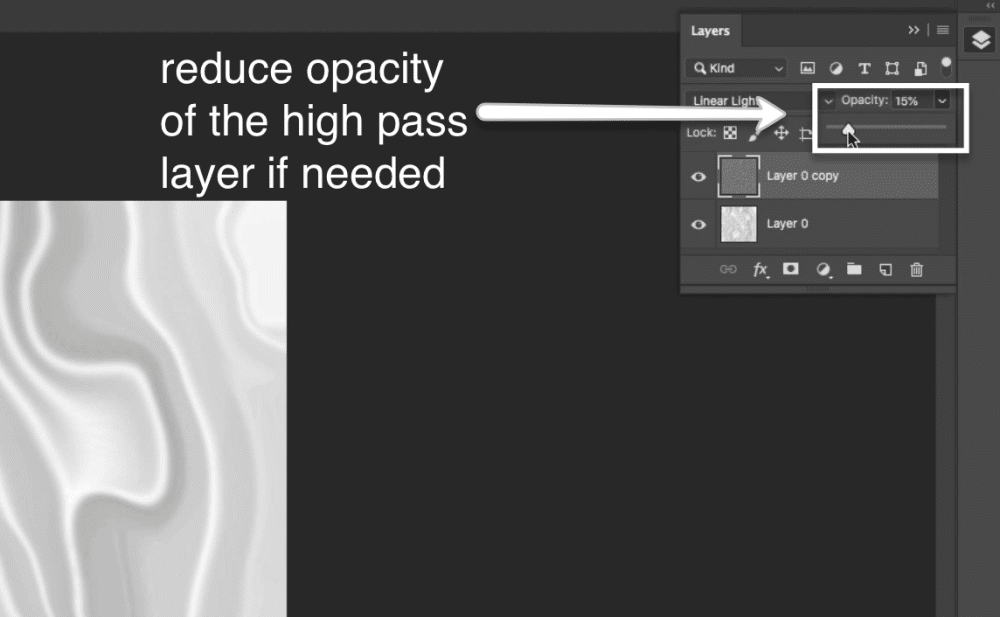
Merge both layers by holding down Ctrl or Command and clicking on the layers then right click on the layers panel and select <<<Merge Layers>>>
Step Twelve
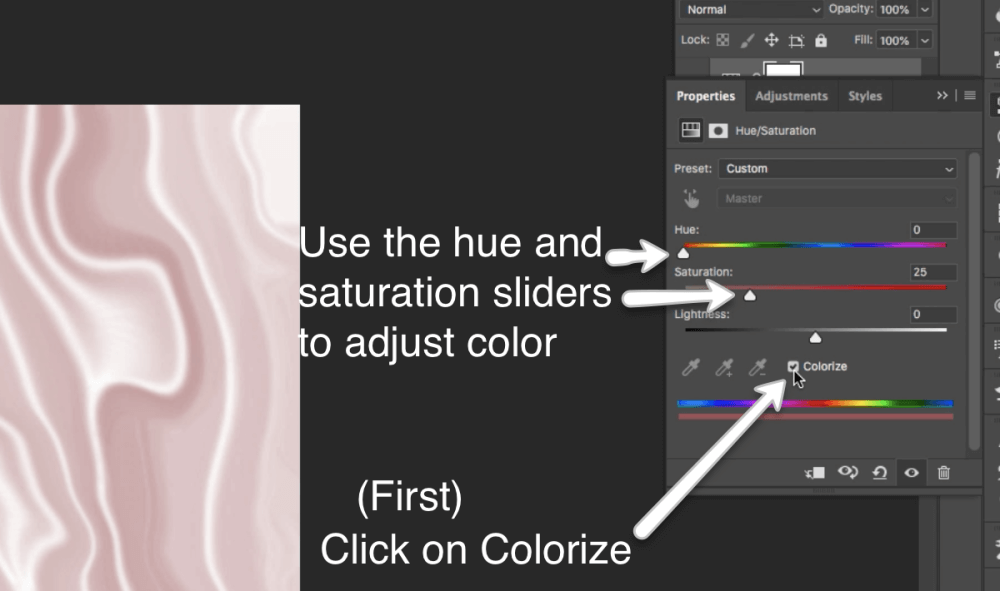
Adding a color adjustment layer to your image gives you tons of design options and variations. You can do this by adding a Hue/Saturation adjustment layer. Do this by clicking on the half white half dark circle at the bottom of the layers panel. A pop up will appear select <<<Hue/Saturation>>> and Photoshop will add a new layer to the layers panel above your design layer. The Hue/Saturation menu will also come up. You will make color adjustments here.
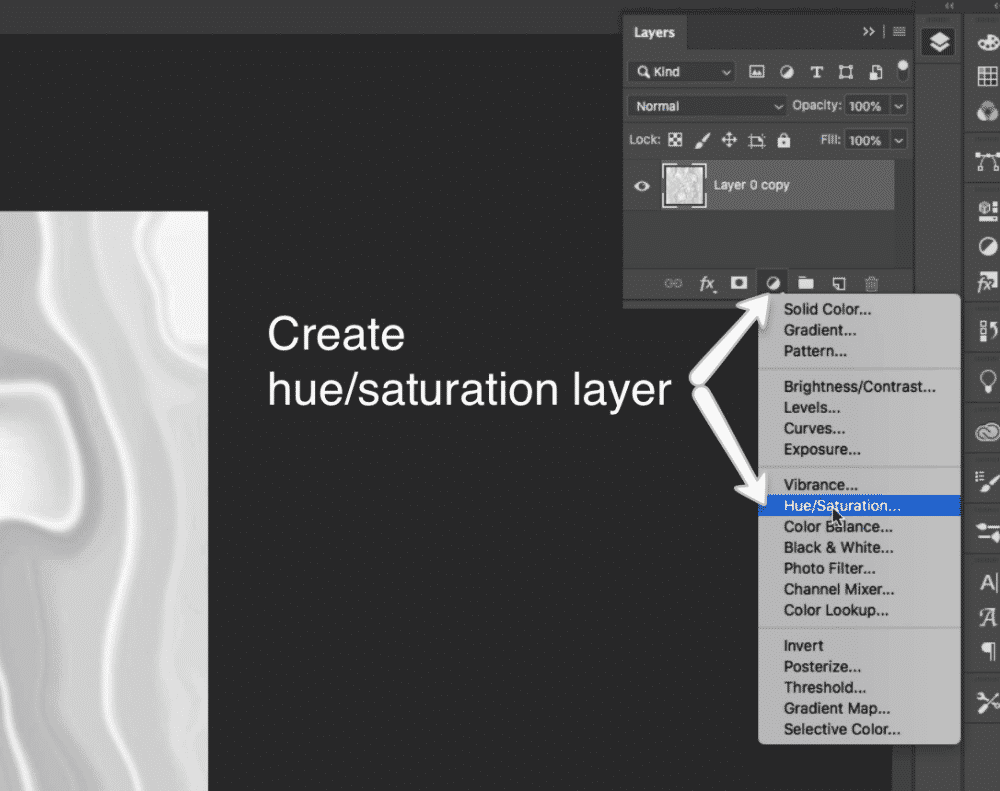
Use the Hue/Saturation sliders to adjust color as shown in the example photo below. Color will not be applied unless <<<Colorize>>> is checked. Make sure that you have this option checked before adjusting your sliders.
For more advanced users, you can also add a displacement layer to add patterns and other textures to your design for even more customized looks.
Other Tutorials in the Photoshop Filters Series
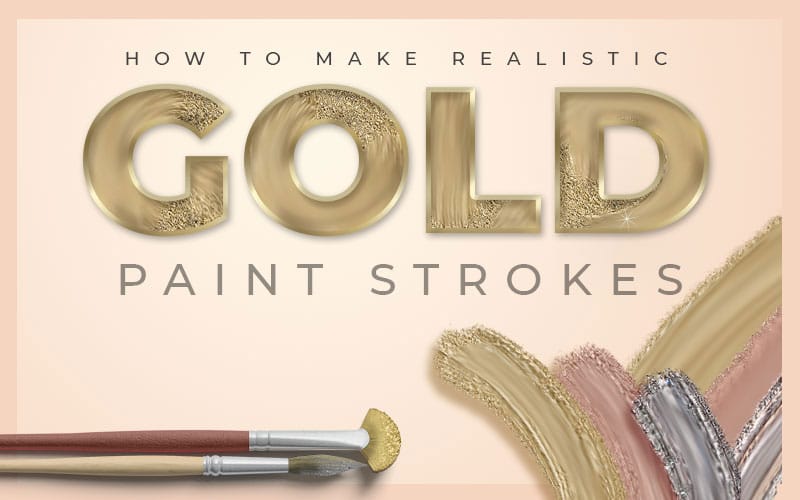
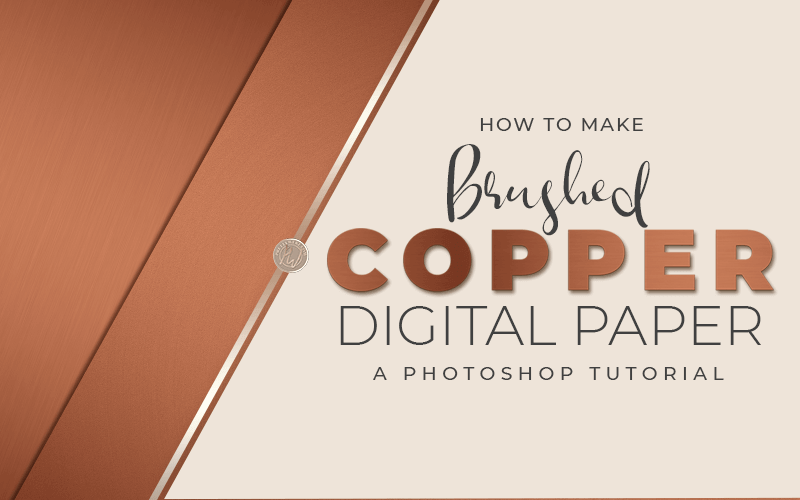
If you enjoyed this tutorial and you want to see other tutorials that work with Photoshop filters, there are three other videos in this series. Check out the silver, gold and rose gold textures for a shimmery, glittery look. Pick up the free Metallic digital papers pack that came with this tutorial as well.
You can also learn how to make a marble texture with encrusted gold leaf and pick up the Marble digital paper pack here.
The third in the series is our beautiful Agate texture which is extremely popular right now and full of vibrant color. All of the color and contrast makes it an ideal design element that is a must-have in your arsenal. Get the free Agate digital papers that accompanied this tutorial here.
You are welcome to use the digital papers pack that comes with each of these tutorials both personally and commercially for all your projects. So make sure to check out each one of these videos and download all of the pre-made textures as well.
Other Posts You Might Like
What’s Next?
If you find these types of tutorials valuable, I would love it if you subscribe to the blog to receive a notification on everything new on the blog as well in all the latest freebies and other design resources available in the shop. You can expect to see design tutorials in Photoshop, online editors, the Microsoft Office suite, keynote and many more.
This blog is not about Photoshop. This website and blog are all about helping marketers (including bloggers) and companies doing business online. We are here to give you resources for the design and marketing of your business. I understand that not all business owners want to learn Photoshop, so we try to keep it as well rounded as possible and still give you quick and easy methods for creating your marketing and blog assets.
You can subscribe on the footer of this page. You can also subscribe to my YouTube channel if you preferred to watch on YouTube.
Did you like this post and want to share it? Pin this image!