Rose Gold Text Effect in Photoshop
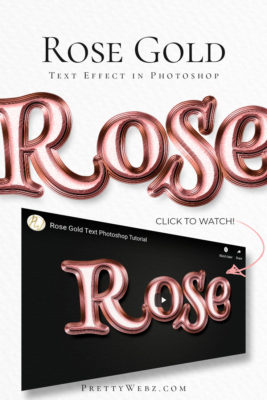
In this tutorial, I’m going to show you how to make a shimmering rose gold text effect inside of Photoshop. This is a different take on creating rose gold text. Photoshop allows us to do so much more than just adding gradient effects so we’re going to take it up a notch with this text effect.
RESOURCES USED IN This Rose Gold Text TUTORIAL
- Fonts used in the tutorial:
- Henny Penny Free for commercial use
Learn Photoshop One Tutorial at a Time
Learn and master the most frustrating aspects of overwhelming programs like Photoshop and Illustrator in a fun and entertaining way with PrettyWebz design tutorials.
Tutorial projects like the ones we share here on the blog are meant to help you grasp the use of the most powerful aspects of design software one step at a time.
In the process, you will build your design assets so that you can create a stunning marketing design for your business. So, don’t forget to sign up below in the footer to become part of the Prettywebz family and never miss another tutorial.
Also join me on YouTube as well to check out the playlists I’ve set up for Photoshop, PowerPoint and other software you can use to design your online graphics.
The Rose Gold text effect in Photoshop tutorial will show you the building blocks for creating an eye-catching text effect in a super-easy way.
More Posts on this Topic
Rose Gold Text Photoshop Document Settings
We’re going to start off today with a new document with the following settings: Width: 1000 pixels, Height: 675 pixels, 72 resolution, RGB mode
The Background Settings
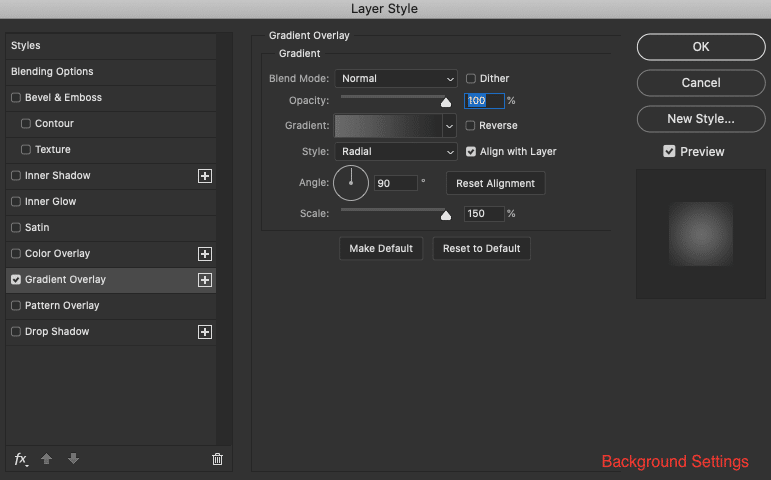
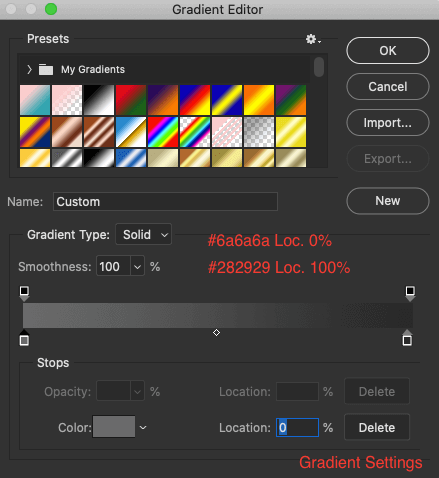
Background Gradient Overlay
Unlock my background by clicking on the lock icon on the background layer and set the following layer styles:
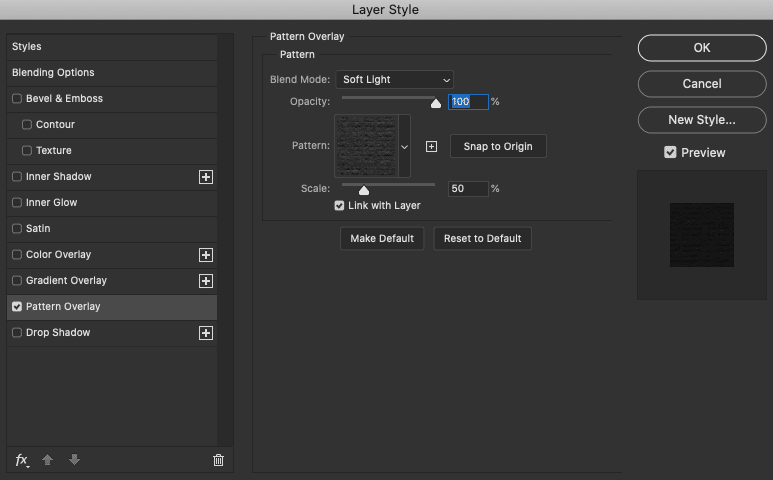
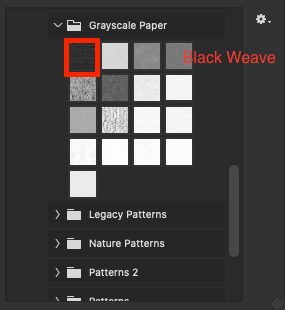
Background Pattern Overlay
Add a second layer over the gradient layer and fill it with any color. Set the layer fill to 0% and add the following layer styles:
Text Settings
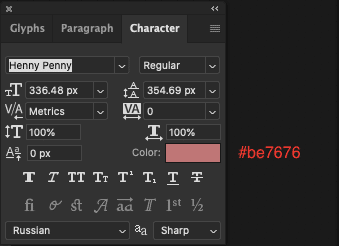
Type out the word you want to use and add the following settings:
- Font: Henny Penny
- Size: 336 pixels
- Color: #be7676
Duplicate this text layer three times and label them 1, 2 and 3 or in a way that you know which is top, middle and bottom.
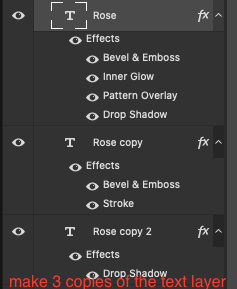
Text layer #1 (Top) Layer style settings:
Bevel and Emboss
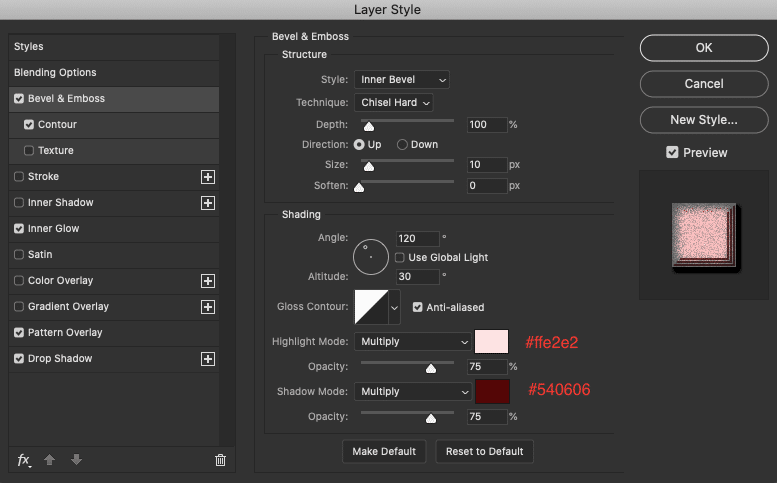
Bevel and Emboss – Contour
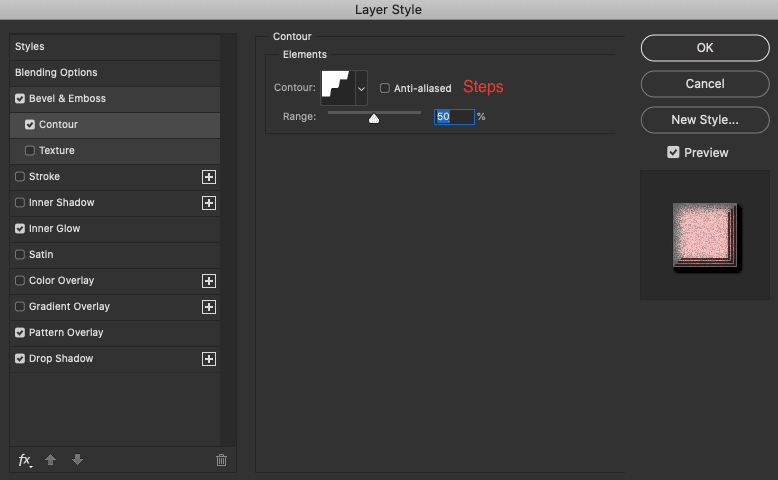
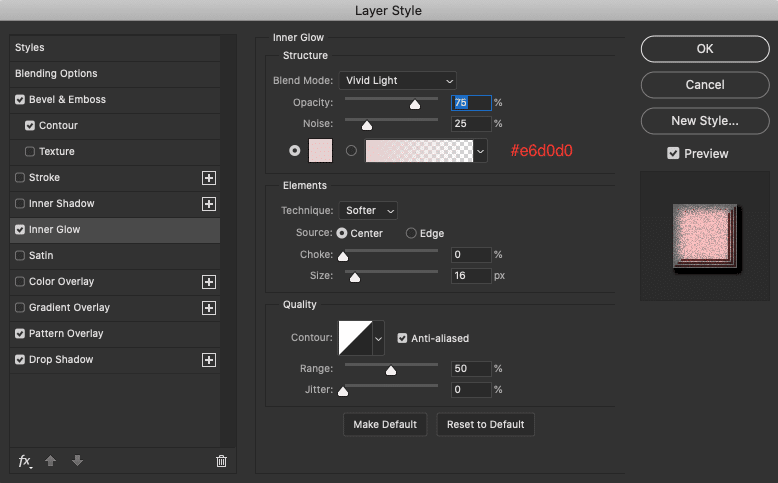
Inner Glow
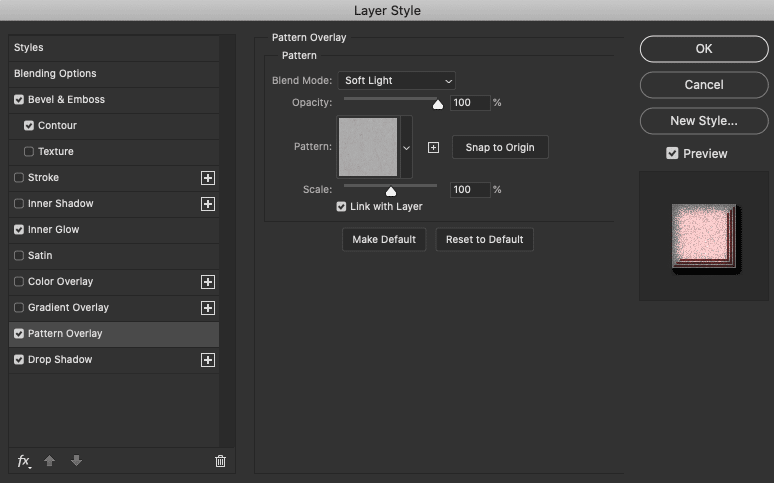
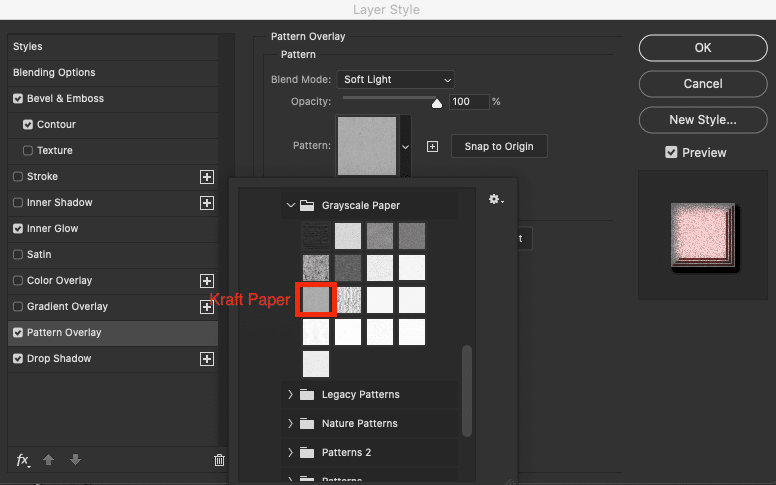
Pattern Overlay
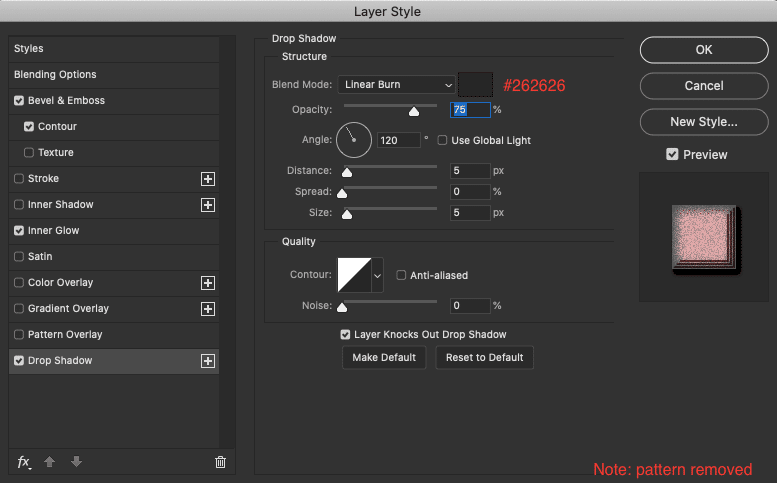
Drop Shadow
Text layer #2 (Middle) Layer style settings:
Bevel & Emboss
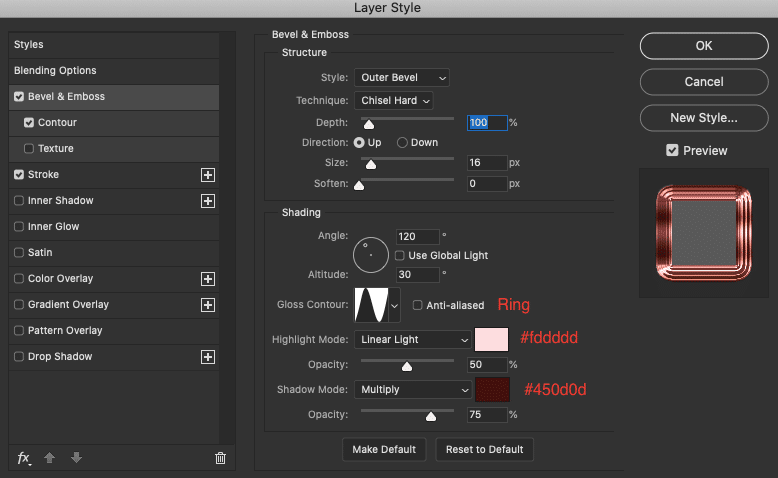
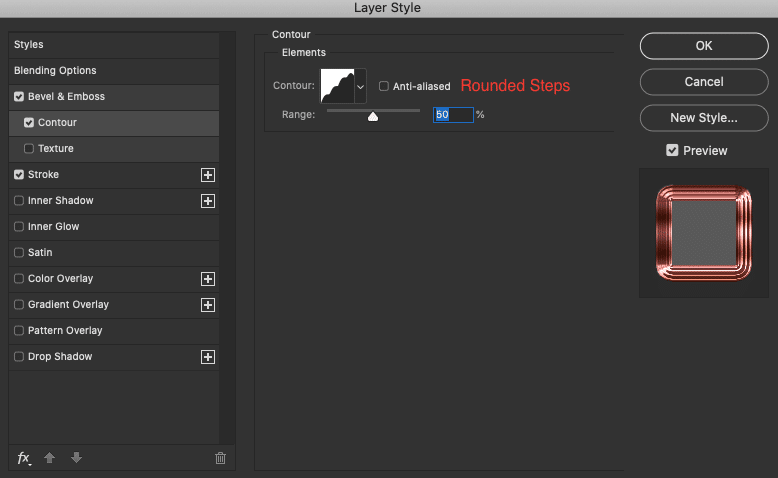
Bevel & Emboss – Contour
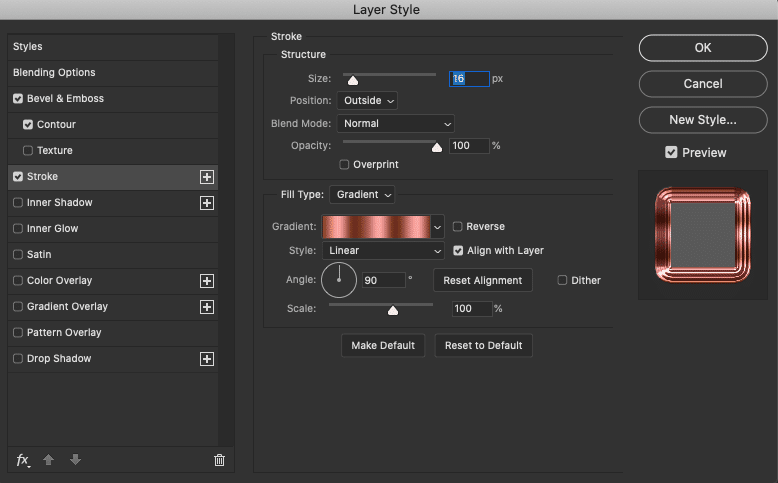
Stroke
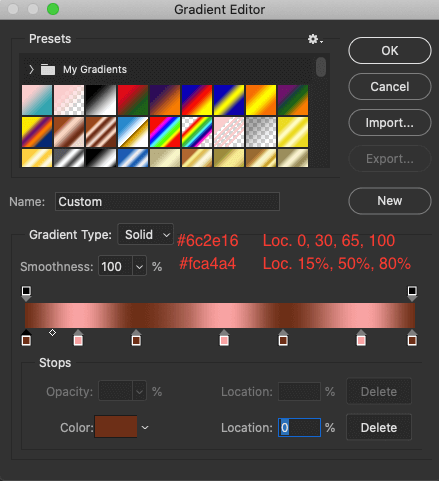
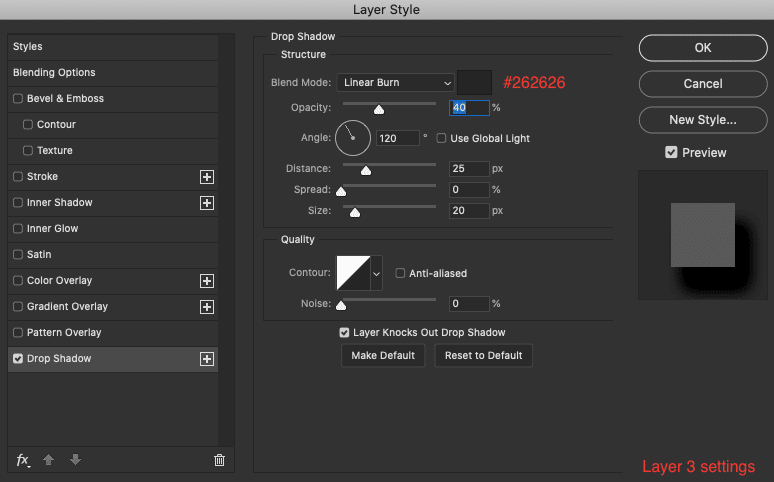
Text layer #3 (Bottom) Layer style settings:
Drop Shadow
You’re done! Now you have a shimmering rose gold text effect.

