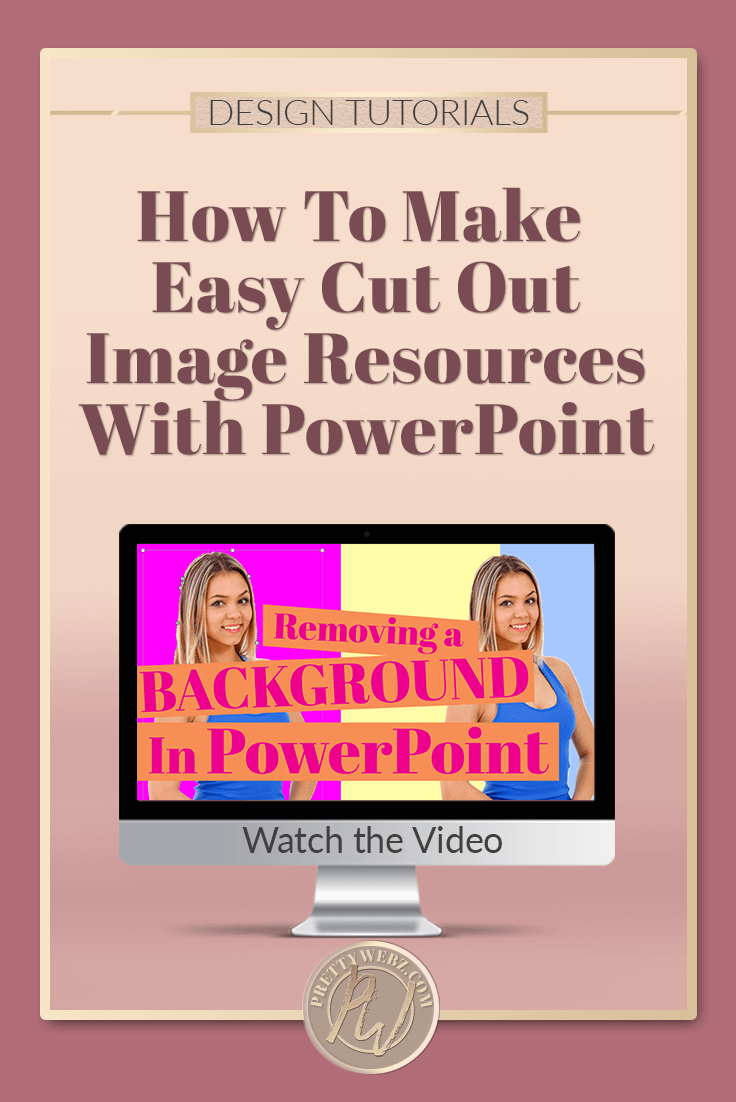
How to Cut Out Image Backgrounds In PowerPoint Easy!
It’s always the simplest things that require the most time to do. The time it takes to cut out image objects from a photo can get frustrating. It can use up a serious investment of time to remove an entire background from a picture.
Today I’m going to show you how to remove the background from your image using a PowerPoint with a super helpful feature not too many people even know exists. Watch the video or read the transcript below.
•••Please Note: The following is a loose transcript of the video above•••
Cut Out Image Objects in PowerPoint Examples
The first image is an example of an image in which I’ve removed the background. You can use the same feature in PowerPoint to isolate and cut out image objects or entire areas of your photo.
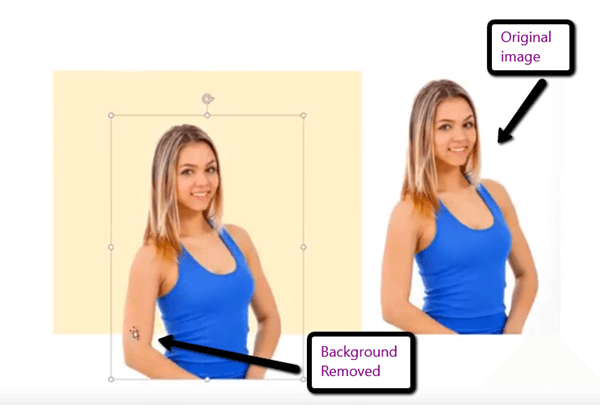
The second example is the original image so that you can see that the white background is part of the picture. Whereas, in the first one, the background is transparent. This means that you have much more flexibility with your image color and overall design.
I can come into the image where I’ve removed the background and change the image background color to anything that I want. This feature comes in handy when you’re trying to keep photos with branding colors, or you have a specific color that you want to use in a thumbnail or featured image.
Caveat
The background removal feature of PowerPoint is not perfect. It’s not Photoshop quality by any means but, it gets the job done, and it’ll help you out with your workflow. With a little tweaking, the difference in quality is almost unnoticeable to the untrained eye, which is most people. Plus, this super helpful tip is quick and easy to do in PowerPoint.
I wanted to show you another example of how we can composite two images together when we remove the background. The remove the background feature in PowerPoint makes it flexible for adding two images together in a composite.
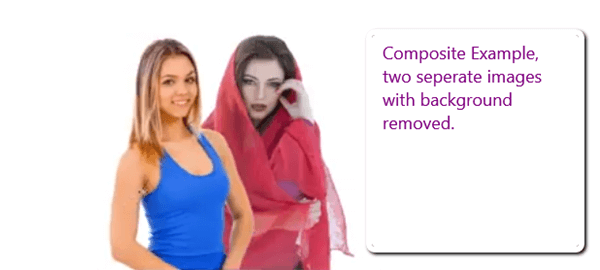
You can see how flexible this can be when you want to add two images together or change the background of an image. We’re going to open up a new slide, and I’m going to insert a picture on the active slide.
How to Remove an Image Background in PowerPoint
When you have the image down to the size you need it all you have to do is come up to >>>> picture tools >>>> format
The background removal tool is going to be the very first option >>> Remove Background >>> I am using PowerPoint 2016. This feature is available in older versions as well. It first became available in the 2010 edition of PowerPoint.
So you’ll click on >>> remove background >>> the background removal tab will open up a new set of options
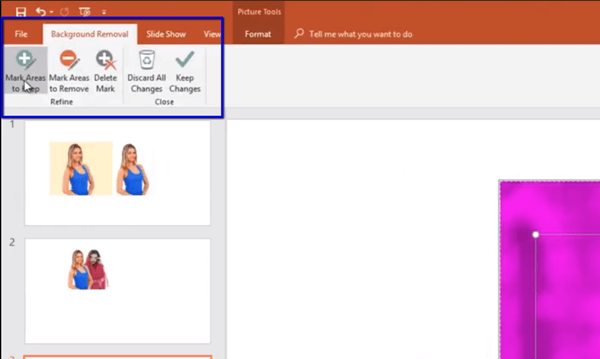
You will have all of these options
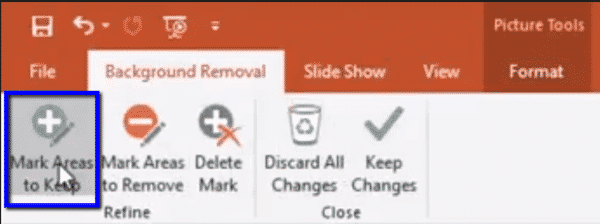
- Mark areas to keep
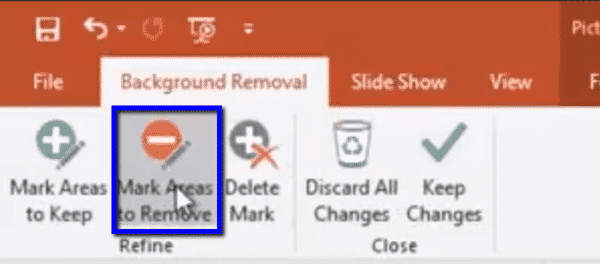
- Mark areas to remove
- Delete a mark
- Discard all
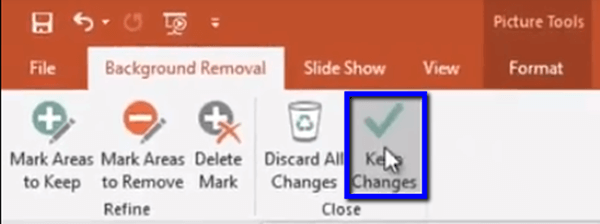
- Keep the changes
Preparing Your Image for Cutting
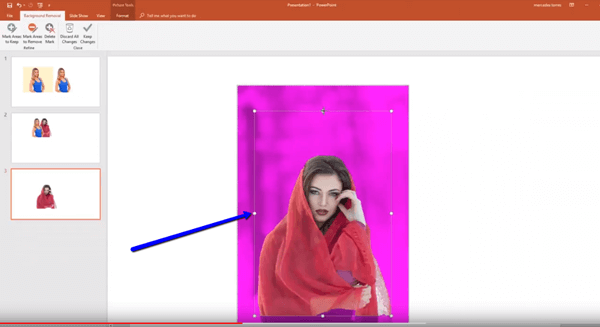
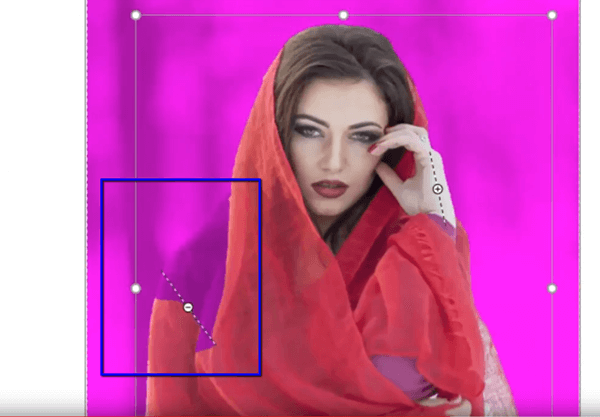
You will notice that we have a bounding box to mark areas where we will cut out image objects. I’m going to bring the bounding box in a little bit more. Some people say that you get a better selection from opening this bounding box to more of the image. In my experience, I’ve gotten a better cut out image quality from tightening it up.
Depending on the photo you’re working with the outcome will be different. You can experiment with this to see what works best for you.
Making Small Adjustments to Your Cut
There are some areas where it’s cut out image objects that we want to keep. All of the dark pink areas are going to be cut out from the image.
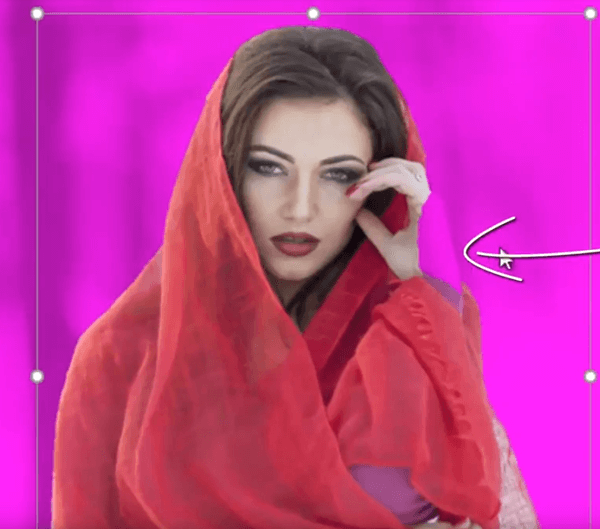
Right here part of her hand is going to be removed. We know this because of the pink color overlay. I don’t want that to happen, so I am going to come up to the background removal tab and click on Mark areas to keep. Once I do this, a small pencil icon will appear on the slide. Use the little pencil to drag over the area that you want to keep.

If there are areas that you want to remove from the photo. Click on the cut out image area while holding down your left mouse button. Then drag the pencil over the part you want to remove. Doing this will highlight it in the magenta/pink color to denote that you want it deleted.
Adding to the Cut Out
To add a portion of a cut out image object back into the image either select “mark areas to remove” or if it’s an area that you previously wanted to delete but later changed your mind select “delete a mark” to remove the mark you previously added. To delete a mark you made >>> click on “delete mark” and then >>> click on the little circle at the center of the mark.

When you’re happy with the way the cut out image looks select >>> keep the changes>>> from the remove background menu and it will automatically remove everything except for the stuff that you want to keep. You will be left with a cut out image that you can add a background to or use as a composite piece in another project. There are a lot of exciting things that you can do when you isolate image objects utilizing this feature.
Other Adjustments to Final Object (Bonus not in Video)
If you find that your final cut out image has a halo or is not as smooth as you would like it to be there are some adjustments you can play with to smooth out your graphics as much as possible. Select the object and right-click to access the popup menu for the item. Select <<<Format Picture>>> When the “Format Picture” side panel pops up select <<<Soft Edges>>> and adjust the edge hardness as much or as little as needed to get a look that works for you.
What Next?
I hope you get a lot of use from this cool PowerPoint trick. Don’t forget to watch the video for full visuals on everything I explained here. If you’d like to see more videos on editing graphics using a PowerPoint check out my playlist on YouTube or you can sign up for the PrettyWebz newsletter at the bottom of this page and I’ll send you a round-up of all the tutorials, freebies and resources that we make available on the blog and premium freebies from the PrettyWebz shop every single month.
Did you like this post? Want to save it for later? Pin this image!