Bokeh Brush in Photoshop
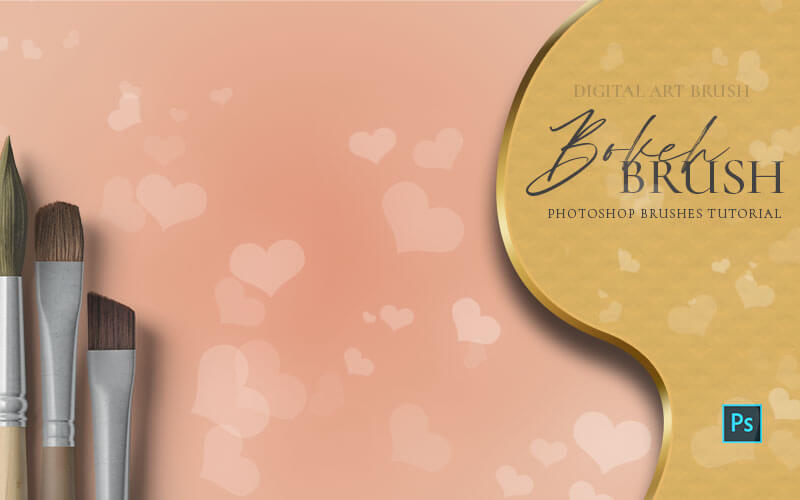
Learn how to make a bokeh brush in Photoshop. This is a fun and easy bokeh brush Photoshop tutorial to help you add another asset to your design collection. Learn how to style the bokeh for editing images. Get some tips on applying bokeh to get the best results when you add this effect to your images during post-editing.
Using bokeh brushes in Photoshop is a great way to add very specific placement of bokeh effects to your photographs. You can also make this bokeh brush style with any shape from circles, like traditional bokeh, the heart-shaped bokeh that I will demonstrate in this video, and any other shape you can imagine.
Where to use Bokeh Effects
I’ve always felt that bokeh adds a beautiful and romantic touch to images. It can also give that Hygge feel, for cozy and welcoming settings, camping, and outdoor-themed photographs. My favorite use for bokeh in photography has to be for creating allure and mystery in nightlife and city life scenes.
LEARN DESIGN TOOLS ONE STEP AT A TIME
Learn and master the most frustrating aspects of overwhelming programs like Photoshop and Illustrator in a fun and entertaining way with PrettyWebz design tutorials.
Tutorial projects, like the ones we share here on the blog, are meant to help you grasp the use of the most powerful aspects of design software one step at a time. In the process, you will build your design assets. Before you know it, you will have created a good working knowledge of Adobe design software and a nice asset library for your business.
Don’t forget to sign up below in the footer to become part of the Prettywebz family and never miss another tutorial.
Also join me on YouTube as well to check out the playlists I’ve set up for Photoshop, PowerPoint and other software you can use to help build your online presence.
Resources for This Tutorial
Click for a direct download of the resources mentioned in the video. Resources are for reference, or in personal or client work. Tools can be used for creating your own resources but cannot be repackaged and sold on their own. Thank you!
____________________
More Posts on this Topic
Similar Premium Products
Bokeh Brush in Photoshop TUTORIAL
Bokeh Brush in Photoshop Transcript
Hey there, Mercedes here from prettywebz.com and today I’m going to show you how to make a bokeh brush in photoshop.
Now, making a bokeh brush is pretty similar to other brushes that I’ve shown you how to make on this channel.
Like confetti brushes, sparkle, glitter brushes, those types of things. It is a scatter brush, but there is one big difference.
And that’s going to be the opacity of the brush. So we need to make sure that this brush has good opacity.
And the way you’re going to do that is the setup in the beginning. So that’s the most important part of this.
Bokeh brush in Photoshop sample set up
So what I’m going to do is show you how I set this up and then I’ll go through the settings of the brush itself.
Then I’m going to show you different ways to style it and make it look a lot more realistic.
So you can make this brush in any shape that you want. You typically see it in circles and things like that.
Because we’re so close to Valentine’s day I am going to make a heart brush, so heart bokeh.
So I’m going to come over here to the shapes. Now usually, you’ll see this rectangle tool right here.
What you’ll do is just click, hold it until this fly-out menu comes out, and then you’re going to come here to custom shape tool.
And then you’re going to get all of these options up here on the top. I’m going to go ahead and click on that drop-down arrow.
Importing Shapes for Photoshop 2020 or higher
You can see that I am working in photoshop 2021.
So if you’re in photoshop 2020 or higher and you don’t see the legacy shapes and more it’s because you have to load them in here.
So you cannot do that from here, so this isn’t going to help you. What you need to do is go into the shapes window.
We’re going to come here to Window and I’m going to go here to shapes. That’s going to open up this window right here.
And you’ll see that little hamburger menu. You’ll go ahead and click on that.
Choose legacy shapes and more and that will load those in for you so that they’re available up here.
You’ll come back in here, I’m going to be using legacy shapes and more, all legacy default shapes and just scroll down.
I believe I used shapes, so I’m going to come in here to the shapes folder.
So I’m going to be using the heart from here and again, you can use any shapes you want.
In fact, you can create your own shapes. I do have a video that shows you exactly how to create your own custom shapes.
So if you’re interested in that I’ll go ahead and leave a link up in the top and down in the description so you can check that out.
This actually would be a nice brush for this tube but we’re going to go ahead and stick with this solid heart right here.
I’m just going to click on the canvas. I’ll make this 1000px to start and then put that right here.
How color affects Transparency in Photoshop brushes
Maybe stretch it a little bit. I’m going to press the letter u on the keyboard to bring all of these back.
Usually, when you’re creating a brush you want something like this because everything that is in black will register as the brush.
So usually when you’re making brushes you’re going to work with the white background.
And whatever is going to register as your brush will be black, the most opaque color.
So we are going to stick with the white background. we do need to have that because this is complete transparency right here.
But brushes work similarly to masks in that black hides and white reveals. Except it’s the opposite here. Everything in black is going to register.
So what that tells me is that gradations are going to have varying transparency.
So if we use like a 50 percent gray or something, it’s going to be 50 percent transparent.
You know, all the way until it gets up to white, which will be completely transparent, or black.
Which is 100 percent opaque. I hope that made sense, we are going to change the color of this, and that’s the most important part of the bokeh.
Setting color for the Bokeh Shape
So what I’m going to do is just choose this color right here. Let me see what color that is.
This color is b7 b7 b7. I’ll go ahead and click ok, and I’m also going to add a stroke to this.
A darker stroke just to, make it a little more interesting. I’ll go ahead and choose this one, and that color is 636363.
Go ahead and click ok and I’m going to change the pixels to about 10 for that, so you have something that looks like this.
It’s going to have this outline, it’s not completely black but it’s darker than what’s in the center.
So we’re going to go with that and I’m going to come here to edit.
I’m actually going to bring this heart in just a little bit because it looks like it’s hitting the top there.
I want to make sure that my brush is completely inside the canvas so that the whole thing will register.
I’m going to come up here to edit, define brush preset. You can name it whatever you want. It’s just your sampled brush.
We’re going to end up changing it anyway so just go ahead and click ok and then we’re going to come in here to the brush settings.
If you don’t see brush settings, this little icon right here on the side, you can just come up here to Window, brush settings and that will be in there.
Brush Settings Adjustments
So it’s automatically going to choose the brush that we just created, so that’s what you’re going to see in here.
Brush Tip Shape
I’m going to come in here to brush tip shape and I’m going to reduce this.
It’s always good to start with a really big brush and then bring it down, rather than starting with the small one and then bringing it up.
So just for quality, but we’re going to bring that brush size down to 100 pixels. our spacing I’ll take up to 200 pixels.
200 or something close to it. So something like that.
Shape Dynamics
I’m going to come in here to shape dynamics and I’m going to take my size jitter up to 50 percent.
I’ll take my angle to about 20 percent as well. Everything else here can stay as it is.
So we’ll come in here to scattering and I’m going to scatter this brush out about, I’ll just go 550, 560 somewhere between those two numbers.
I am going to raise my count to 2 and then everything else can stay as it is.
I’m going to come back in here to size jitter and use pen pressure.
Transfer Settings
Now the most important part of creating this particular brush is going to be right here, transfer.
So our opacity jitter we’re going to take up to about 70, between 70 and 80 percent.
Flow jitter, the same thing, between 70 and 80, and you can work with this if you want less opacity or more.
You can definitely come in and work with this to get exactly what you want.
But this one right here is going to be the most important in order to get that nice bokeh look.
Other Settings
So I have smoothing and protect texture, we don’t even have texture in this but I usually check it off anyway.
You can also protect your textures by just locking them.
Go ahead and keep those checked and then we’re going to come here to file, new brush preset.
I’m going to call this, heart bokeh, and click ok. So let’s take a look at what that looks like.
Testing the Bokeh Brush in Photoshop
I’m going to go ahead and turn this off, add a new layer just so we can test this.
I have this red color in here, hit the letter b on the keyboard to bring up my brush tool.
You can see what that looks like. It just looks like a scatter brush right now because we don’t have an image.
So I brought in some images here. I wanted to show you how to use it with images.
Because a photographer taking this style of the picture would not have red bokeh all over the place.
It just doesn’t make sense.
When you’re actually taking an, when you’re actually taking a picture, that bokeh effect is picking up on light and color from the image.
So that’s what we need to do as well.
Tips for applying Bokeh effect on Images
When we add the bokeh effect to this image right here we need to make sure that we’re picking up on the light and color from this particular image.
So we’re going to come in here and I’m just going to click right here to get a sample.
I’ll bring it closer to this because I want to pick up on some of this over here.
So I think this color is good for that. From there, you can just come in and add the bokeh.
Another thing that you can do with this is come in here to the blend modes and see if you can get a better look from this.
So this color dodge looks really nice, linear dodge.
You know, these ones right here are all really nice, and then these ones right here are probably better for lighter images.
So we’ll take a look at a lighter image now. I’m gonna go ahead and close that so let me go ahead and grab a color from this.
So it’s like a reddish color and then go ahead and paint that on there.
And I’ll actually, I think, like a lighter color would make more sense here because you’re going to definitely be getting a lot of really bright light with an image like this.
So maybe color dodge, this right here would look really nice.
So just make sure that you’re paying attention to the light source, how much light is in the scene.
Resources and wrap up
So if you stuck with me up until this point I just wanted to let you know I do have some brushes that you can download over at my website.
I’m going to go ahead and leave a link down in the description to that.
You will get this heart bokeh, a regular circle bokeh, and then some like, lip smears.
If you like this video make sure to like and share it.
If you’re interested in the type of content I put out on this channel make sure to subscribe so you don’t miss another video.
And as always, make sure to go over to prettywebz.com for more design resources and tutorials.
Until next time thanks for watching.

