Fur Brush Photoshop Tutorial
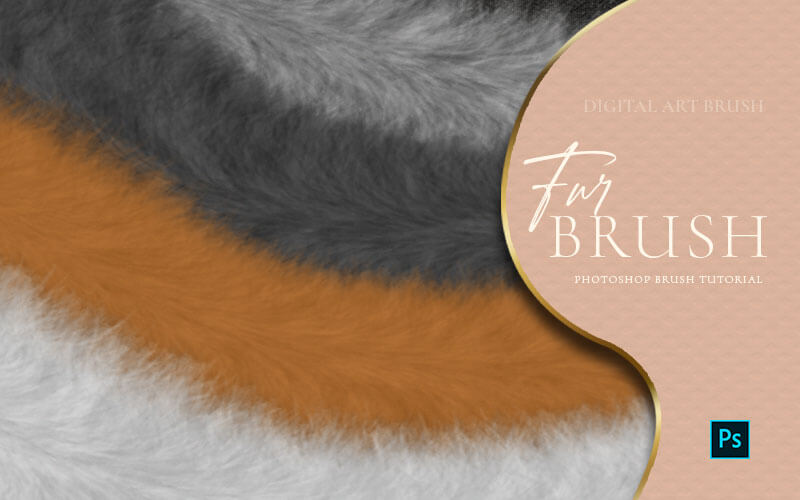
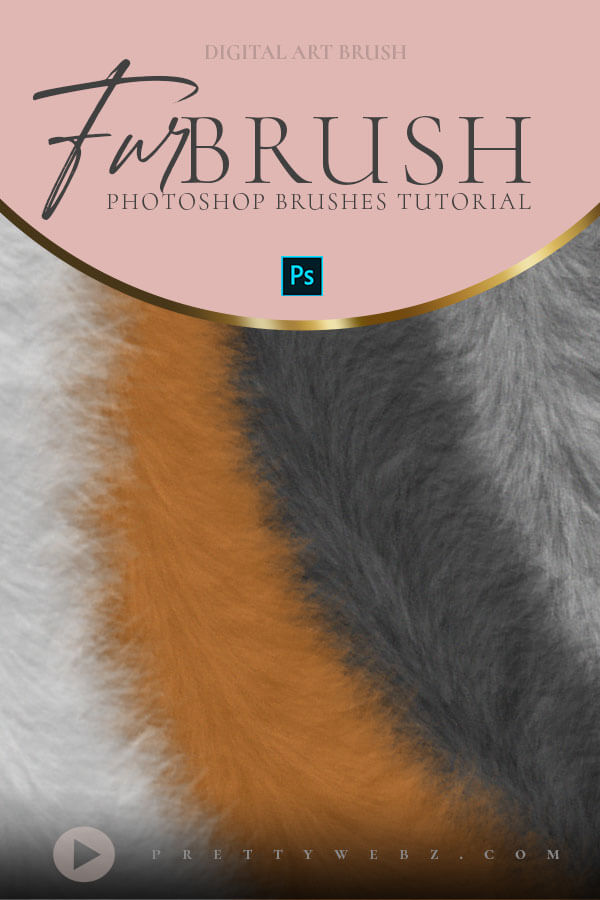
In this fur brush Photoshop tutorial, I’ll show you how to make a basic fur brush in Photoshop using only the default assets you already have with the program. Use this brush to create tons of different styles of fur just by modifying color options and slight texture changes. I’ll show you how to do all of that in this video.
LEARN DESIGN TOOLS ONE STEP AT A TIME
Learn and master the most frustrating aspects of overwhelming programs like Photoshop and Illustrator in a fun and entertaining way with PrettyWebz design tutorials.
Tutorial projects, like the ones we share here on the blog, are meant to help you grasp the use of the most powerful aspects of design software one step at a time. In the process, you will build your design assets. Before you know it, you will have created a good working knowledge of Adobe design software and a nice asset library for your business.
Don’t forget to sign up below in the footer to become part of the Prettywebz family and never miss another tutorial.
Also join me on YouTube as well to check out the playlists I’ve set up for Photoshop, PowerPoint and other software you can use to help build your online presence.
Resources for This Tutorial
Click for a direct download of the resources mentioned in the video. Resources are for reference, or in personal or client work. Tools can be used for creating your own resources but cannot be repackaged and sold on their own. Thank you!
____________________
More Posts on this Topic
Similar Premium Products
Fur Brush Photoshop TUTORIAL Video
Fur Brush Photoshop Tutorial Video Trancript
Hey there, Mercedes here from prettywebz.com, and today we’re working on a fur brush photoshop tutorial.
This is a basic fur that we’re going to create using a basic photoshop default brush.
And then just making some adjustments to it.
I’m going to go through all of the adjustments that I’m going to use to create this brush.
Then I’m going to show you how to make adjustments to the color direction stiffness, all of that stuff.
Let’s go ahead and get started. I want to show you what the brush looks like. Now you can see right here that I have these two brown colors.
So I’m doing them very high contrast like this, just to give you an idea of what this brush looks like and so that it shows up on camera.
Of course, you can adjust these to anything that you want.
What I usually do is I’ll just, you know, grab a screenshot of the fur that I want and then just pick out colors from that.
For this one, we’re going to use these pretty high contrast colors and I just want to show you the brush that we’re going to be making.
So I’m going to just do this like tail type thing here. I wanted to show you the direction of this.
You can see that as I draw, this fur is just taking the direction that I’m drawing, and then it’s picking up on both of these two colors here.
And you can see how much dimension that these colors are adding to this right here.
And then we’re also going to work on this exterior this area right here, the stiffness of this.
So we’re going to go ahead and get started, I’m going to show you how to create the brush.
Fur Brush Photoshop Settings
I’m going to come in here to my brushes.
If you don’t have this little icon here and this doesn’t come up for you, you can just come here to Window and click on Brushes.
That will come up for you there.
Flow Settings
Before we get started with any of the settings, we need to make sure that our flow up here is at five percent.
This is going to be one of the most important things for this brush.
So, I’m going to show you the brush and then I’m going to show it to you with a flow at 100 percent.
You’re gonna see the big difference in the style of the brush. So you can see right there what a drastic change these are.
That’s because when the flow is at five percent it’s giving you more of a blend between all of these brush tips
that are being laid down on the canvas right here.
So just make sure that your flow is at five percent and you should be okay.
Now, when you save this brush you’re gonna have to save it with that flow at five percent.
Otherwise, you’re going to come back to them and you’re going to see something like this and wonder what happened there.
So just make sure that you’re saving it with these settings as well. So when you come in here you have all of your settings taken care of.
Your brush settings, you know, everything is good. You’re going to come here to the three lines.
You’ll choose New Brush Preset and you want to include the tool settings but not the color.
So just make sure that you do include those tool settings or what you’ve created today, this one, is actually going to look like this.
So, you can name it whatever you want but I just wanted to point that out that you will have to save those tool settings in order to get this.
Starting the Fur Brush
This right here is the brush that I already created with all of the settings but I did use a photoshop default brush to create it.
So what I’m going to do is come up here to Legacy Brushes. If you’re in photoshop 2020 and you don’t see this, you’ll have to come here to the three little bars right there.
Click on that, and then choose Legacy Brushes and that will load all of those brushes in for you.
So we’re going to come in here to Legacy Brushes, default brushes, and we’re gonna scroll down until we find the grass brush.
So this is the dune grass, we want just the regular grass, which is the one with the three.
The dune grass has the one. You can use either, but I just like this one it comes out a little bit thicker.
So we’re gonna use the grass brush, so if you’re starting this on your own, you’re gonna start here with this brush.
For me, I’m just going to grab the brush I already created. Just because I want to show you the settings on it.
You can see just by the outline of this that it is that grass brush.
Brush Tip Shape
I’m going to come over here to my brush settings, that’s this little icon right here.
If you don’t have it there, again, here in brush settings you can just click on that, right here in brush tip shape.
So for this one, I’m gonna make this 200 pixels. My spacing is going to be one percent and that’s it for this part right here.
Shape Dynamics
I’m going to come in here to Shape Dynamics. I’m going to leave my size jitter at sixteen percent.
My Control is Pen Pressure, Minimum Diameter, zero. Angle Jitter, I have that all the way up to one hundred percent.
And this right here is very important, make sure that you have Initial Direction selected.
That’s what’s going to give us that, you know, where it’s kind of following where I’m taking the pencil.
Roundness Jitter you can leave at zero. Control, off, and then everything else is going to be off for that.
Scattering
Now we’re going to move over here to scattering. For scattering, you can leave both axes unchecked. Zero, control is going to be Pen Pressure.
Our count is six, our count jitter is zero. I’m going to show you the difference that the count makes.
Bring this down to one and you can see the difference there. so if you want to bump this up even more you can do that as well.
I’m going to go ahead and leave mine at six, but you can see how sparse it is when you don’t have that selected.
So make sure that your count is up. You know pretty, a pretty good number for your count.
Texture
Now we’re going to move over here to texture. Now for the texture, we’re using another Photoshop default pattern here.
When you click on that, you’ll see where all of these are. So we’re here in Photoshop defaults, Legacy Patterns, and more.
Loading Legacy Patterns
If you don’t have this because you, you know, are updated to photoshop 2020 or higher.
You’ll have to actually manually come in here and do that as well. So I’m going to come here to Window and I’m going to click on my patterns.
That will bring something similar to this. You’re not going to have all of this stuff here.
What we want to load is this one right here, the Photoshop default.
Once this window is up you’ll just click on the three little lines there and choose Legacy Patterns and more.
Just click on that, that’s going to bring up your legacy patterns right here. So if you click on Photoshop defaults, it’s going to be right there, Legacy Patterns and More.
It might be outside of this I might have moved it I’m not sure. Anyhow, just look for this folder right here, Legacy Patterns and More when you’re inside of the brush settings.
Texture Settings
So we’re going to click on that and it’s going to bring up something similar to that patterns menu right here.
You can see, I have the Photoshop defaults, I’m right here, Legacy Patterns and More.
I’m choosing legacy patterns and then inside of legacy patterns, I’m coming down here to patterns.
I am using this one right here, this is called Clouds. It is the third to last inside of this patterns folder.
So we’re going to go ahead and click on that. Just click outside of there to get out of that one.
Our scale is one percent. So basically, here all I did was take these sliders all the way down on all of these.
Scale, brightness, contrast, everything is here. So brightness, negative 150, contrast negative 50.
Texture each tip is selected. Your mode is Height, and the depth is 100. Depth jitter, zero. Control is off for the texture.
We’re going to come here to dual brushes. We don’t really need dual brushes.
Yeah, you’re going to get pretty much the same thing. So I’m going to go ahead and leave dual brushes off for this one.
Dual brushes will come in handy if you’re trying to make spotted furs and other things like that. For this one, we don’t need it.
Color Dynamics
I’m going to come in here to color dynamics this is very important for this brush.
So this is going to control the coloring and dimension of the fur just by, you know, these colors that you have chosen here.
So for Color Dynamics, I’m going to make sure that Apply Per Tip is selected. My foreground/background jitter is at 100 percent.
Control is going to be off and then I have all of these set to zero. So hue, saturation, brightness, and purity are all at zero percent.
I’m going to go ahead and turn Transfer off too, I don’t think we need that for this brush.
And then just make sure that Buildup is selected, Smoothing is selected, and Protect Texture is selected. So this is our brush.
Color Adjustments for the fur brush
I just wanted to show you a few things with the coloring. So if you come here to Color Dynamics.
I’m going to show this to you in black and white. This is my jitter at 100 percent. So it’s more like a gray color.
But if you wanted a darker fur, you can come in here to Color Dynamics and maybe set this to 50 percent.
And then that’ll give you a darker color. It’s just a matter of working with the foreground/background color.
If you want that foreground color to be more prominent, then you, you know, just bring it down.
You can bring it down even more and you’re going to get a lot of that dark color. But I go about 50 percent just to make that foreground color a little more dominant.
So you have that, this is at 50 percent, and then if I make the white the dominant color.
Now this right here, the white becomes the dominant color here. And if I take that back up, and I have my white there, you can see I’m just going back to that gray color.
So the Color Dynamics is going to be very important for this.
Texture Adjustments for the fur brush
I’m going to leave this at 16 just to make a reference here.
And then I’m going to take the size jitter up to about 60 and you can see how much looser the fur starts to get as I do that.
So this will, you know, help you get a different style as well. You can save different variations of these brushes.
Once you’re happy with one, you can just come over here to the little three bars there and choose New Brush Preset.
Name it whatever you want and then do that for each iteration of the brush.
I hope you enjoyed this video. If you did, make sure to like and share it. And if you like the content that I put out on this channel, please make sure to subscribe so that you don’t miss another video.
And as always go over to prettywebz.com for more design resources and tutorials. Until next time thanks for watching this video.

