How to use Font Awesome with PrettyWebz to Create Custom Icons
Creating Custom Icons with Font Awesome
Please note: this is a transcript of a video demonstration, for the video scroll down to the bottom of this page.
I want to introduce you to a resource that I use all the time for putting together icons. This resource is called Font Awesome, it’s something that you install on your computer exactly like a font but it’s so convenient because it had so many of the icons that we use regularly so many other icons
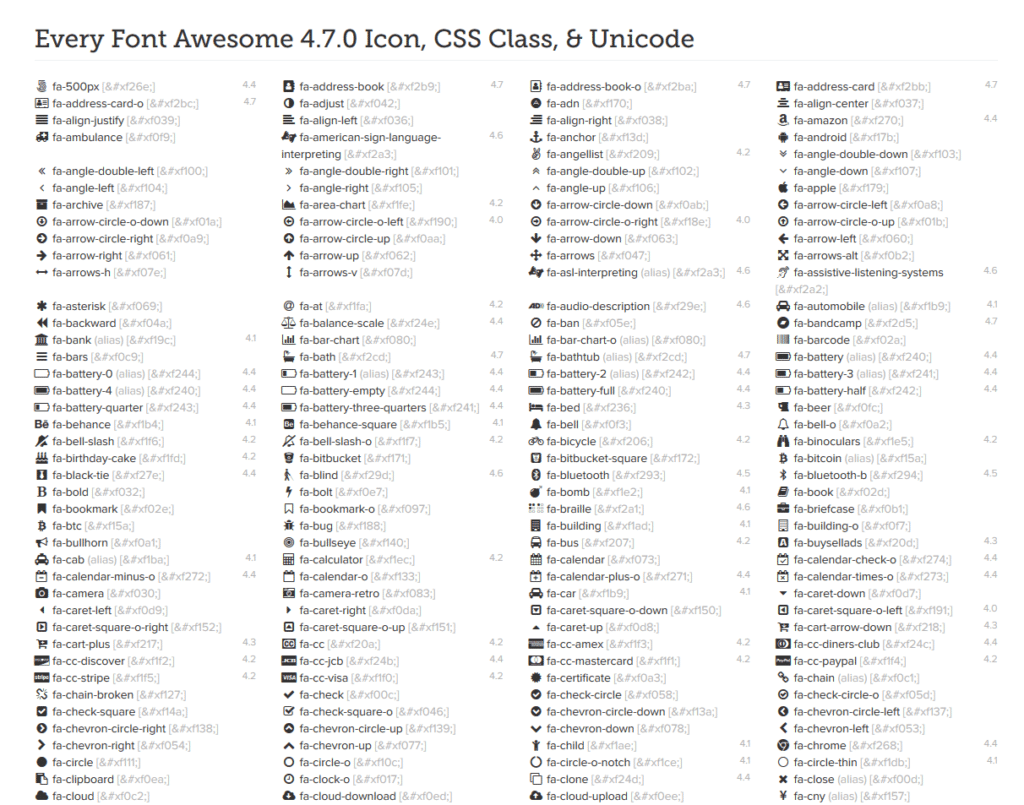
This is the cheat sheet that they have on their website and you can see it has all this here but this is just a small sample this cheat sheet is very extensive.

It’s tricky to use though, if you don’t know how to use it. That’s why I wanted to go over that with you. When you first get on the site the URL is Fonteawesom.I0.
When you get to the site you will see a big download button. You’re going to download Font Awesome just like you would any other font. Once you get it on your computer after you extract it you’re going to have a group of files. What you looking for here is the open type font file you’ll just right click on it and hit install.
If you’re on a Mac
Double-click the font file > “install font” button at the botton of the preview. Under any version of Mac OS X: Put the files into /Library/Fonts (for all users), or into /Users/Your username/Library/Fonts (for you only).
If you’re using Windows
For a Windows computer you’ll just right click and click install on the drop down. I use Font Awesome a lot in Photoshop and if you have Photoshop it can be used with that program as well but because I want to take an image from this and I’m trying to do that without Photoshop for those of us that are that are using online graphics editors I’m gonna do PowerPoint to show this to you.
So once you have the font installed it’s as easy as opening a PowerPoint file. Go back to the cheat sheet on the Font Awesome website. Let’s say we want to grab this chart looking thing here. Copy the icon not any of this Unicode, just the icon. You’ll highlight it, right click and copy that. Then you’ll go back to the program that you’re working in and you’ll right click and paste it there.
You’ll get something like this:
Highlight the placeholder icon and change your font to Font Awesome to get the Icon that you copied. Once you have the icon that you want, grab the picture and then right click to open the options panel.
Here you’ll see the option to save as a picture. We’re going to save the picture and I am going to save this to the desktop and I’m going to call it mountain. It is saving as a PNG file which is extremely important that you can create a transparent background.
So that’s Font Awesome, it’s extremely convenient. You do have to go back to the Font Awesome site to copy icons but other than that once you have that the font installed it’s just a matter of coming and picking up the icon that you need from the cheat sheet. Getting to the cheat sheet I always find a little confusing. If you go to “All icons” there’s a link on the top of that page to the cheat sheet. You can go straight there and then once you have the link you can just save it and then go back there anytime you need it.
I went ahead and made 62 different icons these are all separate PNG files those are all going to be on my website if you want to download those from there all the work is already done but if there something that you need that’s not in here there are so many more on the Font Awesome website.
I hope this was helpful. Check out other discussions about typography and using fonts here and don’t forget to subscribe to our newsletter to be notified when new videos are posted. We’ll see you next time!


