Cool Background Images & How to Make Some for Your Business
UPDATE: The Flatlay Photo Collection is no longer available via this page. It will be added to my general email list as a resource for subscribers.
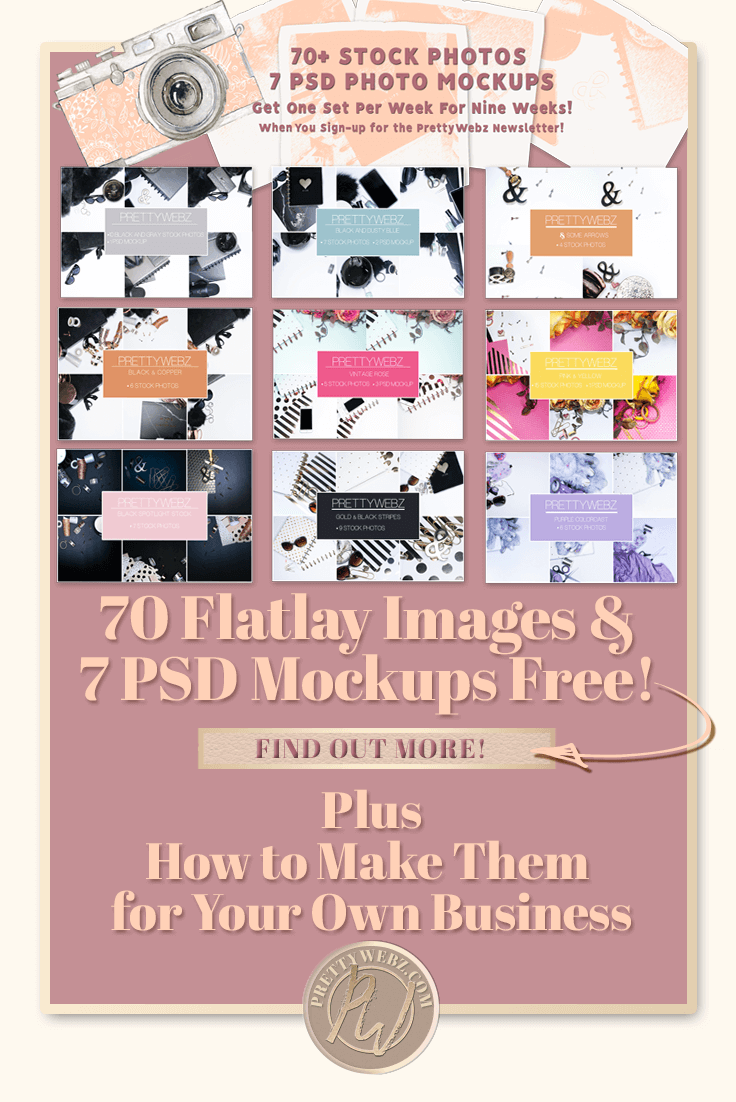
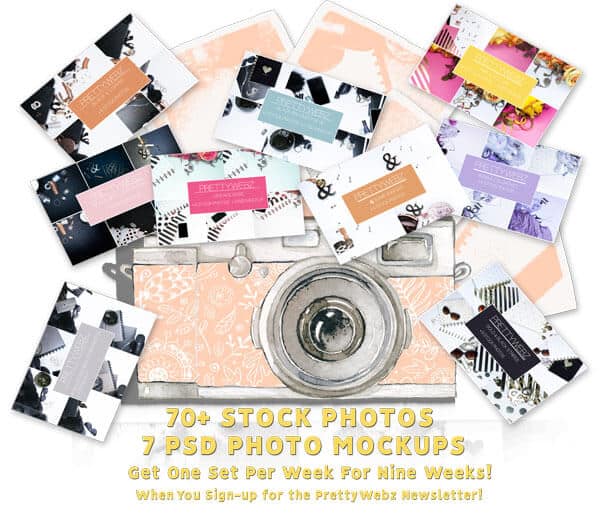
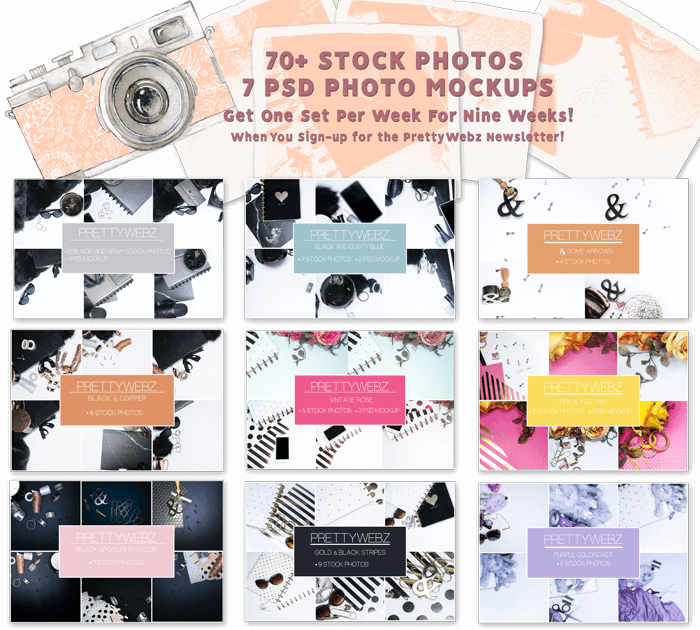
This week on the blog I have something a little bit different for you. I created several sets of cool background images you can use as a backdrop for blog graphics or on social media. I’ve been talking a lot about how to use stock photography in your social media, blog, and promotional graphics and inspiration on where to use stock photos so today I decided to give you a small set of stock photos to put all of that to good use.
I very much enjoyed the creative aspect of photography especially creating and laying out flat photos. This project was so much fun! I had the best time hunting for objects to use in the pictures. I learned about lighting as well. The overall creative process of this was super fun. Now keep in mind I am not a photographer. I have taken a class or two, and I do have all the equipment, but I do not do this professionally.
With that said, these images were created with the help of an actual photographer (my daughter) which made it even more fun for me. Hello, I got to spend some time with her. She helped me with lighting and set up. With a few pointers on placement, I took all of the pictures on my own. I arranged the displays and did all the editing as well. I’m excited about how these photos came out. In total there are over 70 photos that I will be releasing.
My First Photo Set
The set in the photo below is the first set of ten. Some of the sets will have PSD files that come along with them. These PSD files include smart objects for mockups that you can use inside of Photoshop. Not all of the images have the PSD feature.
Initially, this project started for my blog. I wanted to create the photos that were unique to my business. As I went further along with the project, I had so many cool background images and layouts that I couldn’t pass up sharing them with you!

What About the Rest of the Photos?
The full image set of over 70+ photos and the PSD files will be part of an opt-in offer that I have decided to put together for the blog.
If you want to download just this set, you can get them here without signing up! Opt-in for my mailing list to receive my newsletter, freebies and other marketing and promotions at the bottom of this page.
If you would like to grab all nine sets of these commercial use licensed photos sign up here and you will receive one set every week for the next nine weeks! There are several neutral toned photos and dark backgrounds to make your text pop even more on top of these cool background images!
I know this sign up process is a little confusing, that will change I promise. This blog post is the first time I’ve mentioned this offer so you won’t see it anywhere on my site other than this blog post for a few more weeks. For now, if you grab these, you will be one of the first to have these cool backdrop images!
I put a lot of time into creating these stock photos. I’m excited to see how people use them! I laid them out with tons of white space to create cool backdrop images for text and graphics overlays.
Feminine Style Flat lays
All of the stock photos are feminine style flat lay desktop images. These cool background images are perfect for general blog posts and social media. The flat lay style is much more versatile than background images with a focused subject. I’ve intentionally left space for text and graphics overlays.
These images are large-format high-quality photos that range from 4500 pixels to 5500 pixels!
Create Your Cool Background Images in Flat lay Style
Here are a few tips I picked up from this project that you can use to create your photos.
Don’t Overdo it With the Lighting
You may feel the urge to overdo it on lighting, don’t. Sometimes your setup may look a little bit darker when you’re taking the photos. You’ll feel tempted to go overboard on the lighting or use the camera flash. You can adjust the light when editing, so be careful not to overexpose your images. Instead, work with exposure after you take the photos.
The last thing you want to do is lose the finite details of your lighter colors. I lost a lot of great pictures to overexposure while I was taking these photos, but you live and learn. Keep the darker colors, you can always add more exposure during editing. If you add exposure through too much light or with your camera’s flash while you’re taking the photos, you won’t get that detail back.
Natural Light
If you’re using natural light be careful about shadow casting and try to light the area that is not directly in the sunlight. Natural light is the best option if you don’t have a lot of lighting options and it’s just better overall because natural light does create a beautiful lighting environment for your flat lays.
However, there are some cons. First, you have less control of your light source when using natural light. Second, you can’t shoot at night, so you really will have to work this around your schedule. Keep these issues in mind when planning a photoshoot.
In the photos I featured here I used a circle beauty ring over the top of the flat lay and a couple of lights on either side to help remove the shadows. I did this only because I was working mostly at night but the best thing is to use natural light if at all possible. Try to keep everything close to a window and if possible a room that’s flooded with light during the day.

For these particular photos I was working with the DSLR camera, but if you don’t have a DSLR, you can use your phone. I don’t know if the images will be as big and detailed as they will be with DSLR or even a regular single shot camera. However, I don’t even know if the type of camera is all that important anyway. Since most of the time flat lays for blog images and social media are not going to be used in large format.
Create a Theme for Your Photos
Creating a theme doesn’t necessarily have to be about a specific subject such as travel, food, floral or a desktop image. A theme can also be items related by color or even texture. As long as you have some commonality throughout all of the objects in your flat lay, you will be able to create some cohesive and exciting flat lay photography.
Pay Attention to Design Principles and Unity
As with any other design, color, contrast, texture, and balance are all important. If you’re interested in learning more about elements of design unity check out this blog post. You’ll get some useful tips on how to use color, contrast, and space in your design to work with your layouts more confidently.
Don’t Overthink the Organization of Your Flat lay Photography
You want your photos to look natural, not posed. At times they may look messy if that’s who you are then that’s perfect. However, if you’re a meticulous person and you like things organized your photos will probably look organized. Don’t get too caught up in this, try to keep it as natural as possible.
White Space is Important
White space is essential in design. Flat lay design layouts can be very tricky. Be deliberate about the whitespace you put into your photos. I know, I just finished telling you not to overthink your layout. Keep in mind where text overlays and graphics will go if they will be part of your final design. Additionally, balance in your objects is vital if you want to use the photo without text or other graphics.
In some cases, it will be easy to overlay text on top of objects in your photos. If you have a set up with a lot of things happening in the background think about the space you need for additional graphics and text. If you’re taking photos to be used with text overlay, the message is the most critical part of a flat lay image. The space for text needs to be clean and clear. The objects around the text have to be deliberate.
Stabilize Your Camera
It’s important to have stability for your camera. If you don’t already have a tripod definitely think about getting one. I used a tripod with a weighted adjustable arm attachment like the one in the picture below. Honestly, without these things, I would have struggled to get direct shots from a tabletop. I probably would have set up on the floor. Even then, hovering over the set up with a camera and still getting a clear shot would be a challenge.

Even if you are using your phone, make sure that the stability of your shot is good. You don’t want to have shaky or blurred photos. Use a Gorillapod or a small tripod that has a phone mount to help keep your shots steady when using a phone camera.
The Background
For my background, I only used a white and black colored poster board. You can get it at any craft store or Target for $.50. If you’re trying to achieve brighter and more vibrant images you can get posterboard in several different colors. There are a lot of vibrant colors like yellow, orange, and beautiful hot pink colors as well. Posterboard is very versatile and cheap enough that you can have them in tons of different colors and store them easily.
Additionally, you can pick up some craft paper as I did for some of the bold color photosets. I used scrapbook paper from Hobby Lobby for mine.
If you need a little bit more help with styling your flat lays and creating layouts for your cool background images take a look at some of these videos for some inspiration. Have fun!
Did you like this Post?
If you liked this post and want to save it for later, pin this image!